Downloading and installing or upgrading openssl and openssh
Содержание:
- Установка OpenSSL для Windows
- Сборка OpenSSL, GOST-engine, cURL
- Как получить PFX ключ на IIS
- Special notes for Universal Windows Platform builds, aka VC-*-UWP
- Native builds using Embarcadero C++Builder
- Native builds using MinGW
- Linking native applications
- Hosted builds using Cygwin
- Practical OpenSSL Usage
- Troubleshooting & Debugging
- Using OpenSSL on Windows 10 to Generate a CSR & Private Key
- Autoconf[edit]
- Features and Technologies that Require OpenSSL
- Из исходника
- How To Install OpenSSL on Windows
- Create Apache Certification
- 1 ответ
- Как обновить OpenSSL до версии 1.0.2 на CentOS 6 / CentOS 7
- Create the Certification Authority (CA)
- Target Audience
- Что делать если нет сертификата в запросах заявок на сертификат
- Configuration[edit]
- About OpenSSL
- Introduction
- Installing OpenSSL
- Причины
- Installation directories
Установка OpenSSL для Windows
Теперь нам необходимо наш файл pfx переделать в pem, Pem преобразовать в key:
- с расширением .ca-bundle
- с расширением .crt
- key
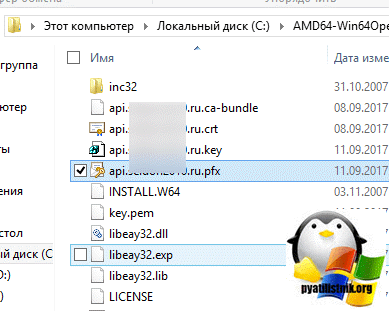
Вы получите из этих трех файлов, нужный для импорта pfx архив. Во всем этом нам поможет утилита OpenSSL для Windows.
Скачать OpenSSL для Windows x64 — https://cloud.mail.ru/public/MZmy/yKvJkc7Ad
В итоге у вас будет архив, распакуйте его куда вам будет угодно. Далее выберите вашу папку, зажмите SHIFT и щелкните по ней правым кликом, в открывшемся контекстном меню, выберите пункт «Открыть окно команд».
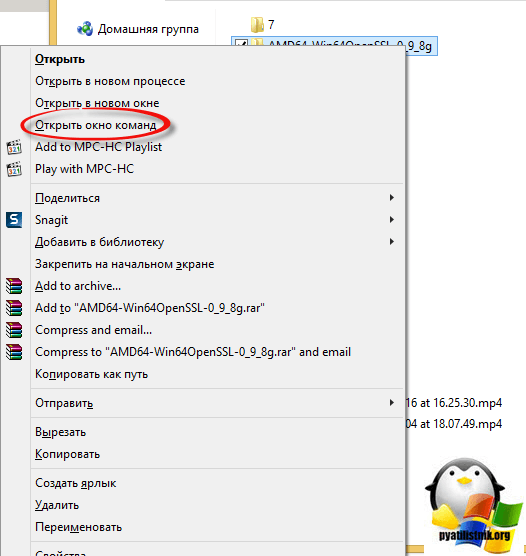
В результате чего у вас откроется командная строка Windows, но уже в нужной папке содержащей утилиту openssl.exe, она нам и поможет все сделать красиво.
Преобразование PFX в PEM
Теперь приступаем к получению фала в формате Pem. Положите в папку с дистрибутивом файл в формате pfx.
openssl.exe pkcs12 -in «имя вашего pfx файла» -nocerts -out key.pem
Мой пример:
openssl.exe pkcs12 -in api.pyatilistnik.ru.pfx» -nocerts -out key.pem
Вас попросят указать пароль от Pfx архива, вы его задавали при экспорте, после чего нужно придумать пароль на pem файл.
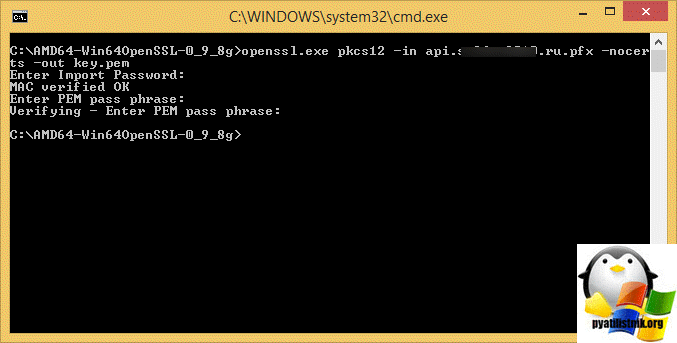
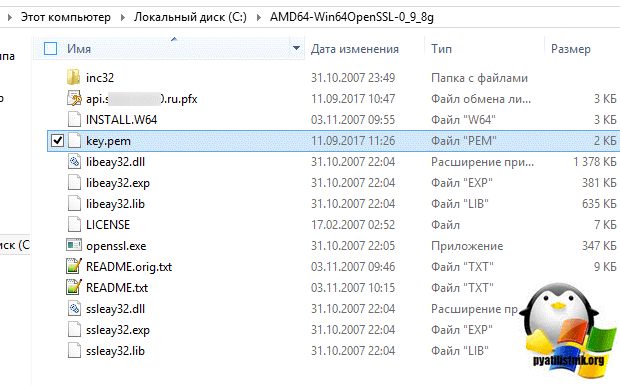
В папке с дистрибутивом OpenSSL вы обнаружите файл key.pem, он нам нужен будет для следующего этапа.
Преобразование PEM в KEY
Теперь получим файл с расширением key, для этого есть вот такая команда:
openssl rsa -in key.pem -out <путь к вашему файлу key>
Мой пример:
openssl rsa -in key.pem -out api.pyatilistnik.ru.key
Вас попросят указать пароль от pem ключа.
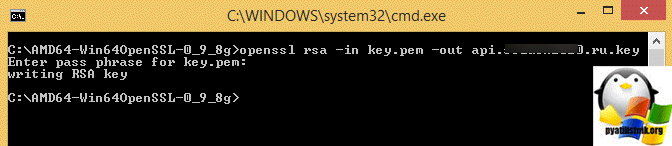
В итоге я получил закрытый ключ в формате key.

Осталась финишная прямая.
Получаем PFX ключ для импорта в IIS
Теперь когда у вас есть все составляющие, вы можете выполнить последнюю команду для создания PFX файла для IIS сервера.
Задаем пароль для pfx файла, потребуется при импортировании.

В итоге вы получаете нужный вам файл, который можно загружать на ваш почтовый сервер.
Сборка OpenSSL, GOST-engine, cURL
Сборка стороннего продукта для тех, кто делает это редко, может быть нетривиальной задачей. Для сборки OpenSSL, GOST-engine и cURL пришлось разобраться с кучей опций и перепробовать несколько комбинаций версий. Если в Dockerfile вы заметите странное, то, скорее всего, это осталось от таких экспериментов.
Я зафиксировал все версии проектов для сборки, чтобы исключить ситуацию, что из-за обновления что-то перестанет работать. Например, я собирал OpenSSL 1.1.0h + GOST-engine и команда не содержала GOST-алгоритмов, хотя показывала GOST-engine в списке. Указав предыдущую версию OpenSSL 1.1.0g, все работало, как ожидалось. Это было очень странно, я повторил это еще раз, потом пытался выяснить , но в итоге решил остаться на 1.1.0g.
Собирая сам GOST-engine, я не сразу обратил внимание на наличие файла в master-ветке, потому что собирал из ветки по неизвестно откуда взятой документации. Та версия собиралась с кастомной сборкой OpenSSL командой. Но master-ветка так собираться перестала, появились ошибки об отсутствии и подобное
В итоге решение было найдено и зафиксировано
Но master-ветка так собираться перестала, появились ошибки об отсутствии и подобное. В итоге решение было найдено и зафиксировано.
Для сборки cURL с кастомной сборкой OpenSSL гораздо больше документации, тем не менее, документация успевала устаревать, и с опциями пришлось много экспериментировать.Результат работы выложен здесь.Образ запушен в Docker Hub.
Как получить PFX ключ на IIS
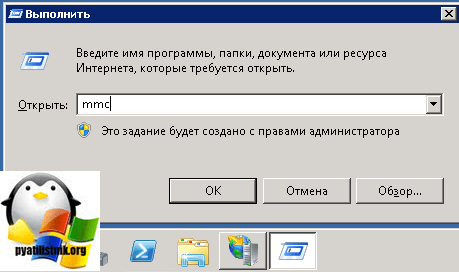
нажимаем сочетание клавиш WIN+R и вводим mmc, для вызова оснастки. Я вам уже рассказывал о ее применении и удобстве для системного администратора.
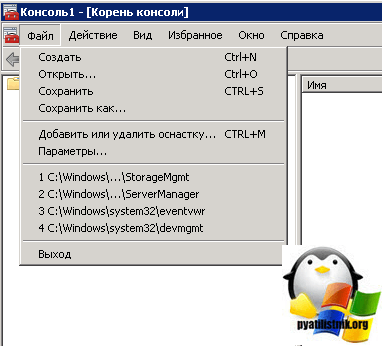
Далее вам необходимо через меню «Файл» добавить новую оснастку.
Находим сертификаты и нажимаем кнопку «Добавить»
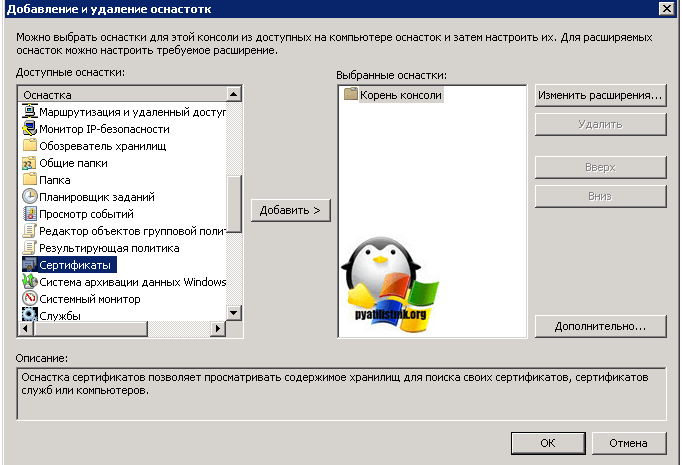
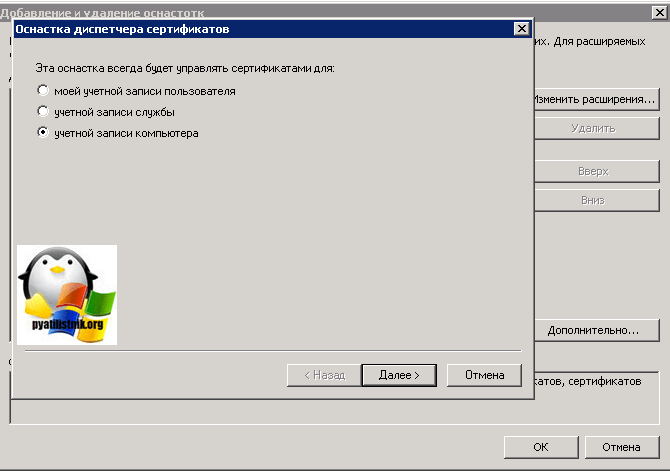
В следующем окне выбираем «для учетной записи компьютера»
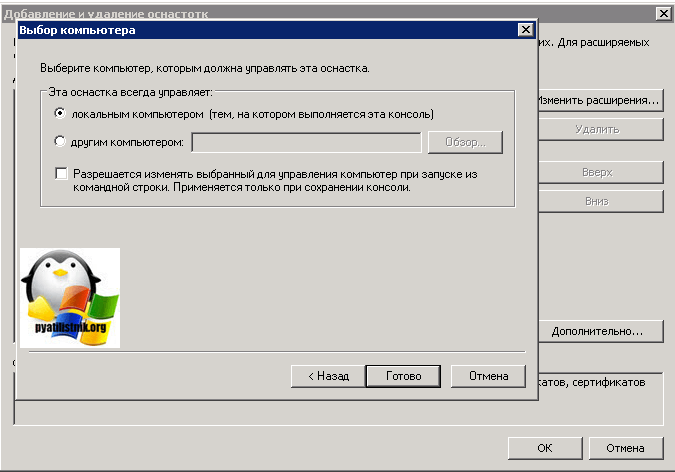
подтверждаем, что нас интересует локальный компьютер.
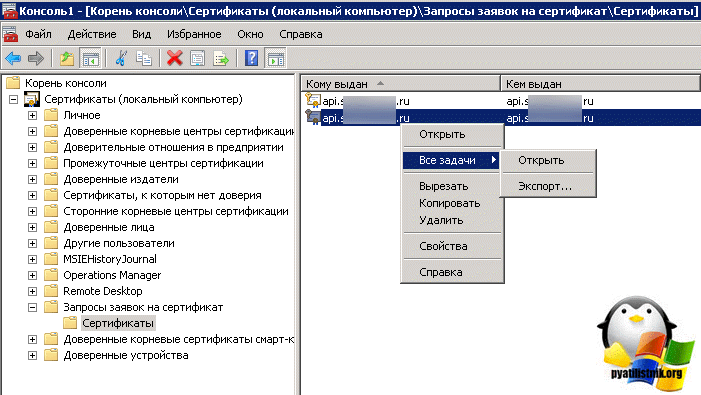
Далее находим пункт «Запросы заявок на сертификат», тут вы обнаружите ваш запрос, находите его и через правый клик экспортируете его.
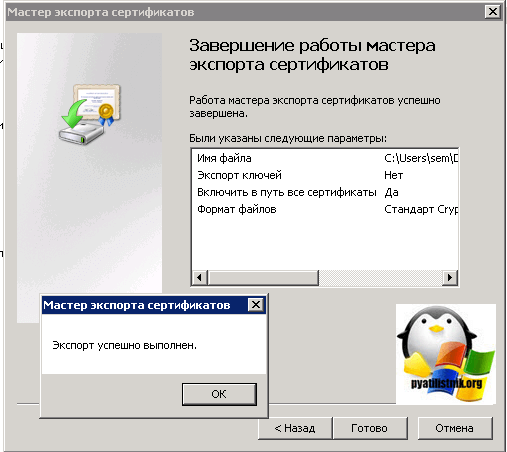
У вас откроется мастер экспорта сертификатов

Далее вы выбираете «Да, экспортировать закрытый ключ»

Ставим галку «Включить по возможности все сертификаты в путь сертификации» и начинаем наш экспорт PFX архива.

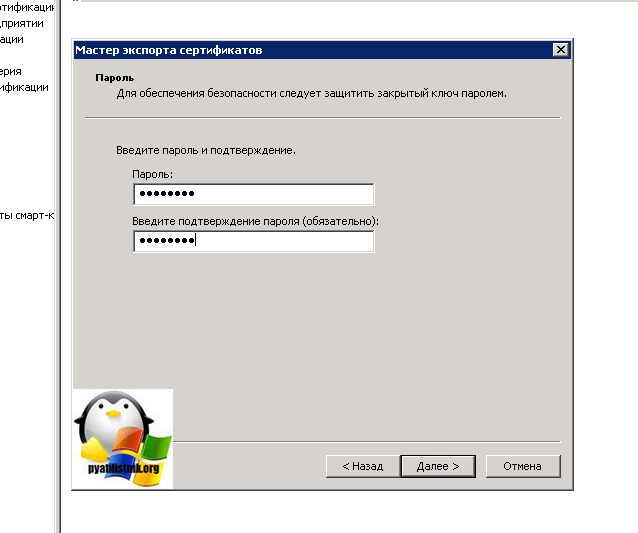
Теперь мастер экспорта, просит вас указать два раза нужный вам пароль, для защиты pfx архива.
Через кнопку обзор, указываем место сохранения вашего файла.
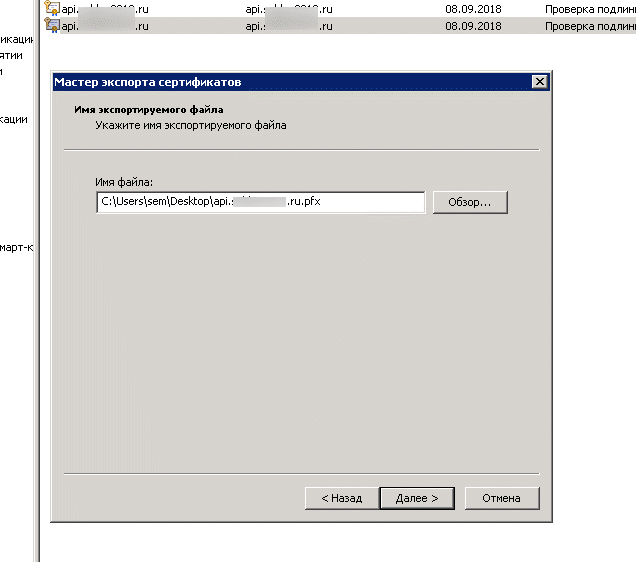
Нажимаем «Готово»

Как видим, все успешно выгружено.

Special notes for Universal Windows Platform builds, aka VC-*-UWP
-
UWP targets only support building the static and dynamic libraries.
-
You should define the platform type to «uwp» and the target arch via
«vcvarsall.bat» before you compile. For example, if you want to build
«arm64» builds, you should run «vcvarsall.bat x86_arm64 uwp».
Native builds using Embarcadero C++Builder
-
Install Perl.
-
Open the RAD Studio Command Prompt.
-
Go to the root of the OpenSSL source directory and run:
perl Configure BC-32 —prefix=%CD% -
make -N
-
make -N test
-
Build your program against this OpenSSL:
- Set your include search path to the «include» subdirectory of OpenSSL.
- Set your library search path to the OpenSSL source directory.
Note that this is very experimental. Support for 64-bit and other Configure
options is still pending.
Native builds using MinGW
MinGW offers an alternative way to build native OpenSSL, by cross compilation.
-
Usually the build is done on Windows in a GNU-like environment called MSYS2.
MSYS2 provides GNU tools, a Unix-like command prompt,
and a UNIX compatibility layer for applications.
However, in this context it is only used for building OpenSSL.
The resulting OpenSSL does not rely on MSYS2 to run and is fully native.Requirement details
-
Perl, at least version 5.10.0, which usually comes pre-installed with MSYS2
-
make, installed using «pacman -S make» into the MSYS2 environment
-
MinGW compiler: mingw-w64-i686-gcc and/or mingw-w64-x86_64-gcc.
These compilers must be on your MSYS2 $PATH.
A common error is to not have these on your $PATH.
The MSYS2 version of gcc will not work correctly here.
In the MSYS2 shell do the configuration depending on the target architecture:
or
./Configure mingw64 …
or
./Configure …for the default architecture.
Apart from that, follow the Unix / Linux instructions in INSTALL.md.
-
-
It is also possible to build mingw on Linux or Cygwin.
In this case configure with the corresponding —cross-compile-prefix= option.
For exampleor
./Configure mingw64 —cross-compile-prefix=x86_64-w64-mingw32- …This requires that you’ve installed the necessary add-on packages for
mingw cross compilation.
Linking native applications
This section applies to all native builds.
If you link with static OpenSSL libraries then you’re expected to
additionally link your application with WS2_32.LIB, GDI32.LIB,
ADVAPI32.LIB, CRYPT32.LIB and USER32.LIB. Those developing
non-interactive service applications might feel concerned about
linking with GDI32.LIB and USER32.LIB, as they are justly associated
with interactive desktop, which is not available to service
processes. The toolkit is designed to detect in which context it’s
currently executed, GUI, console app or service, and act accordingly,
namely whether or not to actually make GUI calls. Additionally those
who wish to /DELAYLOAD:GDI32.DLL and /DELAYLOAD:USER32.DLL and
actually keep them off service process should consider implementing
and exporting from .exe image in question own _OPENSSL_isservice not
relying on USER32.DLL. E.g., on Windows Vista and later you could:
If you link with OpenSSL .DLLs, then you’re expected to include into
your application code a small «shim» snippet, which provides
the glue between the OpenSSL BIO layer and your compiler run-time.
See also the OPENSSL_Applink manual page.
Hosted builds using Cygwin
Cygwin implements a POSIX/Unix runtime system (cygwin1.dll) on top of the
Windows subsystem and provides a Bash shell and GNU tools environment.
Consequently, a build of OpenSSL with Cygwin is virtually identical to the
Unix procedure.
To build OpenSSL using Cygwin, you need to:
-
Install Cygwin Perl, at least version 5.10.0
and ensure it is in the $PATH -
Run the Cygwin Bash shell
Apart from that, follow the Unix / Linux instructions in INSTALL.md.
NOTE: «make test» and normal file operations may fail in directories
mounted as text (i.e. mount -t c:\somewhere /home) due to Cygwin
stripping of carriage returns. To avoid this ensure that a binary
mount is used, e.g. mount -b c:\somewhere /home.
Practical OpenSSL Usage
Installing OpenSSL Library
To install the OpenSSL general-purpose library, first determine the applicable version of the library available for your Ubuntu computer with the following command issued at a terminal prompt:
apt-cache search libssl | grep SSL
You should observe output from the command similar to the following:
libssl0.9.6 - SSL shared libraries (old version)
libssl-dev - SSL development libraries, header files and documentation
libssl0.9.7 - SSL shared libraries
In the above example, you would most likely want to install the current OpenSSL library, which appears in the output as libssl0.9.7 (like sudo apt-get install libssl0.9.7. Install the following packages libssl0.9.7 (see InstallingSoftware). You may also need to install ca-certificates.
Installing OpenSSL Development Library
In order to build software which requires the OpenSSL general-purpose library, you must first install the development instance of the OpenSSL library. Install the following packages libssl-dev (see InstallingSoftware). Due to OpenSSL’s license being incompatible with the GPL, linking the OpenSSL library with programs covered by GPL requires an explicit linking exception for packages present in the Ubuntu Archive. (Ubuntu Technical Board decision)
Basic OpenSSL Commands
The following section of the guide presents some of the more common basic commands, and parameters to commands which are part of the OpenSSL toolkit. For additional information, read the various OpenSSL system manual pages with the man command, and refer to the information presented in the Resources section of this guide.
Determine installed OpenSSL version:
openssl version
List of available OpenSSL sub-commands:
openssl help
Get additional help information on OpenSSL sub-commands by using the openssl command followed by the sub-command, and the -h switch. For example, to get additional information on the openssl enc sub-command:
openssl -h enc
List all available cipher algorithms:
openssl ciphers -v
You may benchmark your computer’s speed with OpenSSL, measuring how many bytes per second can be processed for each algorithm, and the times needed for sign/verify cycles by using the following command:
openssl speed
Troubleshooting & Debugging
Now that you can create & convert CSR’s, certificates, and key pairs, it’s time to learn how to troubleshoot and debug them. OpenSSL comes with commands that make it a breeze to troubleshoot problems.
OpenSSL also allows you to check certificates for file integrity and test for possible data corruption. Using an MD5 checksum, you can use the following code examples to test certificates, keys and CSR’s:
Once you have the original hash, you can then compare that original hash with a current hash to verify the certificate hasn’t been modified or corrupted.
Here’s a sample of what that code looks like when run in PowerShell:
 Sample troubleshooting command output with OpenSSL in PowerShell
Using OpenSSL on Windows 10 to Generate a CSR & Private Key
Before you can create an SSL certificate, you must generate a certifiate-signing request (CSR). A CSR is an encoded file that provides you with a way to share your public key with a certificate authority (CA). This file contains identifying information, a signature algorithm, and a digital signature. Let’s create your first CSR and private key.
Related: Your Guide to X509 Certificates for Mortals
To create a CSR, run the below command. OpenSSL will then prompt you to enter some identifying information as you can see in the following demonstration.
 Generating a CSR and Private Key using OpenSSL in PowerShell
Once complete, you will have a valid CSR and private key which can be used to issue an SSL certificate to you.
The configuration file defaults can be edited further to streamline this process should you not want to enter data every time you generate a CSR.
Autoconf[edit]
OpenSSL uses its own configuration system, and does not use Autoconf. However, a number of popular projects use both OpenSSL and Autoconf, and it would be useful to detect either OPENSSL_init_ssl or SSL_library_init from libssl. To craft a feature test for OpenSSL that recognizes both OPENSSL_init_ssl and SSL_library_init, you can use the following.
if test "$with_openssl" = yes ; then
  dnl Order matters!
  if test "$PORTNAME" != "win32"; then
     AC_CHECK_LIB(crypto, CRYPTO_new_ex_data, [], )])
     FOUND_SSL_LIB="no"
     AC_CHECK_LIB(ssl, OPENSSL_init_ssl, )
     AC_CHECK_LIB(ssl, SSL_library_init, )
     AS_IF(, )])
  else
     AC_SEARCH_LIBS(CRYPTO_new_ex_data, eay32 crypto, [], )])
     FOUND_SSL_LIB="no"
     AC_SEARCH_LIBS(OPENSSL_init_ssl, ssleay32 ssl, )
     AC_SEARCH_LIBS(SSL_library_init, ssleay32 ssl, )
     AS_IF(, )])
  fi
fi
Features and Technologies that Require OpenSSL
RAD Studio requires OpenSSL for HTTPS support for the following features and technologies:
- Sending push notifications with the EMS Server: You need to install the OpenSSL libraries in the system where the RAD Server Engine (EMS Server) runs to send push notifications. You need to install the 32-bit or 64-bit OpenSSL depending on the EMS Server binary you are running.
- Indy
- InterBase: InterBase uses OpenSSL for encryption and OTW/SSL features.
- DataSnap Server: OpenSSL is required by DataSnap servers when encryption filters are enabled, or when the Communication Protocol is set to HTTPS in the .
Из исходника
Устанавливаем пакеты, необходимые для сборки пакета:
yum install make gcc

* как видим, на момент написания обновления инструкции это была версия 1.1.1.
И копируем ссылку на ее скачивание:

На CentOS скачиваем исходник с использованием найденной ссылки:
И распаковываем его с последующим удалением:
tar -xvf openssl-*.tar.gz && \rm openssl-*.tar.gz
Переходим в папку с распакованным исходником:
./config —prefix=/usr/local —openssldir=/usr/local
Резервируем предыдущую версию openssl:
mv /usr/bin/openssl /root/openssl.back
И делаем ссылку на новую:
ln -s /usr/local/bin/openssl /usr/bin/openssl
Снова проверяем версию:
openssl version -a
Система вернет полные сведения об openssl, например:
OpenSSL 1.1.1g 21 Apr 2020 (Library: OpenSSL 1.0.2k-fips 26 Jan 2017) built on: Sat May 11 01:54:53 2019 UTC platform: linux-x86_64 options: bn(64,64) rc4(16x,int) des(int) idea(int) blowfish(ptr) compiler: gcc -fPIC -pthread -m64 -Wa,—noexecstack -Wall -O3 -O2 -g -pipe -Wall -Werror=format-security -Wp,-D_FORTIFY_SOURCE=2 -Wp,-D_GLIBCXX_ASSERTIONS -fexceptions -fstack-protector-strong -grecord-gcc-switches -specs=/usr/lib/rpm/redhat/redhat-hardened-cc1 -specs=/usr/lib/rpm/redhat/redhat-annobin-cc1 -m64 -mtune=generic -fasynchronous-unwind-tables -fstack-clash-protection -fcf-protection -Wa,—noexecstack -Wa,—generate-missing-build-notes=yes -specs=/usr/lib/rpm/redhat/redhat-hardened-ld -DOPENSSL_USE_NODELETE -DL_ENDIAN -DOPENSSL_PIC -DOPENSSL_CPUID_OBJ -DOPENSSL_IA32_SSE2 -DOPENSSL_BN_ASM_MONT -DOPENSSL_BN_ASM_MONT5 -DOPENSSL_BN_ASM_GF2m -DSHA1_ASM -DSHA256_ASM -DSHA512_ASM -DKECCAK1600_ASM -DRC4_ASM -DMD5_ASM -DAES_ASM -DVPAES_ASM -DBSAES_ASM -DGHASH_ASM -DECP_NISTZ256_ASM -DX25519_ASM -DPADLOCK_ASM -DPOLY1305_ASM -DZLIB -DNDEBUG -DPURIFY -DDEVRANDOM=»\»/dev/urandom\»» -DSYSTEM_CIPHERS_FILE=»/etc/crypto-policies/back-ends/openssl.config» OPENSSLDIR: «/etc/pki/tls» ENGINESDIR: «/usr/lib64/engines-1.1» Seeding source: os-specific
Обращаем внимание, что у нас установлена новая версия OpenSSL, но по прежнему, используется старая библиотека — Library: OpenSSL 1.0.2k-fips 26 Jan 2017. Необходимо добавить в ldconfig новый путь
Для это создаем файл:
Необходимо добавить в ldconfig новый путь. Для это создаем файл:
* если у нас используется система 32-бит, то путь будет /usr/local/lib.
How To Install OpenSSL on Windows
OpenSSL is a full-featured toolkit for the Transport Layer Security (TLS) and Secure Sockets Layer (SSL) protocols. It is licensed under an Apache-style license. This tutorial will help you to install OpenSSL on Windows operating systems.
Create Apache Certification
Create a pair of keys. We will need to specify the password and certification data. A file key (server.key) and certification request (server.pem) will be created.
$ openssl req -new -sha1 -newkey rsa:2048 -nodes -keyout server.key -out server.pem
CA should sign the certification request. Copy server.pem to certification request and sign.
$ openssl ca -config /etc/ssl/openssl.cnf -policy policy_anything -extensions ssl_server -out requests/server-signed.pem -infiles requests/server.pem
Apache will need a PEM format, is mandatory to convert to this format:
$ openssl x509 -in requests/server-signed.pem -out requests/server.crt
1 ответ
Чтобы обновить openssl Cygwin, вам просто нужно запустить установщик и выбрать более новую версию. Сайт Cygwin гласит следующее:
Шаги для обновления следующие:
- Перейдите на сайт Cygwin и загрузите файл setup.exe.
- Запустите setup.exe и нажимайте «Далее», пока не перейдете на страницу «Выбор пакетов».
- Введите пакет, который вы хотите обновить (openssl) в поле поиска.
- Выберите версию, которую вы хотите установить.
- Нажмите Далее и подождите, пока он установится / загрузится.

После завершения установки / обновления вы сможете увидеть новую версию в Cygwin с помощью следующей команды:
Вы также можете собрать OpenSSL из исходного кода, но я никогда не пробовал. Я полагаю, что Cygwin занимается установкой / обновлением по определенной причине.
Как обновить OpenSSL до версии 1.0.2 на CentOS 6 / CentOS 7
OpenSSL — это библиотека, которая обеспечивает криптографическую функциональность, в частности SSL / TLS для популярных приложений, таких как защищенные веб-серверы, базы данных MySQL и приложения электронной почты.
У меня на сервере CentOS 6 до сих пор стояла версия библиотеки OpenSSL 1.0.1e-fips 11 Feb 2013 которая в свое время стала уязвимой для хакеров и прочих злоумышленников, и сегодня я вам опишу мои шаги успешного обновления данной библиотеки до версии OpenSSL 1.0.2l 25 May 2017
1. Проверяем текущею версию командой «openssl version»:
2. Далее командой «yum info openssl» проверяем возможные готовые пакеты обновления:
Как видим доступный пакет обновлений уже установлен и он версии 1.0.1e что в нашем случае нас не устраивает!
4. Переходим в папку и конфигурируем:
5. Проверяем и устанавливаем:
6. Резервируем предыдущую версию OpenSSL:
7. И делаем ссылку на новую:
8. Проверяем версию OpenSSL:
в ответ мы получаем OpenSSL 1.0.2l 25 May 2017. Поздравляю вы успешно справились с задачей и обновили библиотеку до новой версии!
Create the Certification Authority (CA)
Create the folder structure to hold certificates:
$ mkdir /opt/met-ca$ mkdir /opt/met-ca/certs$ mkdir /opt/met-ca/crl$ mkdir /opt/met-ca/newcerts$ mkdir /opt/met-ca/private$ mkdir /opt/met-ca/requests$ touch /opt/met-ca/index.txt$ echo “01” > /opt/ca/serial$ echo “01” > /opt/ca/crlnumber$ chmod 700 /opt/ca
Create public and private auto signed keys of our own Certification Authority (in the example it is valid for 10 years). We will need to specify certificate data, the password for encryption and the process will generate two files:
$ openssl req -config /etc/ssl/openssl.cnf -new -x509 -days 3650 -sha1 -newkey rsa:2048 -keyout /opt/ca/private/ca.key -out /opt/ca/ca.crt
Change key grants:
$ chmod 600 /opt/met-ca/private/ca.key
Target Audience
To properly implement the practical steps found in this guide, the reader should be a user of Ubuntu who is comfortable with the use of command-line applications, using the Bourne Again SHell (bash) environment, and editing system configuration files with their preferred text editor application. While previous familiarity with Server Sockets Layer (SSL), or the OpenSSL implementation in particular, is not required for this guide, if desired, the reader is advised to pursue further learning from the resources listed in the Resources section of this guide in order to broaden his/her understanding of this powerful security layer.
Что делать если нет сертификата в запросах заявок на сертификат
Бывают ситуации, что на вашем сервере по каким-то причинам, в папке запросы на сертификат, может не оказаться вашего, в этом случае вам необходимо будет перейти в этой же mmc в раздел «Личное-Сертификаты». Выбираем нужный и делаем экспорт.

Появится мастер экспорта сертификатов.

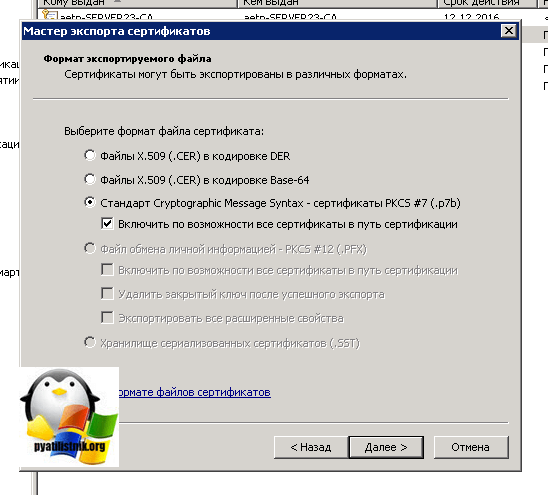
Обратите внимание, что в pfx выгрузить не получится, но это не страшно, нам подойдет и p7b, но с включенной галкой «Включить по возможности все сертификаты в путь сертификации»
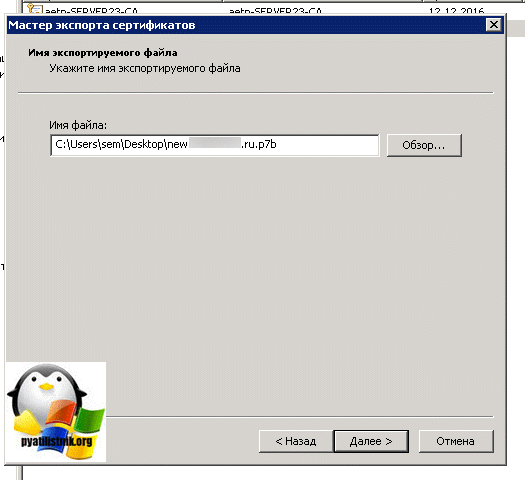
Указываем путь сохраняемого файла.
Видим, что все успешно выполнено.
Преобразование p7b в pem
Попробует такое преобразование.
openssl pkcs7 -in cert.p7b -inform DER -print_certs -out cert.pem
Мой пример
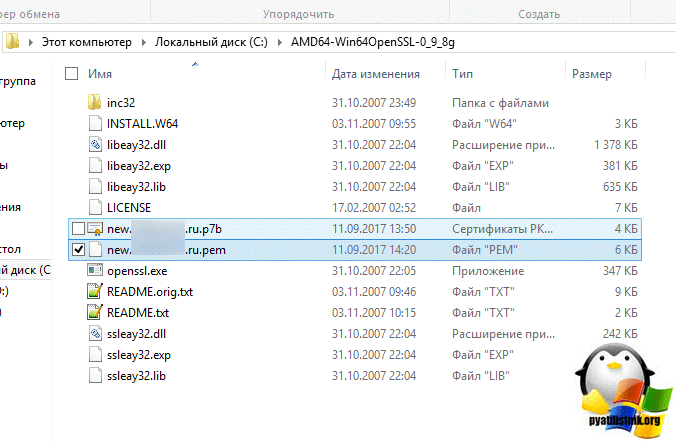
openssl.exe pkcs7 -in new.pyatilistnik.ru.p7b -inform DER -print_certs -out new.pyatilistnik.ru.pem

В итоге я получил файл new.pyatilistnik.ru.pem
Ну, а дальше уже по инструкции сверху. Если у вас выскочит ошибка, по типу
C:\AMD64-Win64OpenSSL-0_9_8g>openssl.exe rsa -in new.pyatilistnik.ru.pem -out new. pyatilistnik.ru.key unable to load Private Key 6944:error:0906D06C:PEM routines:PEM_read_bio:no start line:.\crypto\pem\pem_lib .c:647:Expecting: ANY PRIVATE KEY
То наш вариант это .crt в .der и уже .der в .pem
Преобразование CRT в PEM
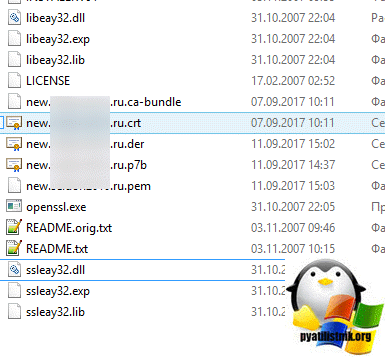
Кладем так же все в одну папку, файл crt вам должны были прислать вместе с ca-bundle.
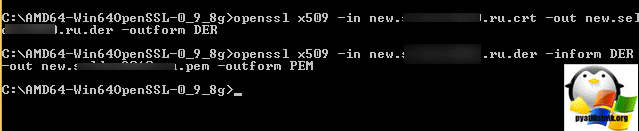
Первое это crt в der
openssl x509 -in new.pyatilistnik.ru.crt -out new.pyatilistnik.ru.der -outform DER
Теперь der в pem.
openssl x509 -in new.pyatilistnik.ru.der -inform DER -out new.pyatilistnik.ru.pem -outform PEM
В итоге у меня получилось, вот так.
Configuration[edit]
OpenSSL is configured for a particular platform with protocol and behavior options using Configure and config.
You should avoid custom build systems because they often miss details, like each architecture and platform has a unique opensslconf.h and bn.h generated by Configure.
Supported Platformsedit
You can run Configure LIST to see a list of available platforms.
$ ./Configure LIST
BC-32
BS2000-OSD
BSD-generic32
BSD-generic64
BSD-ia64
BSD-sparc64
BSD-sparcv8
BSD-x86
BSD-x86-elf
BSD-x86_64
Cygwin
Cygwin-x86_64
DJGPP
...
If your platform is not listed, then use a similar platform and tune the $cflags and $ldflags by making a copy of the configure line and giving it its own name. $cflags and $ldflags correspond to fields 2 and 6 in a configure line. An example of using a similar configure line is presented in .
Configure & Configedit
You use Configure and config to tune the compile and installation process through options and switches. The difference between is Configure properly handles the host-arch-compiler triplet, and config does not. config attempts to guess the triplet, so it’s a lot like autotool’s config.guess.
You can usually use config and it will do the right thing (from Ubuntu 13.04, x64):
$ ./config
Operating system: x86_64-whatever-linux2
Configuring for linux-x86_64
Configuring for linux-x86_64
    no-ec_nistp_64_gcc_128   OPENSSL_NO_EC_NISTP_64_GCC_128 (skip dir)
    no-gmp            OPENSSL_NO_GMP (skip dir)
    no-jpake         OPENSSL_NO_JPAKE (skip dir)
    no-krb5          OPENSSL_NO_KRB5
    ...
Mac OS X can have issues (it’s often a neglected platform), and you will have to use Configure:
 ./Configure darwin64-x86_64-cc
Configuring for darwin64-x86_64-cc
    no-ec_nistp_64_gcc_128   OPENSSL_NO_EC_NISTP_64_GCC_128 (skip dir)
    no-gmp            OPENSSL_NO_GMP (skip dir)
    no-jpake         OPENSSL_NO_JPAKE (skip dir)
    no-krb5          OPENSSL_NO_KRB5
    ...
You can also configure on Darwin by exporting KERNEL_BITS:
$ export KERNEL_BITS=64
$ ./config shared no-ssl2 no-ssl3 enable-ec_nistp_64_gcc_128 --openssldir=/usr/local/ssl/macosx-x64/
Operating system: i686-apple-darwinDarwin Kernel Version 12.5.0: Sun Sep 29 13:33:47 PDT 2013; root:xnu-2050.48.12~1/RELEASE_X86_64
Configuring for darwin64-x86_64-cc
Configuring for darwin64-x86_64-cc
    no-gmp            OPENSSL_NO_GMP (skip dir)
    no-jpake         OPENSSL_NO_JPAKE (skip dir)
    no-krb5          OPENSSL_NO_KRB5
    ...
If you provide a option not known to configure or ask for help, then you get a brief help message:
$ ./Configure --help
Usage: Configure
      threads] shared]
zlib|zlib-dynamic]
 ]  os/compiler
And if you supply an unknown triplet:
$ ./Configure darwin64-x86_64-clang
Configuring for darwin64-x86_64-clang
Usage: Configure
      threads] shared]
zlib|zlib-dynamic]
 ]  os/compiler

pick os/compiler from:
BC-32 BS2000-OSD BSD-generic32 BSD-generic64 BSD-ia64 BSD-sparc64 BSD-sparcv8
BSD-x86 BSD-x86-elf BSD-x86_64 Cygwin Cygwin-pre1.3 DJGPP MPE/iX-gcc OS2-EMX
...

NOTE: If in doubt, on Unix-ish systems use './config'.
Dependenciesedit
If you are prompted to run make depend, then you must do so. For OpenSSL 1.0.2 and below, it’s required to update the standard distribution once configuration options change.
Since you've disabled or enabled at least one algorithm, you need to do
the following before building:

	make depend
OpenSSL 1.1.0 and above performs the dependency step for you, so you should not see the message. However, you should perform a make clean to ensure the list of objects files is accurate after a reconfiguration.
About OpenSSL
Secure Sockets Layer is an application-level protocol which was developed by the Netscape Corporation for the purpose of transmitting sensitive information, such as Credit Card details, via the Internet. SSL works by using a private key to encrypt data transferred over the SSL-enabled connection, thus thwarting eavesdropping of the information. The most popular use of SSL is in conjunction with web browsing (using the HTTP protocol), but many network applications can benefit from using SSL. By convention, URLs that require an SSL connection start with https: instead of http:.
OpenSSL is a robust, commercial-grade implementation of SSL tools, and related general purpose library based upon SSLeay, developed by Eric A. Young and Tim J. Hudson. OpenSSL is available as an Open Source equivalent to commercial implementations of SSL via an Apache-style license.
About X.509
X.509 is a specification for digital certificates published by the International Telecommunications Union — Telecommunication (ITU-T). It specifies information and attributes required for the identification of a person or a computer system, and is used for secure management and distribution of digitally signed certificates across secure Internet networks. OpenSSL most commonly uses X.509 certificates.
Introduction
This guide is designed to introduce the reader to the Secure Sockets Layer (SSL) application-level protocol, and particularly the OpenSSL implementation of SSL. After a brief description of exactly what OpenSSL is, and what it is useful for, the guide will further illustrate the practical usage of OpenSSL in a client-server environment, and provide specific examples of applications which may benefit from OpenSSL. Finally, the guide will lead the user through example procedures required to use OpenSSL with the popular Apache Hyper Text Transport Protocol (HTTP) server for the purpose of serving secured web pages from your Ubuntu computer.
Installing OpenSSL
If your application , you need to have the necessary library files in your file system before deploying your application.
| Platform | Download Required | File Names | Static/Dynamic Linking |
|---|---|---|---|
| Yes | libeay32.dll and ssleay32.dll | Dynamic | |
| No | libcrypto.dylib, libssl.dylib | Dynamic | |
| Yes | libcrypto.a and libssl.a | Static | |
| No | libcrypto.dylib, libssl.dylib | Dynamic | |
| No | Dynamic |
Review the requirements below depending on the platform that you are using:
32-bit and 64-bit Windows
To install OpenSSL in a 32-bit or 64-bit Windows, you need to copy the libeay32.dll and ssleay32.dll dynamic library files to your file system, you can download them from one of these locations:
- Option 1 — Download the OpenSSL installer files and install them.
- Option 2 — Download the OpenSSL compressed library files and copy the libeay32.dll and ssleay32.dll files to your system path.
- If you go for Option 2 and decide to copy libeay32.dll and ssleay32.dll files to your system path, ensure you copy them to the right location:
- 32-bit Windows: You must copy the libeay32.dll and ssleay32.dll 32-bit files to your Windows system folder (System32 folder).
- 64-bit Windows: You must copy the libeay32.dll and ssleay32.dll 64-bit files to your Windows system folder for 64-bit files (System32) and the libeay32.dll and ssleay32.dll 32-bit files to your Windows 32-bit files folder (SysWOW64 folder).
- So when working with a 64-bit Windows, remember:
- System32 folder is for 64-bit files only.
- SysWOW64 folder is for 32-bit files only.
32-bit and 64-bit iOS Device
To install OpenSSL in a 32-bit or 64-bit iOS device, you must copy the libcrypto.a and libssl.a SSL library files to your system. Download the .zip iOS OpenSSL, extract it and find the .a files in the directory. You must copy the libcrypto.a and libssl.a SSL library files to these directories:
iOS Simulator, macOS and Android
No additional steps are required in iOS Simulator and macOS since the required files are already in your file system.
For Android versions up to 6, you need to include the OpenSSL Libraries since Android moved away from OpenSSL to BoringSSL.
Note: RAD Studio Sydney only supports up to Android 6 versions.
Tip: Android no longer uses OpenSSL since version 6, ensure to bundle all your non-NDK libraries with your APK.
Причины
Для начала стоит сказать, что для продакшн-окружения существуют сертифицированные средства от компаний «Криптоком», «Крипто-Про», «Сигнал-КОМ» и других. Мне же нужно было реализовать взаимодействие в тестовом (девелоперском) окружении на Linux, покупать для этого лицензии не очень-то удобно, но что хуже, в открытом доступе отсутствуют документации по этому вопросу. По запросу «https гост» не так много решений. Среди них упоминается использование OpenSSL + Крипто CSP, я не помню деталей, но эта связка у меня не завелась с поддержкой ГОСТ Р 34.10-2012. Другим результатом, который часто встречался, было предложение использовать OpenSSL 1.0, в котором GOST-engine встроен внутрь, но такое решение тоже не содержало в себе поддержку .
Рабочим решением оказалась сборка OpenSSL 1.1.0g + вынесенный в отдельно подключаемый динамический движок GOST-engine. В интернете часто встречается упоминание, что некая российская компания приложила усилия по его разработке, но в самом репозитории нет сведений об авторах продукта. Пользуясь случаем, выражаю авторам благодарность за движок в open source. На этой странице сказано, что до OpenSSL 1.1.0 использовался встроенный движок GOST, сейчас для GOST используется сторонний от OpenSSL продукт. Судя по конфигурации, скорее всего, это одна и та же библиотека.
Installation directories
The default installation directories are derived from environment
variables.
For VC-WIN32, the following defaults are use:
For VC-WIN64, the following defaults are use:
Should those environment variables not exist (on a pure Win32
installation for examples), these fallbacks are used:
ALSO NOTE that those directories are usually write protected, even if
your account is in the Administrators group. To work around that,
start the command prompt by right-clicking on it and choosing «Run as
Administrator» before running ‘nmake install’. The other solution
is, of course, to choose a different set of directories by using
—prefix and —openssldir when configuring.
