Обзор tftp-сервера tftpd32 (простой протокол передачи файлов)
Содержание:
[edit] General
This article describes how to do an initial flash or a TFTP recovery flash for your device.
- Unplug the router, get a for the PC, and connect it via network cable to a router LAN port
- Set a fixed IP address on the PC with the same network as your router, e.g. Router: 192.168.1.1, PC: 192.168.1.2
- Setup the TFTP client, then start a continuous ping (-t switch is needed for this in Windows) to the router
- Plug in the router and start the TFTP client as soon as there is a TTL=100 ping response. The client should show transfer.
- TTL=64 means application code has been reached. If the router isn’t responding, it is soft-bricked (use OEM firmware)
- Read about timing problems below:
Special Asus TFTP Flashing Procedures
Some routers like the Asus WL-500xx series (WL-500G, WL-500G Premium, WL-500W, WL-500G Deluxe), need additional steps to perform a complete and proper initial flash. See this wiki page: Asus TFTP Flash
Special for Vista, Win7 and Win 2008
In order to catch the narrow window for TFTP flash, you should use platforms with simple TCP/IP implementations that don’t have CTCP implemented: Windows XP or Linux are reported to work, but some have reported significant problems with Vista, Windows 7 or Windows 2008.
For more information see this posting
Edit: While some may have reported problems, CTCP is definitely not the issue, because it is disabled by default in Windows Vista and Windows 7. So unless people are specifically turning it on, it isn’t running. I personally just used TFTP on my router with no difficulties, although mine is a Netgear WNDR3700 that was waiting for a TFTP flash and didn’t have this race condition at boot as some of these routers seem to. But again, even if you have an issue it’s not CTCP. Check out the wikipedia article on CTCP for information on how to check if it is running and how to disable it (both are simple command line entries).
If having issues, try connecting a separate network switch between the PC and router, so the PC network port sees a connection before the router port is up. This should allow for a faster ping reply. Then follow the instructions as normal.
Special for Linksys WRT54GL Users
If the router seems to be bricked so that the power light is constantly blinking and pinging the router results in TLL=100 continuously, then there is still a great chance that tftp can help.
Firstly you must flash the router with the original firmware available at Linksys homepage www.linksys.com, since flashing it with DD-WRT probably won’t give any result at all. Then do a 30/30/30 and after that you can flash with DD-WRT Mini. The initial flashing can be done with only the mini version, perhaps later you can move on to bigger versions of it.
Filename Remapping
The —mapfile option specifies a file which contains filename remapping rules. Each non-comment line (comments begin with hash marks, #)
contains an operation, specified below; a regex, a regular expression in the style of egrep; and optionally a replacement pattern.
The operation indicated by operation is performed if the regex matches all or part of the filename. Rules are processed from the top down, and by
default, all rules are processed even if there is a match.
The operation can be any combination of the following letters:
- r
Replace the substring matched by regex by the replacement pattern. The replacement pattern may contain escape sequences; see below.
g
Repeat this rule until it no longer matches. This is always used with r.
i
Match the regex case-insensitively. By default it is case sensitive.
e
If this rule matches, end rule processing after executing the rule.
s
If this rule matches, start rule processing over from the very first rule after executing this rule.
a
If this rule matches, refuse the request and send an access denied error to the client.
G
This rule applies to GET (RRQ) requests only.
P
This rule applies to PUT (WRQ) requests only.
~
Inverse the sense of this rule, i.e. execute the operation only if the regex doesn’t match. Cannot used together with r.
The following escape sequences are recognized as part of the replacement pattern:
\0
The entire string matched by the regex.
\1 to \9
The strings matched by each of the first nine parenthesized subexpressions, \( … \), of the regex pattern.
\i
The IP address of the requesting host, in dotted-quad notation (e.g. 192.0.2.169).
\x
The IP address of the requesting host, in hexadecimal notation (e.g. C00002A9).
\\
Literal backslash.
\whitespace
Literal whitespace.
\#
Literal hash mark.
\U
Turns all subsequent letters to upper case.
\L
Turns all subsequent letters to lower case.
\E
Cancels the effect of \U or \L.
If the mapping file is changed, you need to send SIGHUP to any outstanding tftpd process.
Security
The use of TFTP services does not require an account or password on the server system. Due to the lack of authentication information, tftpd will
allow only publicly readable files (o+r) to be accessed, unless the —permissive option is specified. Files may be written only if they already exist
and are publicly writable, unless the —create option is specified. Note that this extends the concept of »public» to include all users on all hosts
that can be reached through the network; this may not be appropriate on all systems, and its implications should be considered before enabling TFTP service.
Typically, some kind of firewall or packet-filter solution should be employed. If appropriately compiled (see the output of in.tftpd —version)
tftpd will query the hosts_access(5) database for access control information. This may be slow; sites requiring maximum performance may want to
compile without this option and rely on firewalling or kernel-based packet filters instead.
The server should be set to run as the user with the lowest possible privilege; please see the —user flag. It is probably a good idea to set up a
specific user account for tftpd, rather than letting it run as «nobody», to guard against privilege leaks between applications.
Access to files can, and should, be restricted by invoking tftpd with a list of directories by including pathnames as server program arguments on the
command line. In this case access is restricted to files whole names are prefixed by one of the given directories. If possible, it is recommended that the
—secure flag is used to set up a chroot() environment for the server to run in once a connection has been set up.
Finally, the filename remapping (—mapfile flag) support can be used to provide a limited amount of additional access control.
Tftp сервер windows
Для того, чтобы развернуть сервер на своем рабочем месте необходимо:
Загрузить нужный дистрибутив отсюда
Стоит обратить внимание, что дистрибутивы различаются по типу запуска: как службу (service edition) и как приложение (standard edition) и также по битности ОС. Для себя я выбрал пакет tftpd64 service edition (installer)
После загрузки, устанавливаем загруженный дистрибутив, не изменяя абсолютно никаких параметров
Если Вы загрузили, как и я, дистрибутив с запуском в качестве службы, то стоит вручную запустить службу или просто перезапустить компьютер.
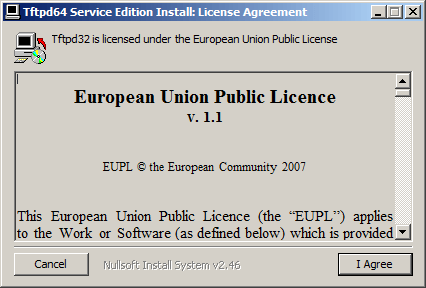
далее жмем i Agree и соглашаемся с лицензионным соглашением.
Выставляем нужный птички и жмем next.
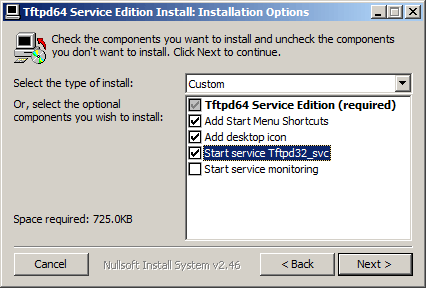
Как установить tftp сервер на примере tftpd64 service edition-03
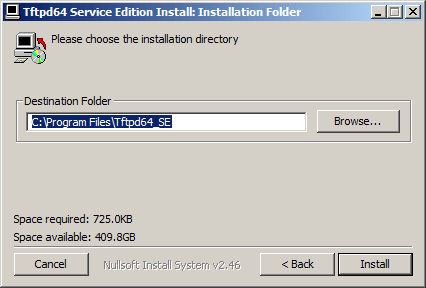
Задаем при необходимости альтернативный каталог для установки.
Как установить tftp сервер на примере tftpd64 service edition-04
Как установить tftp сервер на примере tftpd64 service edition-05
Как установить tftp сервер на примере tftpd64 service edition-06
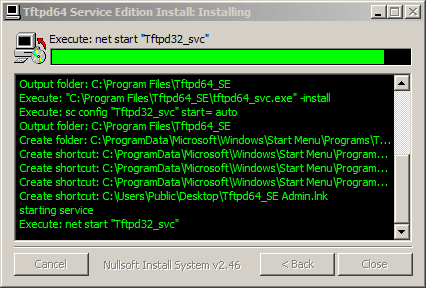
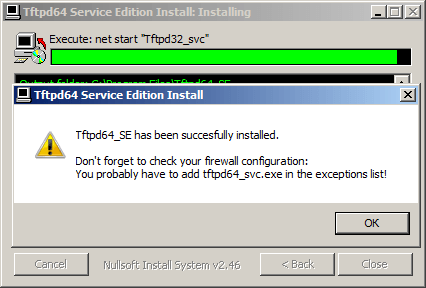
Не забудьте проверить что открыт TCP, UPD порт 69.
Как установить tftp сервер на примере tftpd64 service edition-07
Открываем установленную программу и нажимаем снизу Settings
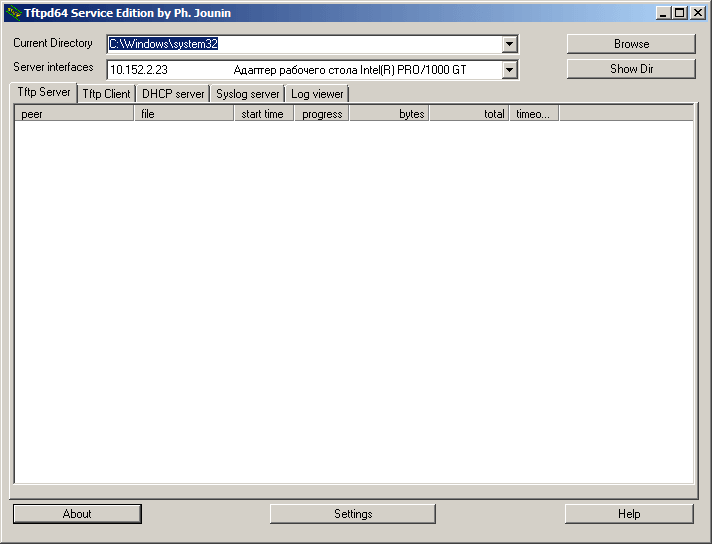
Как установить tftp сервер на примере tftpd64 service edition-08
Оставляем галку TFTP Server
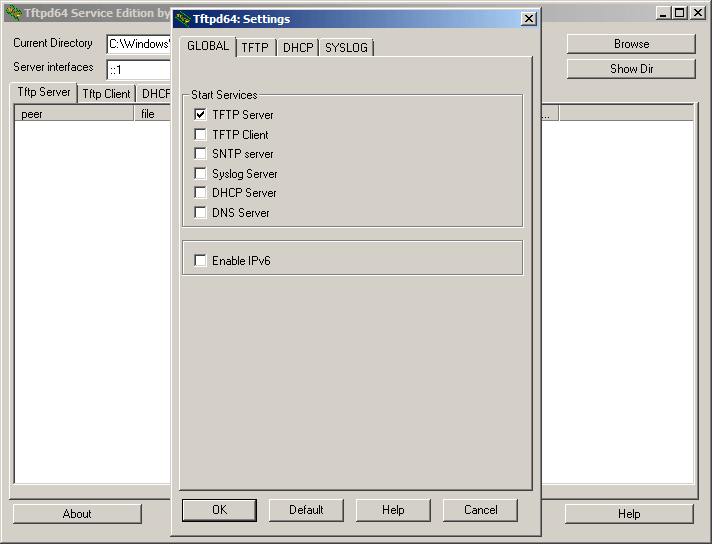
Как установить tftp сервер на примере tftpd64 service edition-09
Переходим на вкладку TFTP и нажимаем Browse
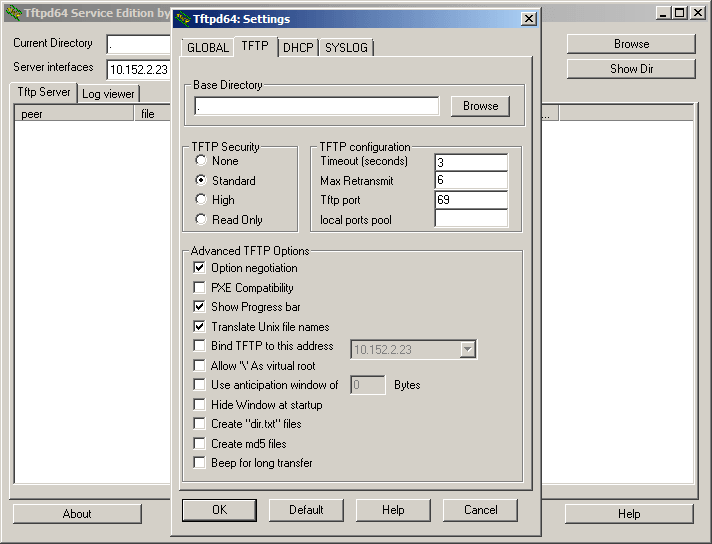
Как установить tftp сервер на примере tftpd64 service edition-10
Указываем папку где у вас будет ссылка на папку tftp
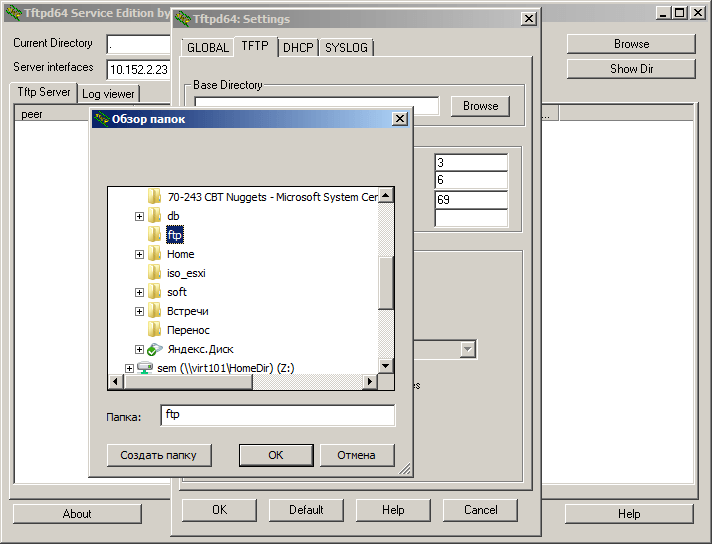
Как установить tftp сервер на примере tftpd64 service edition-11
Закрываем, у вас должно получиться нечто подобное
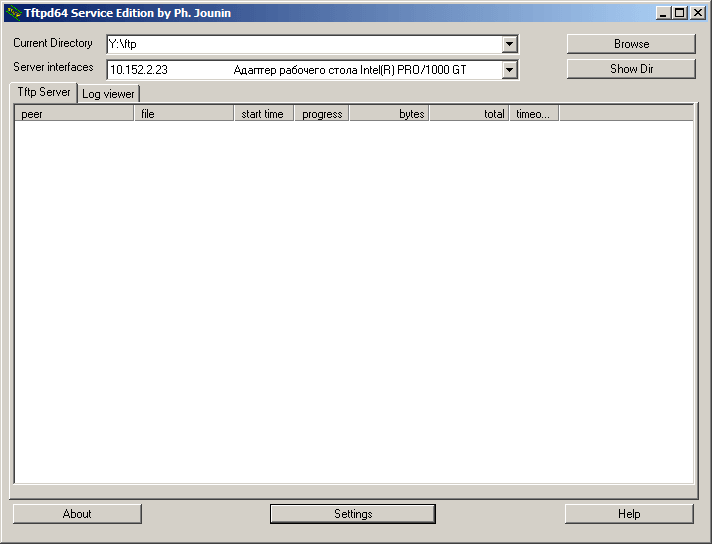
Как установить tftp сервер на примере tftpd64 service edition-12
Всё! Теперь можно подключаться к серверу и копировать файлы. У операционной системы Windows XP tftp-клиент установлен по умолчанию, а у Windows server 2008R2 его необходимо доставить, я описал это тут (Как установить tftp клиента в Windows Server 2008R2)
Troubleshooting
TFTP file transfer doesn’t work from local computer
- Check if your TFTP server is running and listening
- Check if TFTP folder is set up correctly (location, access rights)
- Check if firmware file is set up correctly (location, access rights)
TFTP file transfer works from local computer, but not from another computer:
- Check if network cable is connected properly
- Check if server IP is set correctly
- Make sure server firewall allows inbound TFTP on UDP port 69
TFTP file transfer works from another computer, but not from router:
- Check if server IP is set correctly (same as router is searching for)
- Try using alternate cable, a crossover cable or alternate switch/speed
- Try connecting to an alternate port on the router / routers switch
- Pay attention to any output or verbosity from the router console or led activity if available
- Verify the arp cache on either host… server side is easier…
- Use arp -s to add a static mapping or arp -d to delete stale entries…
- Use a third host to simply ping the router, both with static addresses if possible
- Try an alternate server software, client software or TFTP transfer mode
- If you get some activity, timing can often yield results, power cycle the router and start the transfer earlier or later…
[edit] Mac OS X
OS X ships with a command-line TFTP client.
First, download the firmware file and put it in your user folder (/Users/yourusername/).
Then connect your computer directly to your router via ethernet. Go to System Preferences > Network. Click on «Ethernet» in the left panel and change «Configure IPv4» to «Manually». Then change «IP address» to 192.168.1.x (where x is any number between 2 & 255).
Then copy & paste the following text into a text editor:
 connect 192.168.1.1
 binary
 rexmt 1
 timeout 60
 put dd-wrt.vXX_XXX.XXX
Change the last line to the filename of the firmware file, which you just moved to your user folder. Copy the whole thing, including the line break after the last line.
Now open Applications > Utilities > Terminal. Enter:
tftp
A «tftp>» command prompt will appear. Now press the reset button on your router. On the tftp command line in Terminal, paste (Cmd+v) the text you copied. Since you copied the line break at the end, tftp will execute the command at the moment you paste it. Depending on your router, you may have to paste it multiple times to get the timing right.
If it works, you’ll see something like this:
 tftp> connect 192.168.1.1
 tftp> binary
 tftp> rexmt 1
 tftp> timeout 60
 tftp> put dd-wrt.vXX_XXX.XXX
 Sent 1769472 bytes in 9.0 seconds
[edit] Windows
Command Line
This example is after a bricked update, using a Belkin f5d130uk (which has a bootloader built in, no need for redboot)
ping the router permanently, by running in Start > Run:
ping -t 192.168.2.1 -t
and see if it is responding, e.g. like this
 64 bytes from 192.168.2.1: icmp_seq=1 ttl=64 time=2.90 ms
 64 bytes from 192.168.2.1: icmp_seq=2 ttl=64 time=0.264 ms
 64 bytes from 192.168.2.1: icmp_seq=3 ttl=64 time=1.44 ms
- reboot the router via web-if or powercycle (the ping response will stop)
- if you see the the first ping response again …
 From 192.168.2.1 icmp_seq=1 Destination Host Unreachable
 From 192.168.2.1 icmp_seq=2 Destination Host Unreachable
 64 bytes from 192.168.2.1: icmp_seq=3 ttl=128 time=2.90 ms
 64 bytes from 192.168.2.1: icmp_seq=4 ttl=128 time=3.50 ms
 64 bytes from 192.168.2.1: icmp_seq=5 ttl=128 time=0.90 ms
… you will have to start the tftp upload in binary mode immediately after the first pings responses. The TTL of the boot tftp server will be 100 or 128. It usually does 5 pings responses, after that it will boot the firmware in flash, this is the right time to flash (the TTL of DD-WRT is only 64). If the upload doesn’t work the first time, then you have to try the first steps again. you have to be very fast! 😉 Maybe you will have to reset the device via reset button a few times to get the tftp boot working (Siemens, Belkin and similar hardware).
tftp -i 192.168.2.1 put dd-wrt.vXX_XXX.XXX
- wait a few seconds (be patient! don’t reset the router! keep waiting!) when the upload is successful, change your computer’s IP address to 192.168.1.10, and the router will start responding at 192.168.1.1 with DD-WRT
- user name: root, password: admin
- always do a hardware factory reset after the successful flashing!
Linksys TFTP GUI
Linksys has a GUI flash utility
- Special for Vista, Win7 and Win 2008
- In order to catch the narrow window for TFTP flash, you should use platforms with simple TCP/IP implementations that don’t have CTCP implemented: Windows XP or Linux are reported to work, but some have reported significant problems with Vista, Win7 or W2K8.
- Set your computer hardware adapter to a static IP address within the same subnet as the router’s original firmware (ex…set a static of 192.168.11.10 if your router’s default IP address is 192.168.11.1). Set the net mask to 255.255.255.0.
- Start the TFTP utility.
- The Server/IP address is that of the router being flashed.
- Leave the password blank.
- Navigate and select the firmware you wish to flash.
- Set retries to 10.
- Now plug the ethernet cable from your computer into a LAN port of the router.
- Unplug the router, plug it back in, and immediately hit the Upgrade button on the TFTP utility.
- If the router does not flash immediately stop the attempts and vary the timing from when you plug the unit in to the time you hit the start button. I have had good luck flashing within the first 1/2 second of reapplying powering the device.
- Tip: ping the router continuously. Start > Run > ping -t 192.168.x.x -w 10. Power cycle the router (or tap the reset button) then press Upgrade as soon as you get the first ping reply.
- Once it flashes and you receive the Success message. Wait for a full 2 minutes while the new firmware flash configures itself. DO NOT power down the router!
- After the 2 minutes do a Hard reset or 30/30/30 on the router, then configure at 192.168.1.1 (DD-WRT’s default IP address). The default DD-WRT username/password is root/admin.
Проверка работоспособности TFTP сервера
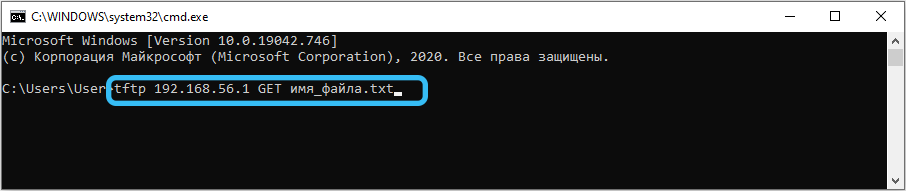
Чтобы проверить, работает ли TFTP сервер, необходимо просто выполнить копирование файла с сервера на клиентское оборудование.
Для этого нужно запустить консоль на клиенте, а затем выполнить команду tftp 192.168.1.35 GET <имя копируемого файла>. Если всё настроено правильно, после паузы, во время которой и происходит передача данных, указанный файл должен появиться на клиентском оборудовании.
Отметим, что копирование будет производиться в каталог, в котором запускалась консоль, если в настройках программы не указан другой путь. Но не все утилиты имеют такие настройки. Например, если вы используете WinAGents TFTP Server, вам нужно будет выполнить последовательно две команды:
- cd <путь назначения>;
- tftp168.1.35 GET <имя копируемого файла>.
В этом случае копирование будет производиться в указанную вами директорию.
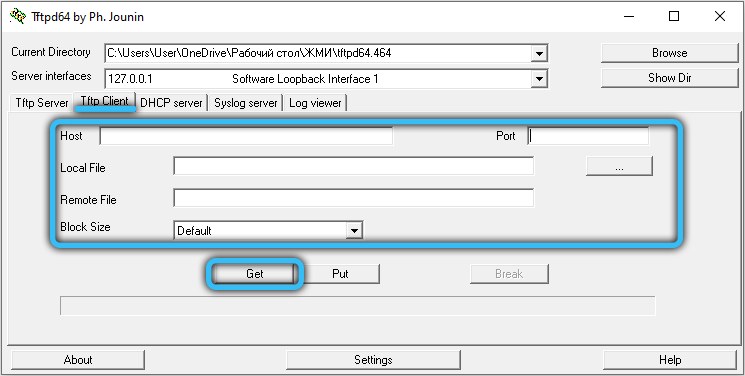
В утилите TFTPD32 копирование будет выглядеть несколько иначе. На клиентской машине следует запустить приложение, открыть в нём вкладку TFTPClient, а затем указать IP-адрес сервера, а затем имя файла, который мы намереваемся скачать. Сохранить его можно и под другим именем, указав его в соответствующей строке настроек. Завершив все приготовления, жмём кнопку GET и дожидаемся результатов операции.
Как видим, использование TFTP сервера не ставит перед пользователем неразрешимых задач, за исключением случаев, когда требуется доступ за пределы локальной сети. Но для этих случаев существуют другие, более защищённые и безопасные сетевые протоколы.
Альтернатива домашней сети
Домашняя группа Windows была удобным инструментом для обмена файлами по сети. Но была исключена с обновлением Windows 10 до версии 1803. Для замены можно использовать TFTP-сервер, который интуитивный в настройке, достаточно надежный и позволяет передавать данные на быстрой скорости.
Перед настройкой сервера TFTP нужно выполнить следующие действия:
- Войдите в систему под учетной записью администратора.
- Загрузите установщик TFTP-сервера компании SolarWinds. После распакуйте загруженный zip архив в любое место на диске и установите программу, следуя инструкциям на экране.
- Чтобы разрешить удаленный доступ к серверу, нужно переадресовать UDP-порт 69 на IP адрес домашней сети. Но, если удаленное подключение не требуется, то переназначать порты не нужно.
[edit] Mac OS X
OS X ships with a command-line TFTP client.
First, download the firmware file and put it in your user folder (/Users/yourusername/).
Then connect your computer directly to your router via ethernet. Go to System Preferences > Network. Click on «Ethernet» in the left panel and change «Configure IPv4» to «Manually». Then change «IP address» to 192.168.1.x (where x is any number between 2 & 255).
Then copy & paste the following text into a text editor:
 connect 192.168.1.1
 binary
 rexmt 1
 timeout 60
 put dd-wrt.vXX_XXX.XXX
Change the last line to the filename of the firmware file, which you just moved to your user folder. Copy the whole thing, including the line break after the last line.
Now open Applications > Utilities > Terminal. Enter:
tftp
A «tftp>» command prompt will appear. Now press the reset button on your router. On the tftp command line in Terminal, paste (Cmd+v) the text you copied. Since you copied the line break at the end, tftp will execute the command at the moment you paste it. Depending on your router, you may have to paste it multiple times to get the timing right.
If it works, you’ll see something like this:
 tftp> connect 192.168.1.1
 tftp> binary
 tftp> rexmt 1
 tftp> timeout 60
 tftp> put dd-wrt.vXX_XXX.XXX
 Sent 1769472 bytes in 9.0 seconds
Как проверить работу tftp-сервера?
Для того, чтобы передать файл необходимо открыть cmd.exe и выполнить команду:
Для того, чтобы получить файл с сервера, есть команда:
Использовать этот сервер для каких-то постоянных задач не рекомендуется, так как у него практически нет никакой защиты от несанкционированного подключений к серверу. Да, можно ограничить доступ к нему только определенным IP-адресам, но та легкость, с которой можно подменить IP-адрес, позволяет сказать, что это не относится к сетевой безопасности вообще.
Включать сервер tftp с таким «уровнем безопасности» можно только на короткое время, для выполнения каких-то сервисных работ, а лучше вообще делать это в изолированной сети.
Отлично и все так просто. Как раз хочу сохранить конфиг с маршрутизатора.
источник
Security
The use of TFTP services does not require an account or password on the server system. Due to the lack of authentication information, tftpd will
allow only publicly readable files (o+r) to be accessed, unless the —permissive option is specified. Files may be written only if they already exist
and are publicly writable, unless the —create option is specified. Note that this extends the concept of »public» to include all users on all hosts
that can be reached through the network; this may not be appropriate on all systems, and its implications should be considered before enabling TFTP service.
Typically, some kind of firewall or packet-filter solution should be employed. If appropriately compiled (see the output of in.tftpd —version)
tftpd will query the hosts_access(5) database for access control information. This may be slow; sites requiring maximum performance may want to
compile without this option and rely on firewalling or kernel-based packet filters instead.
The server should be set to run as the user with the lowest possible privilege; please see the —user flag. It is probably a good idea to set up a
specific user account for tftpd, rather than letting it run as «nobody», to guard against privilege leaks between applications.
Access to files can, and should, be restricted by invoking tftpd with a list of directories by including pathnames as server program arguments on the
command line. In this case access is restricted to files whole names are prefixed by one of the given directories. If possible, it is recommended that the
—secure flag is used to set up a chroot() environment for the server to run in once a connection has been set up.
Finally, the filename remapping (—mapfile flag) support can be used to provide a limited amount of additional access control.
Prerequisites
Requirements
Cisco recommends that you have knowledge of these topics:
-
TFTP Client Software
You can use TFTP to transfer software image files from a PC to your device. This document was written using output from the Cisco TFTP Server application. Cisco has discontinued this application and no longer supports it. If you do not have a TFTP server, obtain any third-party TFTP server application from another source.
Note: There have been problems reported using the Weird Solutions client to TFTP MGX AXIS Shelf Controller (ASC) bootcode.
-
dnld.fw and dnld.sw Template Files
The steps in the section of this document explain how to create these files. The native format of the templates is UNIX, but you can use NotePad or WordPad. Download the shareware editor DwEdit to easily convert to and from DOS and UNIX text formats.
-
Switch software 8.4 or later that supports TFTP
The best macOS TFTP server
1. macOS TFTP server
macOS has a built-in TFTP server that won’t be loaded by default. The easiest way to get it running is to simply type:
Then, provide your password when prompted. You can use something like netstat to confirm it is running:
$ netstat -n | grep *.69
 udp4 0 .69 .*
 udp6 0 .69 .*
The TFTP server is now running on port 69 waiting for connections. You can use any TFTP client to connect to the server and upload or download files. To shut down the TFTP server, simply use the command:
Pros:
- Already part of the macOS, just needs to be loaded
- Easy setup, only takes a minute or two
- Runs incredibly lean, using few resources
Cons:
Configuration options might be difficult to find
Key Features:
- Native to Macs’ operating system
- Command line
- Free TFTP server for macOS
The best Free Linux TFTP servers
There are a variety of TFTP servers available for most Linux distributions. A popular one is the Advanced TFTP server that comes in a package named . The ‘d’ at the end of many Linux packages stands for daemon, which is a Unix-like term for an application that runs in the background. A Linux daemon is akin to a Windows service.
The ATFTP server supports multicast and is multithreaded which makes it a little more flexible to deploy in non-standard network installations. Use or to install it, depending on your Linux distribution.
1. atftpd
You’ll find the sparse configuration file for atftpd in . Set up some quick options such as what ports to listen on, and whether to run as a daemon or via inet.d, and you’re ready to go.
You’ll need a TFTP client. There are many, but the client is a quick and easy command line solution. To install it, use . Then connect and upload a file:
We can see the has been uploaded to the path specified in the config file
- Configuration is relatively simple and done during the installation process
- As a CLI tool, it’s the lightest option available
- Runs as a simple daemon
Cons:
- You’ll still need a TFTP client
- Strictly command line-based
Key Features:
- Command line
- Built into Linux
- Free TFTP Server for Linux
2. tftpd-hpa
Another popular TFTP server for Linux is tftpd-hpa. Since the TFTP protocol is so simple, there are no really obvious advantages to choosing one TFTP server over another. However, due to dependencies and documentation deficiencies, sometimes one server will work better than another. If you’re unable to get atftpd working, give tftpd-hpa a try.
You’ll find the configuration file in :
Modify the settings as desired, then startup the server using .
Cons:
- Support beyond the configuration file may be difficult to find
- Not much different than other Linux CLI options on the market
Key Features:
- Command-line
- Straightforward