[ps2-pc] эмулятор ps2 для pc — pcsx2 r5710 (2012)
Содержание:
- Q2 2018-Q2 2019 Changes
- Q1-Q2 2016 Changes
- Overview[edit]
- Q3-Q4 2016 Changes
- Запуск и настройка эмулятора
- RetroArch, мультиэмулятор снова в действии
- 3. NeutrinoSX2 EMULATOR
- Инструкция по работе
- Q1-Q2 2016 Changes
- Setting up the Build Environment
- Using PS2 ISO Game File in PCSX2
- Alternatives to PCSX2 PS2 Emulator
- Packaging PCSX2 with Nullsoft Scriptable Install System
- Using PS2 CD in PCSX2
- Эмулятор для Sega Dreamcast+игра Soul Calibur (1999)
- 1.PCX2 EMULATOR
- Special hardware[edit]
- Hardware requirements
- List of ingame hotkeys
- Graphics Synthesizer bug fixes
Q2 2018-Q2 2019 Changes
Q2 2018 — Q2 2019 progress Report highlights, read the full report here.
GSdx changelog:
GSdx-HW: Fix half-bottom screen issues on texture/color shuffling.
GSdx-TC: Palette management rework.
Gsdx-HW: implement fixed TEX0 for all renderers.
GSdx: OSD improvements and port to Direct3D10/11.
GSdx: Accurate Date update and partial port to Direct3D10/11.
GSdx-GL: Bypass the texture cache when the framebuffer is sampled.
GSdx-GL: Experimental Sparse Texture support.
GSdx-D3D: Improved palette support has been ported from OpenGL to Direct3D10/11.
GSdx-D3D: GPU accelerate 8 bits texture conversion port from OpenGL to Direct3D10/11.
GSdx-D3D: Depth Emulation port to Direct3D10/11.
GSdx-D3D: Channel shuffle port to Direct3D10/11.
GSdx-D3D: HDR Colclip blend port to Direct3D10/11.
GSdx-D3D: Accurate Blend Fbmask port to Direct3D10/11.
GSdx-D3D: Partial SW blending port to Direct3D10/11.
GSdx-D3D: Alpha hack has been removed completely, replaced with Blending Accuracy option.
GSdx-HW: Removal of MSAA support in favor of better optimizations and accuracy.
GSdx-HW: Removal of Direct3D9 renderer in favor of better optimizations and accuracy.
GSdx-HW: Removal of many no longer needed hacks.
GSdx-HW: Add Skipdraw Offset option for Skipdraw hack.
GSdx-GUI: GUI update to improve usability.
Core changelog:
PCSX2-TAS: Input Recording/Playback Functionality (speedrunning tools).
Vector Units: Fix bug in «Branch in Delay Slot» Optimization.
Recompiler: Fix stall in branch delay slot.
PCSX2: Improved GameDB handling.
VIF: A VIF core update has been made to fix Downtown Run.
Gif Unit: Recheck VIF status after a reset is performed when waiting for PATH3 (Fixes Eragon).
PCSX2 GUI changelog:
PCSX2: «FMV Aspect Ratio Switch/Override» feature.
PCSX2: Save/Load slot improvements, allow to display slot dates.
SPU2-X changelog:
SPU2-X-GUI: The gui has been updated to improve usability.
Q1-Q2 2016 Changes
January — February 2016 progress report hightlights, read the full report here.
Q2 2016 progress report hightlights, read the full report here.
GSdx changelog:
GSdx: Fast texture invalidation option.
GSdx: Improved detection of Framebuffer size.
GSdx: Enable reading of Depth Buffer.
GSdx: Improved PCRTC merge circuit emulation.
GSdx-GL: Fast accurate blending.
GSdx-GL: Depth buffer lookup optimization.
GSdx-FX: Post-Processing updates.
GSdx: Proper handling of 576P/720P/1080I video modes.
Core changelog:
PCSX2: Automatic aspect ratio switch during FMV playback.
VIF: Timing fix for MSCALF, MSCNT instructions.
Vector Units: Scarface I bit gamefix.
CDVD changelog:
CDVDgigaherz: Fixed dual layer DVD reading.
CDVD: Improved ISO layer break detection algorithm.
Lilypad and Onepad changelog:
LilyPad: Add Pop’n Music controller support.
Onepad: GUI redesign.
Miscellaneous changelog:
PCSX2: GUI Improvements.
PCSX2: PCSX2-Auto test suite.
Overview[edit]
PCSX2 is a plugin-based emulator in name only. All plugins are developed in tandem with the emulator in the same source tree. With the exception of some specialized input plugins discussed below, there has not been a reason to add additional plugins such as the older ZeroGS/ZeroSPU2 for many years. Similar to current versions of Dolphin, the PCSX2 developers intend to eventually have all the plugins statically linked/»baked-in». To facilitate this, PSX emulator support was dropped from LilyPad and GSdx (does not affect playing PSX games in PCSX2). Currently, all plugins except the graphics plugin (GSdx) have been integrated into the core.
Q3-Q4 2016 Changes
Q3 2016 progress report hightlights, read the full report here.
Q4 2016 progress report hightlights, read the full report here.
GSdx changelog:
GSdx: Hardware mipmapping support.
GSdx-TC: Proper scaling of all textures.
GSdx: Handling illegal 8 bits pixel storage format.
GSdx-PCRTC: Feedback write support.
GSdx-glsl: Optimize number of active constant buffers in the shader.
GSdx: Avoid illegal instruction crash on older CPUs.
GSdx: Alpha test improvements.
GSdx: Proper custom resolution scaling.
Core changelog:
PCSX2: PSX mode compatibility.
PCSX2: PSX mode, proper video mode initialization.
PCSX2: Improved patch handling.
PCSX2: Accurate video mode detection.
LilyPad and Onepad changelog:
LilyPad: Add separate bindings for each pad type.
LilyPad: Add PlayStation Mouse support.
LilyPad: Updated user interface.
LilyPad: Add dance pad support and revamped Lilypad dialog.
OnePad: General improvements on accuracy.
CDVD changelog:
cdvdgigaherz: Linux port.
Miscellaneous changelog:
PCSX2: FreeBSD support.
Linux: Support Vsync on Linux free driver.
Windows: Remove DirectX redistributable dependency on Windows 8.1/10.
Запуск и настройка эмулятора
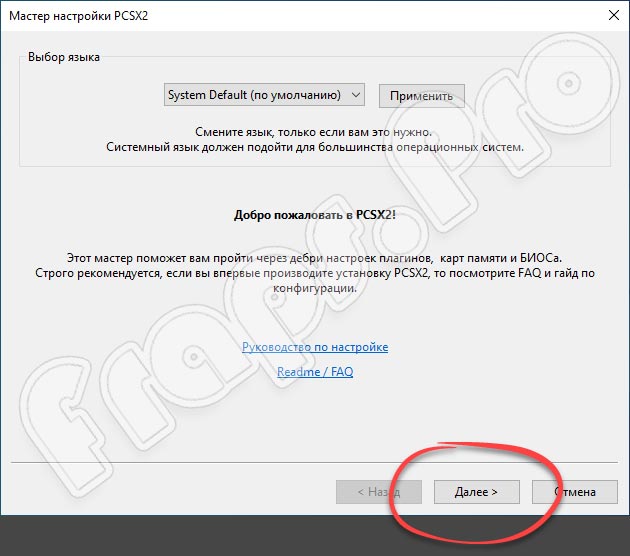
При первом запуске вас встретит мастер настройки, где в выпадающем списке Вы можете включить русский язык:
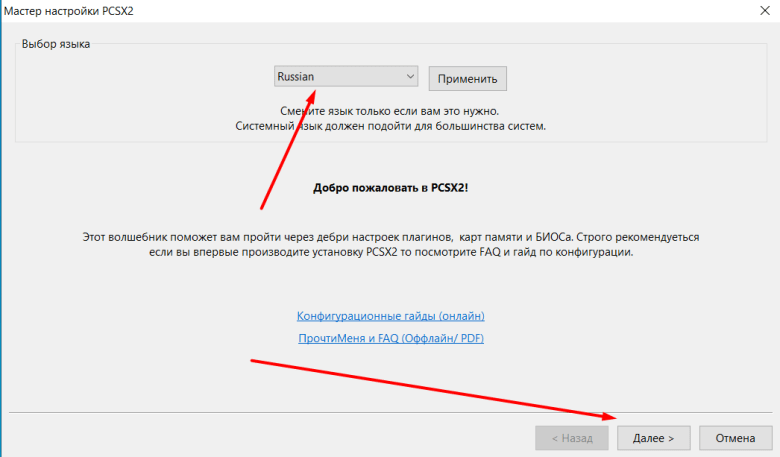
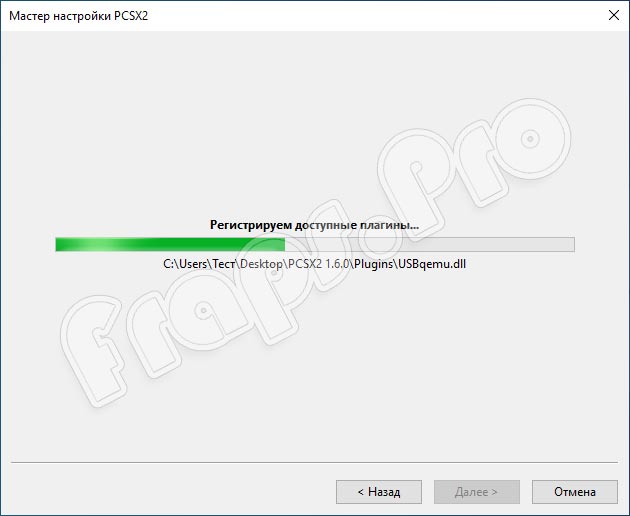
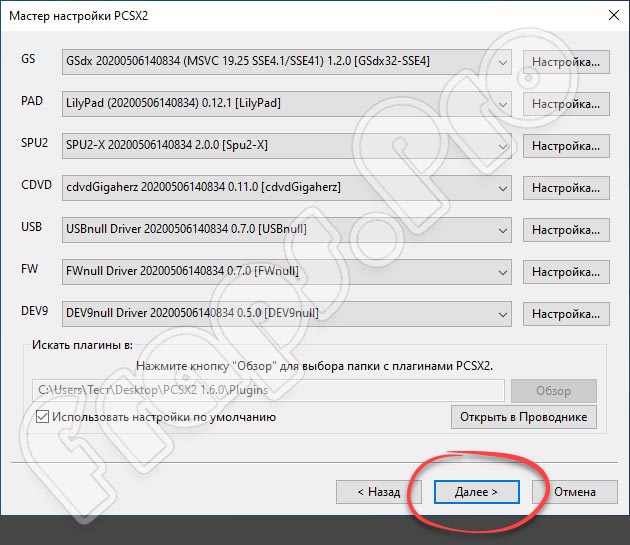
Дождитесь регистрацию доступных плагинов и нажмите далее.
Теперь, Вам необходимо установить BIOS от Sony PlayStation. Загрузить его необходимо в папку вашего эмулятора и указать её в проводнике:
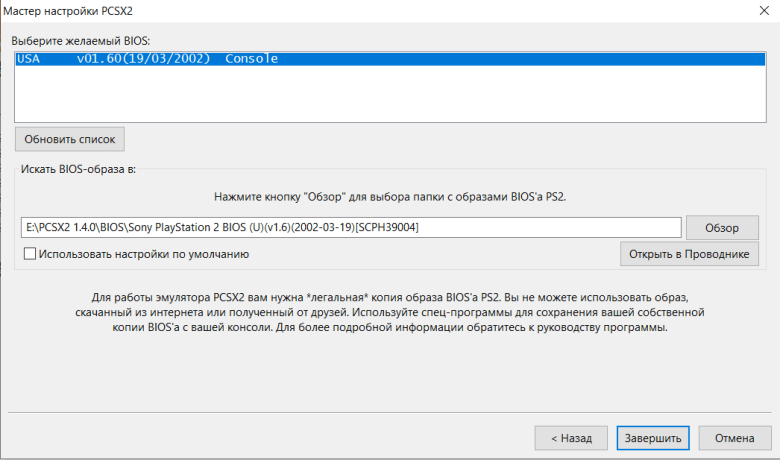
Я создал папку BIOS в корне папки с эмулятором и загрузил в него эти файлы:
https://drive.google.com/open?id=1KJNk-0AF-HXGLkLSqF4JfL9U374IyDFV
В проводнике необходимо выбрать папку с файлами, а не сам файл. Когда Вы её откроете, она будет пустая, просто нажмите «ОК» и у вас должно быть всё как на скриншоте.
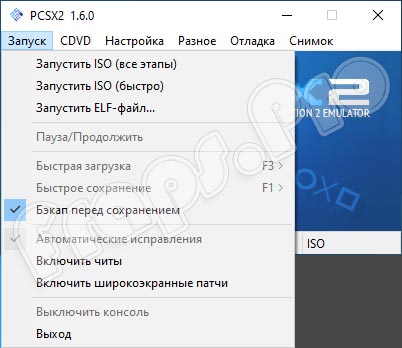
Готово! Установка эмулятора полностью завершена. Теперь, скачайте игру в интернете для PS2 и чтоб запустить её, откройте эмулятор, затем в верхнем меню нажмите «CDVD», далее «Выбор ISO» и выберите игру в нужной папке.
К слову, игра не обязательно должна быть в файле образа (ISO), можно также запускать другие форматы файла, к примеру .BIN
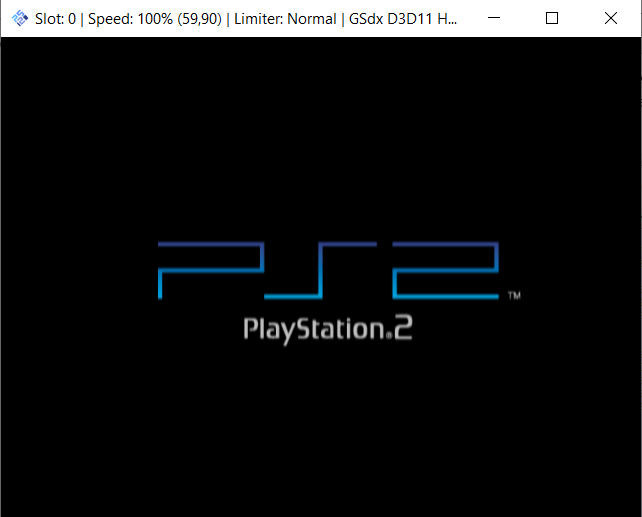
После того, как Вы выбрали игру, нажмите «Запуск» и выберите первый пункт «Перезапустить CD/DVD (все этапы)». Готово, только сильно не увлекайтесь:
Настройки джойстиков находятся на вкладке меню «Настройка», «Джойстики (PAD)», «Настройки плагина». Выберите ваш контроллер и назначьте кнопки так, как вам удобно.
Среди них такие произведения:
- серия Yakuza;
- Final Fantasy X и XII;
- GTA III;
- Warriors Orochi;
- серия Harry Potter;
- Gran Turismo 4;
- Devil May Cry 1 & 2 & 3;
- GTA Vice City;
- Burnout 3;
- Okami;
- God of War 1 & 2;
- Fatal Frame 3
- Silent Hill 2 & 3;
- Metal Gear Solid 2: Sons of Liberty;
- Shadow of the Colossus;
- ICO;
- Tekken 4;
- Metal Gear Solid 3: Subsistence;
- И многие другие.
Приложение доступно на платформах Windows, Mac и Linux.
Игры можно запустить вставив диск в привод DVD-ROM или через файл образа на жестком диске (ISO, IMG и т. д.). Программа требует специальные плагины и компоненты, отвечающие за правильное отображение изображения, звука или контроллеров (есть в нашей сборке).
PCSX2 помимо довольно точной эмуляцией PlayStation 2 предлагает несколько функций, которых нет в консоли компании Sony. Одним из них является возможность улучшения качества графики игры при изменении разрешения (поддерживается до 4096×4096), активации механизма сглаживания и фильтрации текстур. Часто игры в таком режиме выглядят лучше, чем переиздания HD от разработчиков.
Среди других функций, доступных в режиме эмуляции:
- запись видео с игр;
- создание неограниченного количества карт памяти;
- чтения и сохранения прогресса игры в любой момент;
- использование любых контроллеров: геймпадов от приставок PS3 и Xbox360 или мыши и клавиатуры;
- имеет механизм контроля изменения скорости игрового процесса.
Жанр:10PCSX2-All-in-OneКороткая справка о эмуляторе:В комплекте присутствуют:Как этим пользоваться:Лекарство:Размер:Год:
10С этой торрент также скачивают:
- https://webhalpme.ru/emulator-ps2/
- https://soft-reload.ru/pcsx
- https://torrent-games.eu/adventure-kvest/5066-sniper-elite-iii.html
RetroArch, мультиэмулятор снова в действии
RetroArch сегодня является эмулятором для всего. Эта программа действует как интерфейс для Libretro, самого большого пакета эмуляторов, который мы можем найти. Это способно эмулировать практически любую ретро-консоль (и не такую ретро) прямо на нашем ПК.
RetroArch имеет множество достоинств и функций. Например, это наиболее полный эмулятор, который мы можем найти, поскольку он способен открывать практически любую игру и с большой точностью эмуляции. Он имеет сверхсовременную конфигурацию, которая позволит нам настроить все параметры до совершенства, и даже имеет исключительные функции, такие как возможность играть на любой консоли по сети и даже поддержка достижений в играх.
Среди большого количества эмуляторов, которые мы можем найти в RetroArch, ядро Play! Выделяется превыше всего. Это тот, который позволит нам, среди прочего, имитировать игры PlayStation 2 в рамках этой же программы.
Мы можем скачать RetroArch из Следующая ссылка . Этот эмулятор доступен для Windows, macOS, Linux и множества других систем и платформ. Если что-то работает, вы, вероятно, можете установить для этого RetroArch.
3. NeutrinoSX2 EMULATOR
Это новый PlayStation 2 эмулятор. Это примерно на том же уровне, как PCSX 2 и с открытым исходным кодом. Он может играть Клинок 2 и Mortal Kombat 5. Автор ищет помощь в кодировании этого эмулятора. Требуется в GTK Runtimes работать должным образом. Так же, как и другие эмуляторы своего рода, он все еще в стадии строительства, так что да, это означает, что вы не можете запустить любую коммерческую игру с ним. Для того, чтобы запустить этот эмулятор на полной скорости с все варианты включен, вы должны иметь Intel Pentium 4 2,0 ГГц (или AMD XP) 512 MB RAM 5 MB свободного места на диске (для nsx2) 200+ Мб свободного пространства подкачки.

Характеристики и функциональные возможности:
- • эмуляция звука высокого качества
- • Сохранение состояние имеет
- • поддерживается прохождение
- • Хорошая совместимость, даже если это не является полным.
ПРОФИ
- • Быстрый эмулятор оптимизированное
- • Удобный графический интерфейс
- • Полный экран игры.
- • Полная поддержка звука на ПК.
МИНУСЫ
Инструкция по работе
Установка программы не отнимет у вас много времени. Немного ниже разберемся, как загрузить эмулятор и инсталлировать его на ПК.
Скачиваем программу
- Загружаем папку с утилитой, воспользовавшись ссылкой, прикрепленной внизу.
- Распаковываем архив, введя пароль из таблицы, в любое место на ПК.
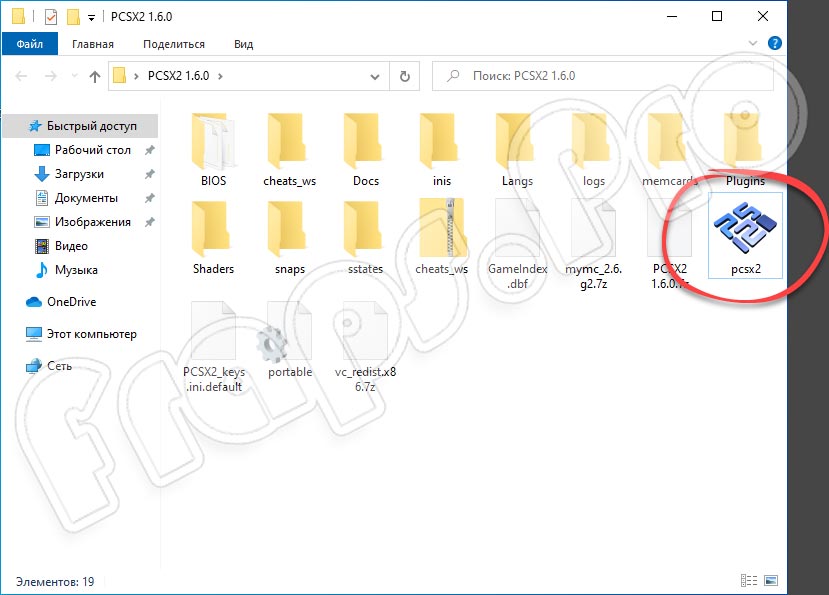
- Кликнув по файлу pcsx, запускаем программу.
- Прочитав информацию о софте, жмем по кнопке «Далее».
- Дальше нужно немного подождать. Сейчас приложение проверит наличие доступных плагинов.
- Выполняем настройку плагинов. Если значения по умолчанию нас устраивают, кликаем по «Далее».
- При завершении инсталляции выбираем нужный вариант BIOS. В некоторых ситуациях софт придется загружать отдельно.
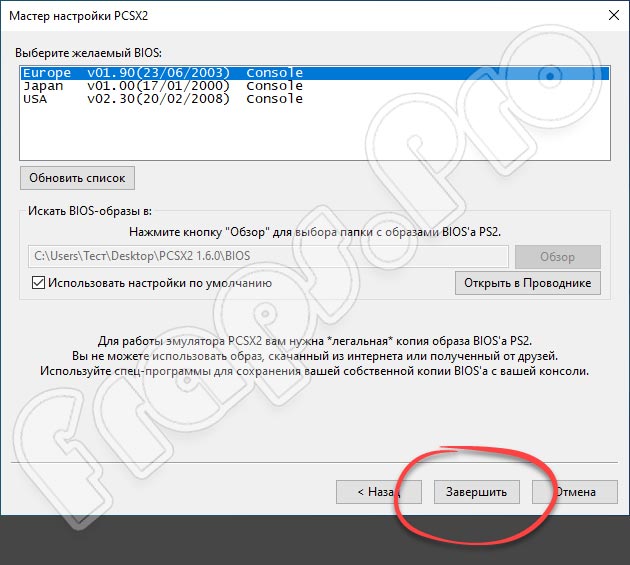
Нажав на кнопку «Завершить», можем работать с программой. При запуске той или иной игры будьте внимательны. В комплекте с образом ISO, как правило, идет информация по настройке игры. Это такие сведения, как плагины, настройки графики, ссылки на BIOS и так далее.
Как пользоваться
Пришло время разобраться, как же запускать проекты, предназначенные для ПС2, на компьютере. Алгоритм действий здесь заключается в следующем:
- Запускаем утилиту и кликаем по разделу «Запуск».
- На следующем этапе кликаем по строке, подразумевающей быстрый запуск ISO.
- Дальше выбираем путь на ПК к нужному образу.
- Ждем окончания процесса загрузки и можем смело отправляться в мир виртуальных приключений.
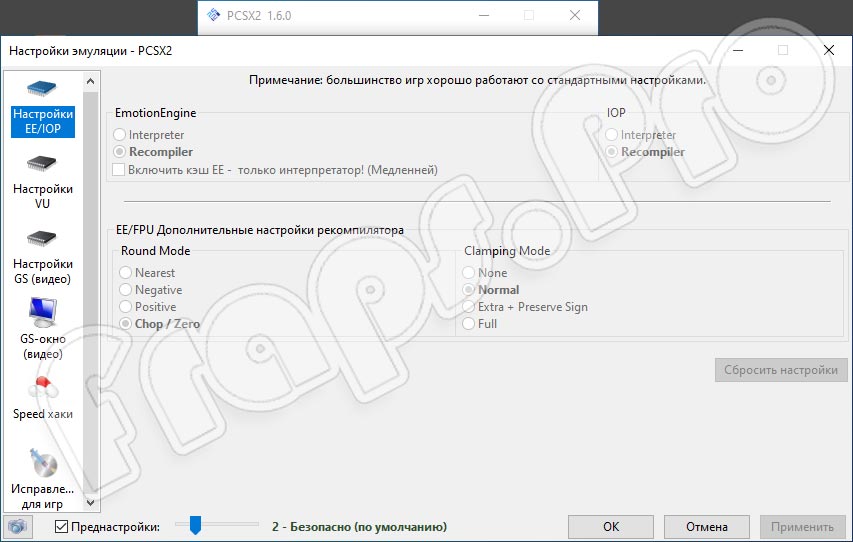
В разделе «Настройки» у геймера будет возможность внести желаемые параметры в ручном режиме. Конечно, если для этого хватает знаний и опыта.
Для игры можно использовать кнопки клавиатуры и мышки, а также установить игровое устройство и вести управление с его помощью. Кстати, программа поддерживает не все современные устройства.
Q1-Q2 2016 Changes
January — February 2016 progress report hightlights, read the full report here.
Q2 2016 progress report hightlights, read the full report here.
GSdx changelog:
GSdx: Fast texture invalidation option.
GSdx: Improved detection of Framebuffer size.
GSdx: Enable reading of Depth Buffer.
GSdx: Improved PCRTC merge circuit emulation.
GSdx-GL: Fast accurate blending.
GSdx-GL: Depth buffer lookup optimization.
GSdx-FX: Post-Processing updates.
GSdx: Proper handling of 576P/720P/1080I video modes.
Core changelog:
PCSX2: Automatic aspect ratio switch during FMV playback.
VIF: Timing fix for MSCALF, MSCNT instructions.
Vector Units: Scarface I bit gamefix.
CDVD changelog:
CDVDgigaherz: Fixed dual layer DVD reading.
CDVD: Improved ISO layer break detection algorithm.
Lilypad and Onepad changelog:
LilyPad: Add Pop’n Music controller support.
Onepad: GUI redesign.
Miscellaneous changelog:
PCSX2: GUI Improvements.
PCSX2: PCSX2-Auto test suite.
Setting up the Build Environment
In order to compile PCSX2 you will need to configure a working build environment based on Microsoft’s Visual Studio. There are some things to download, so I’ve placed links to them at the front of the guide so you can get everything you’ll need at the first step.
Downloading the Prerequisites
Downloading build environment
First you have to download a build environment. Microsoft Visual Studio 2019 and 2017 are capable of compiling PCSX2. At this time, the recommended build environment is Visual Studio 2019 Community.
Visual Studio 2019 — Various Editions
Downloading additional prerequisites
A Visual C++ redistributable runtime matching the build environment major release (Only needed if you’re compiling the Installer):
Visual C++ Redistributable Packages for Visual Studio 2019 and 2017
Installing Microsoft Visual Studio
Microsoft Visual Studio 2019 and 2017 are capable of compiling PCSX2. Depending on whether or not you develop professionally, as well as other factors, you may or may not have access to a copy of Microsoft Visual Studio Professional. This guide will cover the installation and configuration of Visual Studio 2019 Community Windows Desktop.
Installing Visual Studio Community 2019
Download Visual Studio Community 2019 installer from the link above, and run it.
- Run the installer.
- Within Workloads tab make sure Desktop development with C++ is checked.
- I recommend keeping the default installation location. Click Install.
- The components will be downloaded and installed on your computer.
- Once the installation has finished, you may be prompted to restart the system.
- Click Restart Now or Close depending on your situation.
Using PS2 ISO Game File in PCSX2
- To start playing your favorite game, you need to look for its ROM from the reputable ROM site.
- Get the desired PS2 game file and download it on your PC. Keep in mind that it may take some time, so have patience.
- Once it is downloaded, open the PCSX2 PS2 emulator.
- Click the CDVD from the top menu and then ISO Selector from the list followed by the Browse option.

- Now, select the image game file which you have downloaded and saved on your PC.
- Once it is found, click the Open button.
- Now, click System option from the top menu and then select Boot CDVD (Fast).
- It will boot up the game, so wait for your game to be ready and play.
Alternatives to PCSX2 PS2 Emulator
There is no doubt that PCSX2 is leading as the best PS2 emulator since its launch. There is no surprise that still people look for other similar emulators to run and play their favorite PlayStation games on their PC.
If you are looking to use a PS2 emulator other than PCSX2, you have numerous such emulators out there that ensure to make the PS2 emulation easier and accessible.
- RPCS3
- PS2Emu
- NeutrinoSX2
- Play!
- OpenEmu
- HPS2x64
- And many others
Though you can use any of these emulators, PCSX2 has marked its place at the top among all due to its better plugin combinations with settings and also is highly capable of playing most of the PS2 games.
But still, if you want to try something else, you can choose any of these alternatives to play your PS2 games.
Packaging PCSX2 with Nullsoft Scriptable Install System
Just Because It Compiles Doesn’t Mean It Works!
The steps included in this guide will pretty much guarantee that you can set up an environment in which you can compile the .NSI file included in the PCSX2 source to a .exe installer, but PLEASE NOTE THE FOLLOWING: Just because you can get it to compile without erroring does not mean that the output file will be a functional installer! Just like any other piece of code, the .NSI installer needs maintenance whenever there are changes to the file and directory structure of PCSX2. The installer is not the highest priority on the list, so it is possible that the .NSI is out of date and may be including out-dated files, or may not be including new files. It may complete compilation but net an installation that crashes every time it’s run due to missing or unlinked .DLLs. With that said, it is NOT recommended that you use these installers without testing them in a sandbox / virtualized environment first to ensure that they properly install! A successful .NSI file compile does NOT equate to a truly successful installer build!
Installing the Nullsoft Scriptable Install System
Download the installation package from the link above and run it. You will be presented with this Welcome Screen. Click Next.
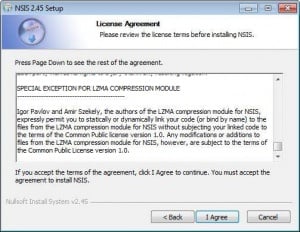
Accept the terms of the EULA.
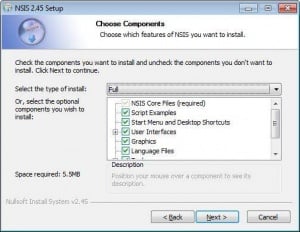
Select «Full Install», if it is not already checked.
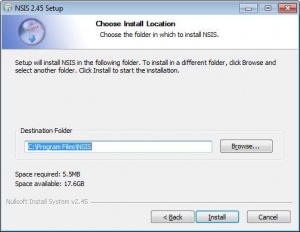
It is recommended that you keep the default installation directory, and click Next.
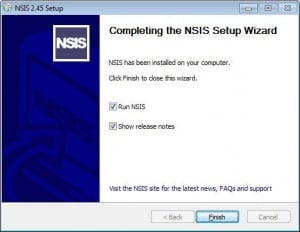
The Nullsoft Scriptable Install System will install very quickly and present you with the final screenshot.
Click Finish and the installer will close.

Lastly, you need to copy the vc_redistx86.exe that you downloaded from the prerequisites above into the following directory:
C:\Development\Project Source\PCSX2\NSIS\
If you skip this step, the NSIS compile will fail. This file must be present for any branch of PCSX2 as well, including wxGUI.
Packaging PCSX2 with NULL Plugins
After you install NSIS and .NSI files are associated with the Nullsoft Scriptable Installer System, you can Right-Click on .NSI files and select «Compile NSIS Script», as shown in the picture.
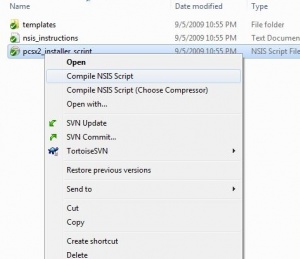
This will compile a PCSX2 installer and include all of the null plugins. This will NOT include the additional plugins (gsDX, SPU-X, etc.)
Packaging PCSX2 with all Plugins
In order to compile PCSX2 and include the Plugins, you must specify the INC_PLUGINS variable to makensis.exe. To do this, run the following in a command prompt (assuming default installation directories):
"C:\Program Files\NSIS\makensis.exe" "C:\Development\Project Source\PCSX2\NSIS\pcsx2_installer_script.nsi" DINC_PLUGINS
This will compile PCSX2 and include all of the plugins in the installer file.
Using PS2 CD in PCSX2
- Open the PCSX2 on your PC.
- Now, insert the PS2 CD on the DVD-ROM drive of your PC. Here, if you don’t have a DVD-ROM drive, the best idea is to go with the above method to run the PS2 game on PC.
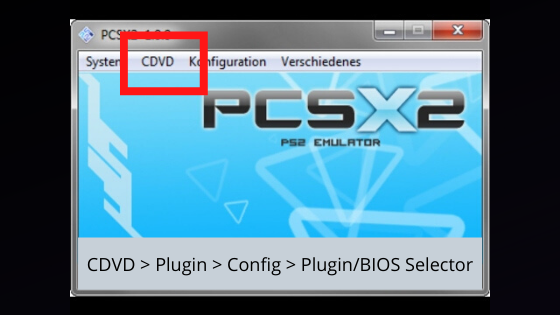
- Click CDVD from the main menu of PCSX2 and select the Plugin option from the list.
- Click Config from the main menu and select the option Plugin/BIOS Selector.
- In the next window, go to the option CDVD and click on its Configure button.
- Now, you have to select the source drive, so select X: as the symbol of the DVD-ROM drive.
- Once it is selected, click Ok and then click OK again.
- Now, click System from the main menu and then select Boot CDVD (Fast).
- After this, your game will boot up and ready to play.
Эмулятор для Sega Dreamcast+игра Soul Calibur (1999)
Nulldc v1.0.0 Public Beta 1:лучший эмулятор Sega Dreamcast. Хорошая скорость, плагинная система, запуск игры из образа диска. Soul Calibur:это не просто невероятно красивый трехмерный файтинг, это культовое творение, несомненный Must-Have для всех ценителей жанра. Изначально Soul Calibur славился именно своей графикой, здесь она действите …
Год выпуска: 1999Жанр: эмуляцияРазработчик: SegaИздательство: пираткаЯзык интерфейса: английскийПлатформа: Sega Dreamcast * CPU: AMD Athlon XP/64/Turion — 2GHz или Intel Pentium 4 — 2.6GHz и выше. * Видео карта Nvidia GeForce 4 TI или ATi Radeon 8500. * RAM 512MB * Windows 2000/XP/2003/Vista * DirectX 9c
1.PCX2 EMULATOR
PCSX2 душа для Sony PlayStation два, что наиболее полная и полезная PS2 душа там. Каждая новая редакция и патч позволяет много игр, которые будут работать и улучшает разумность и скорость души. Большой фактор в отношении этой души является то, что вы просто будете вставить PS2 игры прямо в ваш CD / DVD диск, а также душа может позволить вам играть спорт на вашем laptop.PCSX2, как и его предтеча проекта PCSX (эмулятор PlayStation), основываются на профессиональной словесное описание плагина конструкции PSEmu, отделяя множество функций от основной души. Это графика, аудио, входные элементы управления, CD / DVD дисков, а также USB и порты Fire Wire. Полностью различные плагины могут оказаться разными приводят к каждой совместимости и производительности. Для загрузки, PCSX2 нужен дубликат PS2 BIOS, который не доступен для передачи от разработчиков, относящихся к вопросам авторского права и правовым проблемам, связанным с ней. В настоящее время PCSX2 не совместима с PlayStation игр. PSX игры часто соперничают по виктимизации GSdx с душой PlayStation, как PCSX или EPSXE.

Характеристики и функциональные возможности:
- • поддерживаются контроллеры Dual Shock.
- • Быстрый эмулятор с оптимизацией двигателя.
- • Конечные графические шейдеры и сглаживание.
- • Поддержка сохранение состояния и динамическая перекомпиляции.
ПРОФИ
- • Запускает большинство игр PlayStation.
- • Настраиваемые элементы управления.
- • Простота настройки и установки.
МИНУСЫ
Special hardware[edit]
The DualShock 2 joypad bundled with the PS2 has all buttons and sticks with variable pressure states.
While most PS2 games don’t require this feature, instead preferring variable trigger/stick pressure (e.g. sneaking past the sleeping dog in Chulip), a select few do. Some examples include:
- All three attack buttons in the Bouncer do different attacks based on whether the press was light, medium or strong. Same goes for the musical game Mad Maestro.
- Star Ocean 3 has a musical item that plays different melodies depending on pressure and they’re required for progressing.
Games requiring variable trigger pressure need physical controllers with analog sticks, but rare are third-party controllers which support variable pressure buttons. To know if your controller supports it, open the LilyPad plugin settings by going to the PCSX2 menu and selecting «Config», «Controllers (PAD)», and «Plugin Settings». At the LilyPad plugin popup, select your gamepad from the list of detected controllers in the «Device Diagnostics» box in the lower left then click the «Test Device» button.
A small popup window will appear, showing a list of all the gamepad’s buttons as well as their current state. 0.000 = indicates unpressed, 1.000 = indicates fully depressed. Roll either analog stick around. See how the values change from 0.000 to 0.xyz, with the .xyz values shifting incrementally. These changing .xyz values show how the plugin detects different changes in angle as you move the analog stick around.
Now press any of the buttons normally used by games, i.e. the triangle/square/cross/circle buttons. See how the values immediately shift from 0.000 = unpressed, directly to 1.000 = pressed. If your gamepad truly has pressure sensitive buttons you will see gradual 0.xyz changes as you slowly press each button, just like the different changes in angle as you move the analog sticks around.
If the buttons change from 0.000 directly to 1.000 this proves that your gamepad buttons are not pressure sensitive and are merely tracking the pressed/unpressed state.
The solution would be to either buy an official DualShock 3 controller and use an appropriate 3rd party driver such as SCP Driver Package, or mapping the button to a rarely used trigger/stick in LilyPad this way:
Hardware requirements
In most cases you’ll have several DLLs for each GSdx version. SSE2, SSE4 and AVX2. Which one to choose depends on your CPU installed. Most of the time this will be selected automatically, otherwise users should select the proper plugin supported by their CPUs. If an user selects a plugin not supported by the CPU then they will be asked to select a different plugin.
- SSE2 — is Intel 2001 CPU extension features many additional instructions for 64-bit and floating point operations. AMD adopted these instructions from Athlon 64 CPUs in 2003. Your CPU will surely support SSE2 and thus this dll will be your safe choice.
- AVX2 — is an extension supported by Intel Haswell series CPUs and newer, and AMD Excavator and Zen (Ryzen) CPUs.
The difference between these versions is not immediately apparent to the user. You won’t see large FPS gains when switching from SSE2 to SSE4 but there are some parts in games that do benefit from these optimizations. The AVX versions only provide speed ups for the software renderer of GSdx.
List of ingame hotkeys
The information on hotkeys usable by GSdx is scarce and hard to find. All shortcuts listed here are accessible when the emulated game is running.
F6 — cycles through different aspect ratios. Includes 4:3, 16:9 and «stretch to screen».
F7 — tries to alter the «pixel geometry» by applying some hard-coded filters.
F8 — takes the screenshot of the current screen. Screenshots are taken in the current rendering resolution (not the resolution of your GSdx window) and stored in the emulator’s snaps folder.
F9 — switches from the Hardware rendering into Software rendering which is always in native resolution. Software render and native resolution can both be used to avoid some severe graphics glitches occurring in some games in video or special sequences when they are rendered in non-native resolutions or when the hardware render has bugs like with «Tales of Legendia». Some 2D objects can also suffer from wrong rendering in non-native resolution modes. You can switch runtime to software render finish the critical game section and then switch back to hardware afterwards.
-
F12 — will start to record a video. Note that some versions may have a bug (?) preventing video capture from happening. If your version supports this you’ll see the dialog «Capture settings» after pressing F12. You must choose the filename, codec and resolution before you may continue. Note that lossless or uncompressed video may produce VERY large file so your HDD must have enough free space to contain it. Audio capture file «recording.wav» may also be created along with video. This is the result of work of your audio plugin (SPU-X) which will record the audio simultaneously with GSdx.
- To finish the capture simply press F12 again.
Insert — Toggles HW mipmapping.
Home — Toggles FX shader on/off.
Page Up — Toggles FXAA on/off.
Del — Toggles Software Edge Anti-Aliasing (AA1) on/off.
Graphics Synthesizer bug fixes
This section covers games which received an improvement in visual accuracy, these issues are mostly hard to debug due to the abnormal way of how the Graphics synthesizer handles most functions and the lack of any proper documentation regarding them, our GS developers however always try their best to fix them!
-GSdx: Implementation of fixed TEX0 context for all renderers
Fixes texture corruption in games like Lupin: The Third and James Bond 007 Nightfire.


-GSdx: Improvements in the D3D11 renderer
For a while, the D3D11 renderer has been lagging behind in terms of emulation accuracy in comparison to the OpenGL renderer, the renderer has now gone through various improvements by backporting changes like channel/texture shuffle, depth emulation and texture conversions from OpenGL and is now much improved compared to the 1.4 version.


-GSdx-PCRTC: Improved calculation of output circuit dimensions and add unsupported functions
Previously the height of the framebuffer was calculated using guesswork based on the width of the framebuffer. This method was obviously wrong and it caused some conflicts when scaling the buffer for upscaled resolutions. This was fixed by using the height of the output circuit as a base for the framebuffer height. This fixed upscaling issues with lots of games which didn’t have adequate buffer size in 1.4 version.


 -Addition of Feedback write support: Using the feedback write circuit, we can write a specific rectangular area in the output image to an arbitrary position in a local buffer at an arbitrary sampling rate dependent on the status of feedback write setting registers. This feature was not implemented before, and implementation of this allows games like Xenosaga to make use of the feedback write mechanism to convert the color to a luminance greyscale. This fix is exclusive to the OpenGL renderer at the moment.
 -Improved merge circuit emulation: In some cases the GS is configured to use two side by side display rectangles for rendering. The rectangles are merged by the GS’s merge circuit and the resulting image is sent to the TV. The horizontal position of the display rectangles, however, was ignored when emulating the merge circuit, which caused image overlap issues where only half the image was displayed. The display rectangles’ horizontal position is now taken into account, which fixes the image overlap issues and makes split screen mode in Time Crisis 2 and 3 playable.Time Crisis 2 (before) (320 X 224)
 Time Crisis 2 (now) (640 X 224)
 -Support double scan mode: The output size for games are halved whenever the INT and FFMD flag are set in the display mode registers, however there was a bug which led the halving to be done twice unintentionally, this behavior was fixed to get proper output back on games like Gitaroo man.


-GSdx: Hardware mipmapping support
Previously, all the hardware renderers suffered from mipmapping issues due to various unimplemented functions. For example, whenever mipmapping is performed, it is necessary to set the base pointer address and the buffer width of the textures of two (or) more mipmap levels, even this basic function was not emulated before as there wasn’t much priority on getting mipmapping to work on hardware renderers. The main reasons were that only some few games (around 10-30) had mipmapping related issues which is quite a small amount of games in comparison to the whole PS2 library and there was also a possibility that mipmapping could influence the performance negatively, so none of the developers were planning on tackling it, as at that time, there were far more severe bugs related to the CLUT, Texture cache, display rectangle setup and Z buffer which were more prioritized. However, mipmapping has now finally been implemented!


GSdx-HW: Improved texture search and validations in texture cache
Improve texture search/invalidation in render target by correctly matching vertex offset draws with buffer offset reads in the texture cache, the eyes are now properly rendered in hardware mode.
| Before | After |
 |
 |
