Scribus
Содержание:
- Как пользоваться
- Копирование блоков и подобные операции
- Installing and running Scribus
- Описание
- ???
- The Colour Editor
- Разумный технологический процесс
- About Columns
- Делаем висячую буквицу
- Scribus. Урок 7: Работа с изображениями
- Scribus on Windows
- Зачем нужны слои
- Возможности
- Open source desktop publishing app
- Making the Most of Scribus
- OK, So Begin
- Colour Basics
- English
- Общий обзор функций
Как пользоваться
Теперь давайте переходить непосредственно к инструкции по бесплатной установке программы Scribus и основам работы с ней.
Скачиваем и устанавливаем Scribus
В первую очередь, конечно же, нам нужно скачать программу. Для этого поступаем так:
- Переходим немного ниже и находим кнопку, которая позволит бесплатно скачать последнюю русскую версию нужной нам утилиты.
- Дожидаемся завершения загрузки и распаковываем архив. Для этого применяем пароль, который вы найдете в нем же.
- Теперь, когда нужный нам файл распакован, запускаем его и начинаем инсталляцию. Для этого просто делаем двойной левый клик на файле с расширением .EXE.
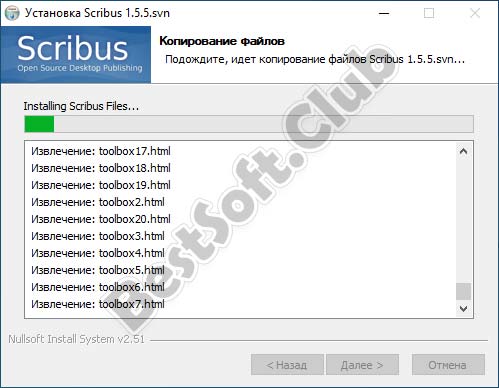
Запустится еще одно небольшое окошко, в котором нужно будет указать путь установки, включить или отключить ярлыки на рабочем столе, назначить ассоциации и выполнить другие стандартные для установки действия.
Когда процесс инсталляции будет завершен, закрываем окошко.
Пример использования
Для того чтобы начать работать с Scribus руководствуемся общим шаблоном:
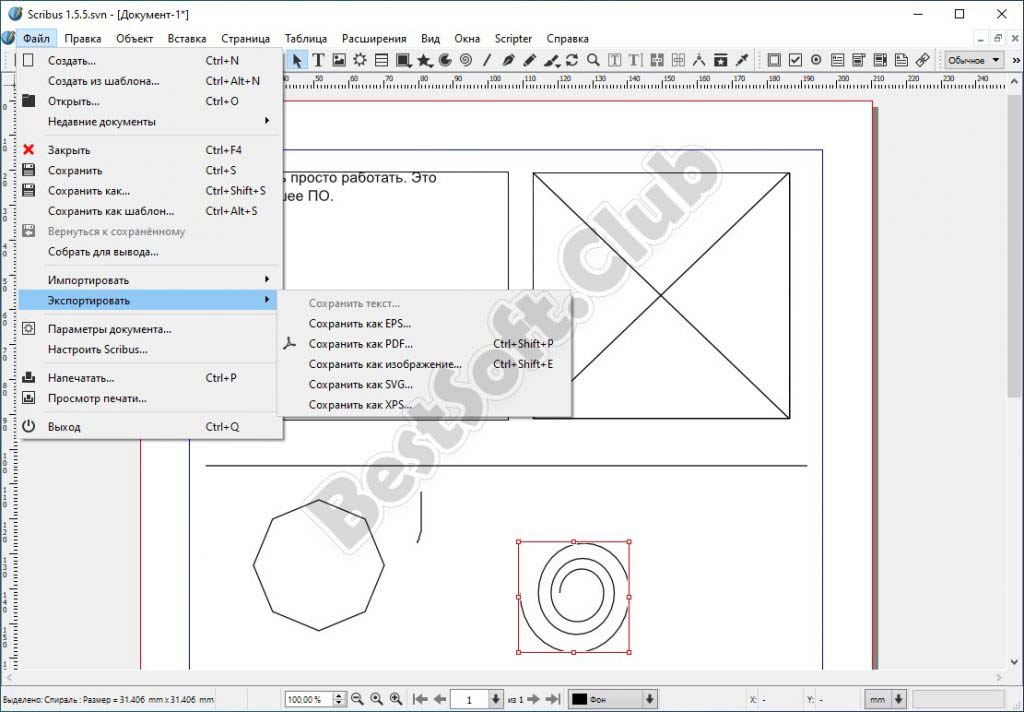
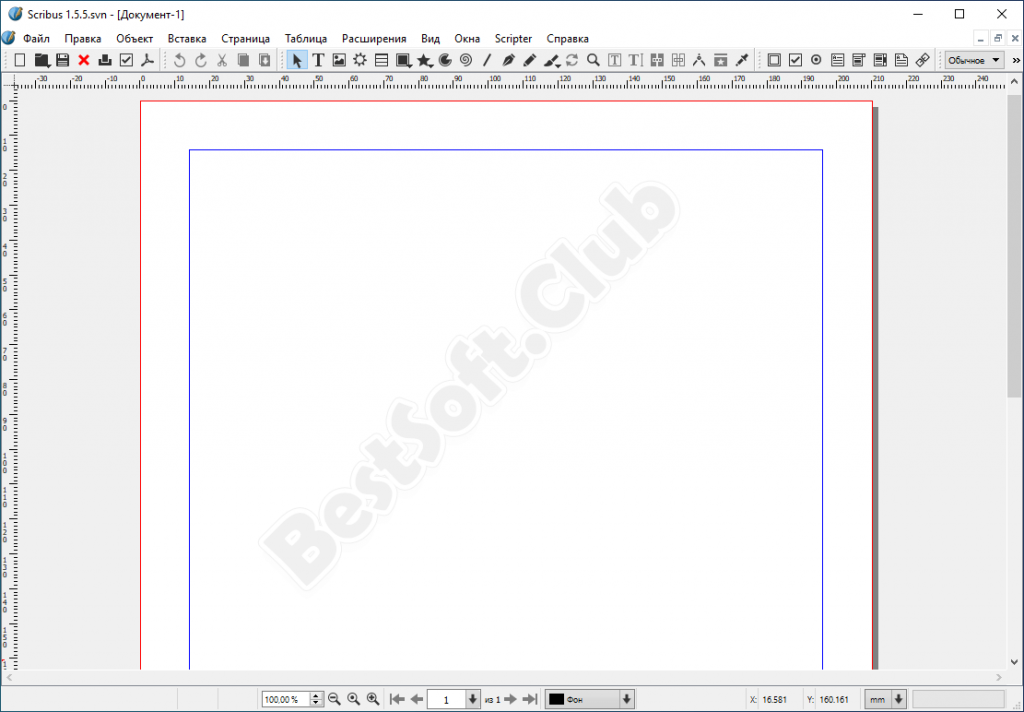
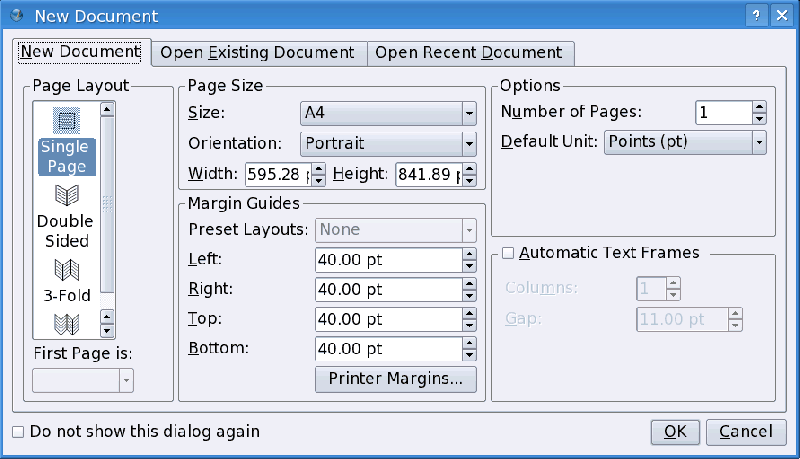
- Изначально запускаем саму программу и при помощи главного меню создаем новый проект. В первом окошке необходимо будет настроить размер листа, его другие характеристики и указать все то, что можно указать при помощи имеющихся полей.
- В результате запустится основная рабочая среда, при помощи которой нам и нужно будет создать новый документ.
Когда проект будет завершен, мы сможем экспортировать готовый результат, прибегнув к помощи все того же главного меню. Также есть возможность сохранить проект для дальнейшей работы над ним. Поддерживается множество форматов. вы должны будете выбрать именно то решение, которое будет удобно для дальнейшей работы с документом.
Копирование блоков и подобные операции
Один из путей копирования блоков его дублирование (клавиатурная комбинация Ctrl+Alt+Shift+D)Объект>Продублировать. Эта операция создает практически офсетную копию, находящуюся на более высоком слое.
Используя команду продублировать многократно Объект>Продублировать многократно можно создать сколь угодно большое количество копий.
Если перетягивать объект правой кнопкой мыши, то после того как ее отпустить можно в появившемся запросе выбрать создание копии, перетаскивание данного объекта или завершение операции.
Для копирования объектов можно использовать Альбом (меню «Объект>Передать в альбом» или в контекстном меню «Передать в альбом»). Это создает поименованную копию блока и его содержимого в Альбоме. Чтобы получить копию из альбома следует выбрать меню Окна>Альбом
Объекты с которыми осуществляется работа могут находиться не только на странице, но и за её границами. При сохранении документа, сохраняется все объекты, даже если они находятся за границами страницы. Это позволяет расширить пространство рабочего стола, временно помещая за границы страницы объекты. Когда создается файл публикации PDF для находящихся за пределами страницы объектов будут получины сообщения об ошибках. Если пропустить эти ошибки, то полученный файл PDF, не будет включать эти объекты.
Installing and running Scribus
Which Scribus should I install on my computer?
Platform
How do I get Scribus for Linux?
- If you don’t need anything fancy, use your packet manager to install Scribus (synaptics, yum, apt-get, …). This is the preferred way to install Scribus.
How do I get Scribus for OS X?
- Installers for the stable version (Intel only, Leopard (10.5) or higher) are available on the download page.
- You can find detailed installation instructions here.
- At the moment, there is no (easy) way to compile yourself Scribus for OS X
- Images (.dmg) for more recent development versions won’t work on OS X 10.4. If you want to install Scribus 1.3.8 or later you will have to install it through Fink:
- Activate the unstable packages (fink commander > preferences > fink, Use unstable packages»).
How do I get Scribus for Windows?
- See Download for direct links.
- Binaries are available on Sourceforge
- It’s not easy to compile. The BUILDING_win32.txt explains how to do it.
Which version should I use?
The current stable version is 1.4.6. The previous stable version (now abandoned) was 1.3.3.14.
As a rule of thumb: all versions that have an odd number as a second (minor) version number (1.1, 1.3, 1.5, 1.7) are unstable/development versions, all version with an even minor number are stable versions (1.0, 1.2, 1.4, 1.6, …)
1.3.3.x is an exception and was declared stable because 1.2 was too old and 1.4 was too far away.
Stable version
1.4.6 is the stable version – use it for your normal work. Please remember that documents created with 1.4.x versions cannot be opened by previous versions.
Experimental branch
1.5 is the current experimental branch: Only for people wanting to experiment with the latest Scribus features should use it. Remember, you cannot open 1.5 in older Scribus versions.
Compatibility
Since its beginnings, Scribus has always maintained backward compatibility, so that every later version will be able to load a file from an earlier version. Because new features are added, the reverse is not true. For example, you can’t load a 1.3.6 file into 1.3.3.14, but you can load 1.3.3.x files into 1.3.6+ and 1.5.
So which one should I use?
How do I compile Scribus?
There may be a few reasons for you to compile Scribus yourself:
- There is no current Scribus for your platform (like Linux PPC or Mac OS X 10.4).
- You need a fix that has been applied after the latest binary snapshot has been released.
- You want to follow Scribus development to stay up to date and to test.
Further reading:
- Building_SVN_versions_with_CMake
See the compilation requirements.
Where is my Ghostscript?
You have successfully installed Scribus and now you see a warning that Ghostscript is missing.
One approach is to simply ignore the warning, as you only need it for EPS import and the Print Preview. Or you can install it later.
Linux
It’s highly unlikely you would ever get this alert under Linux, unless you have installed Ghostscript in some quite nonstandard location. If it happens anyway, just use your package manager to install Ghostscript.
Mac OS X
Once Ghostscript has been installed, go to Scribus > Preferences > External Tools, and browse (Change…) for the gs executable (the path will be something like «/usr/local/bin/gs»).
Microsoft Windows
- Once installed, Scribus needs to find it, which may or may not work automatically on Windows. If Scribus doesn’t detect the Ghostscript executable after the installation, go to File > Preferences > External Tools, and browse («Change…») for the gs executable. For 32-bit, its gswin32c.exe, the important thing being that «c», since there is another executable without a «c» in the file name.
Startup issues
Scribus is slow to launch. Why?
For those who are new at desktop publishing, unlike most programs, DTP applications care greatly about which fonts are installed and if the font paths are valid. So, when Scribus launches, one of the things it does is to completely and thoroughly scan your font paths and ensure they are valid. This takes time. If you have a large number of fonts (200+) or more and slow launch times are a problem, reduce the number of fonts or font paths.
The other reason is your scrapbook is filled with complex or large image files. Deleting unneeded items or saving the scrapbook under a different name and then creating a new blank scrapbook will also help reduce the startup time.
Описание
У приложения для верстки книг и газет Scribus очень долгая история. Постепенно функционал и пользовательский интерфейс совершенствовались, а в результате наша программа получила следующие возможности:
- Возможность работы с символами Unicode.
- Как и у любых других графических редакторов, тут присутствуют основные инструменты, например: обрезка, выделение, работа со слоями и так далее.
- Поддерживаются и другие функции для форматирования текста. Это может быть выравнивание, начертание, положение по вертикали и подобное.
- Уже готовые блоки, которые мы добавили на тот или иной слой, можно масштабировать, менять местами, перемещать в другое место страницы и, вообще, настраивать как угодно.
Данное ПО способно работать с форматом PDF и содержит все необходимые инструменты, которые вы можете найти в графических или текстовых редакторах.
???
Текст перетекает на 4-ую страницу. Одиночный текстовый блок на пол колонки в левой части страницы содержит краткое описание рассказа и подписи к фотографиям. Блок внизу страницы содержит текст, отформатированный разными стилями параграфа. Грдиентная заливка к этому блоку применена с помощью вкладки «Цвета» панели «Свойства». Там, под иконкой ведра находится выпадающий список, в котором находится пункт «Вертикальный градиент» среди остальных. Выберите цвет LimeGreen 40% в качестве начального цвета, и CyanBlue 20% — в качестве конечного.
Этот текст имеет поля от границ блока в 2.5 мм со всех сторон. Это видно в свойствах во вкладке «Очертания». Красный квадратик говорит о том, что это окончание текста.
Properties: Colors v1.2.5
The Colour Editor
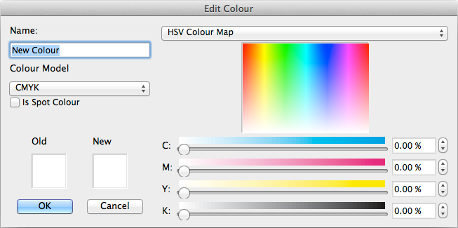
If you press the any of the New Edit or Duplicate buttons you will be presented with the Edit Colour dialog as above.
At the top-left of the editor you will see the name of the colour you are working on. You can use any name you want — including spaces — as long as it’s not already being used by another colour.
The colours are always listed in ascending alphabetical order but UPPERCASE characters are treated as being earlier in the alphabet than lowercase characters so a colour named «almond» will be listed below one called «Zebrafinch».
If you have imported some SVG vector art into your document, the colours used by this art will have been imported with names such as «FromSVG#<values>» where <values> are the hexadecimal RGB values that make up that colour. If you delete this colour your SVG art will change. Be careful.
Below the name is a drop-down selector for the «Colour Model» — CMYK/RGB, as mentioned earlier.
Below that are two panels. The panel on the left shows the Old (original) colour, and the one on the right is the New (changed) colour. The Old colour is always «White» when you create a new colour. If you are editing a colour, the Old colour is what the colour was before you made any changes. If you are duplicating a colour, the Old colour is the original colour you are making a duplicate of. The New colour is always what will be created when you press OK.
At the top-right of the dialog is the «Palette Selector» drop-down menu. By default this is set to «HSV Colour Map». Selecting from the HSV Colour Map gives you the multi-coloured rectangle like that above where you can click to select the colour under the mouse pointer.
Разумный технологический процесс
Наш журнал, который называется ‘FreedomYug’, изобилует картинками и текстом. Журнал из нескольких сотен страниц можно было бы разделить на несколько документов Scribus, каждый по восемь-двадцать страниц. Лучше всего для каждой публикации создать отдельную папку. Нашу я назвал ‘Fyug’. Внутри неё находятся ещё две папки — ‘Text’ и ‘Images’. Для набора текста можно пользоваться простым текстовым редактором вроде Vim или Emacs в Linux или Notepad в Windows. Вы также может пользоваться текстовым процессором вроде Openoffice.org Writer, документы которого Scribus может импортировать в текстовые блоки с ограниченным сохранением форматирования. Более поздние версии Scribus (1.2.5, 1.3.3 и выше) также могут импортироваться документы Microsoft Word, но всё форматирование будет потеряно.
About Columns
This is a common source of confusion, sometimes consternation, with those new to Scribus. New users frequently want to assign a «columns property» to a Document page, but as stated above, the page is just your workspace, defining the boundaries of what your project will be.
Two ways to create and work in a columns environment
Text frames can have columns. Once you have a text frame, you will find this can be set in the Properties Tool, in the Shape Tab, Properties > Shape, where you will set the number of columns and the gap between columns. Perhaps needless to say, setting too many columns for the size of your frame can get quite ugly. If you are tired of setting this repeatedly, you can make columns a default feature of your text frames. In versions 1.2.x, go to Settings > Preferences > Tools. In versions 1.3.x, go to File > Preferences > Tools. If you have a document open while setting preferences, the new settings will apply to future documents, not the current one. In versions 1.3.x, you can modify this feature of the current document in File > Document Setup…. (In 1.2.x, there are a very limited number of parameters in File > Document Setup….)
You can also use the column guides feature of the page (maybe the source of confusion for some), but these are just guides. Once you have guides (or even without them), you can make text frames arranged in columns on the page, then link from one frame to the next for text flow. This allows you to use columns of varying width, an unusual arrangement, or atypical linking pattern.
Делаем висячую буквицу
Если вы вернётесь в меню «Правка» > «Абзацные стили…» и пройдёте в редактирование любого существующего стиля, то заметите возможность создания автоматической буквицы в произвольное количество строк (на ваше пожелание). Но позвольте мне показать вам, как в Scribus’е можно сделать висячую буквицу, а также — технику выдавливания текста. Возьмите инструмент ‘Нарисовать различные очертания’ и создайте прямоугольник в позиции X-Поз: 59, Y-Поз: 200, Ширина: 19, Высота: 24.3. Во вкладке «Цвета» поставьте «Ничего» для заливки и линии чтобы он стал невидимым. Установите галочку «Текст обтекает блок» и вы увидите, как начало первого параграфа вашей статьи обтекает вокруг этого невидимого объекта. Теперь поместите текстовый блок в позиции X-Поз: 52, Y-Поз: 195, Ширина: 24.5, Высота: 36, и снимите галочку «Текст обтекает блок» для него. Используя редактор текста или инструмент редактирования, введите букву «D» в этом текстовом фрейме. В палитре «Свойства» установите шрифт Georgia Roman, 87 пунктов, ……….. with leading at 104 points. Цвет заливки текста должен быть чёрным, а для изменения насыщенности выберите «Тень» > «Другое…» (в выпадающем меню) и введите 69%. Буквица готова. Если вы захотите выделить невидимый прямоугольник, используемый для отступа текста и находящийся под текстовым блоком, зажмите ctrl+shift и щелкайте мышкой над ним до тех пор, пока не выделится нужный объект в стеке.
Рассмотрим ещё раз, что же мы сделали. Для отображения буквы нужного размера, текстовый блок (на рисунке — блок в серой пунктирной рамке) должен иметь пустые интервалы сверху и снизу (причём, эти интервалы могут быть различными для разных версий Scribus’а). А для выдавливания текста на необходимое расстояние мы использовали невидимый прямоугольник-подложку (на рисунке — в красной пунктирной рамке).
Этот пример использует URW Palladio с соответсвующими поправками в размере, интерлиньяже и трэкинге.
Scribus. Урок 7: Работа с изображениями
Scribus. Урок 7: Работа с изображениями
Все вы, выродки, которые хотят сделать его большим в мире онлайн-изданий — один из лучших способов сделать это — написать книгу. И поверьте мне, или нет, вашего хорошего «Microsoft Word» недостаточно, чтобы написать хорошую книгу для вас. Вместо этого вы можете проверить это межплатформенное программное обеспечение для открытых настольных издательских систем с открытым исходным кодом Scribus .
Scribus — бесплатное приложение для публикации на рабочем столе, которое поддерживает такие профессиональные функции, как цветоделение, поддержка CMYK и Spot Color. Он также поддерживает управление цветом ICC и включает в себя универсальную функцию создания PDF-файлов. Мы можем сказать, что это полнофункциональная публикация приложений для Windows. Он поддерживает множество форматов изображений, включая SVG (Scalable Vector Graphics) и другие.
Scribus Features
Вы можете использовать Scribus для разработки и производства книг, журналов, информационных бюллетеней, брошюр, календарей и т. Д. Короче говоря, все, что требует текста выглядеть привлекательно на бумаге. Это также помогает в создании PDF-документов и предлагает расширенные функции, такие как формы, кнопки, пароли и т. Д.
Если мы поговорим об особенностях приложения, список может выглядеть бесконечным. Чтобы дать вам обзор, вот некоторые из его важных функций:
- Поддержка многих форматов изображений
- Профессиональные настройки изображения
- Управление цветом ICC
- Встроенный скриптовый движок
- Доступно более чем в 24 Языки
- Уровень 3 драйвер сценария
- Кодировка символов Unicode
- Опция импорта для Open Office
- Сохранить его как профессиональный файл PDF
- Интерактивный и профессиональный интерфейс.
Он также использует некоторые другие программное обеспечение для повышения его собственных функциональных возможностей. Он использует Gimp для редактирования изображений и пакета Open Office для некоторых функций редактирования документа.
Интерфейс Scribus
Интерфейс может показаться довольно странным для некоторых, но он действительно очень мощный. Это действительно хорошая альтернатива Microsoft Publisher. Приложение первоначально предназначалось для Linux, но вскоре было перенесено на Windows и Mac. Интерфейс немного сложный для новичков, но непосвященный, но как только вы намочите руки, вы заполните его тем, что он предлагает намного больше, чем вы ожидали.

Учебник Scribus
Учебник этого новичка об использовании Scribus для макета страницы и создания PDF поможет вам начать работу. Они также доступны в форматах PDF.
Scribus Download
Если вы считаете, что можете быть автором или уже являетесь одним из них и хотите, чтобы ваши публикации выглядели более профессиональными, вы можете проверить Scribus.

Загрузите эти лучшие бесплатные программы для записи и записи видео и настольных магнитофонов, таких как CamStudio , APowerSoft, Free Screen Recorder и т. Д. Для ПК с Windows 10/8/7.

EventSentry Light — это бесплатный мониторинг системы, управление журналом, программное обеспечение для сетевого обеспечения для Windows 8/7 для администраторов. Прочитайте обзор и загрузите его.

Wondershare Scrapbook Studio — отличное бесплатное программное обеспечение, упрощающее цифровой скрапбукинг, с помощью готовых шаблонов .
Scribus on Windows
Historical Background
Scribus was originally developed on and for Linux, but over time it has been ported to other platforms like Mac OS X or Windows, so sometimes things work in a rather OS-neutral way.
Downloading Scribus for Windows
Hardware/Software Minimum Requirements:
- Windows 2000 SP4, Windows XP, Vista or 7 are supported. Windows 98 and ME have not been tested and are not supported. Any and all bug reports relating to Windows 9X will be closed quickly.
- 512MB RAM or more is strongly recommended – the more, the better.
- Pentium III or better – 750MHz or better
- It is strongly recommended to disable any custom desktop themes. If you encounter any strange behaviour, like no document appearing on screen, use the “Windows Classic“ theme. There is a known Qt issue with custom themes causing document loading problems. This is especially true with third party themes.
Before Installing Scribus
- Scribus is very intolerant of poorly constructed or marginal grade fonts. Once installed, please read the font setup section in the documentation carefully. Scribus may and often will refuse to load fonts which do not follow the True Type, Type 1 and OpenType specifications properly. What this means in plain English is that freeware fonts may work in other programs, but will be rejected by Scribus when starting. Some of the information is Linux-specific, but has detailed explanations as to why poor quality fonts will cause problems.
After Installing
- The first launch of Scribus or when a new user launches Scribus will be much longer than usual. This is because Scribus is creating a cache file of your fonts. Later re-starts will be much quicker.
- When you select the “Extra Fonts” Option in the installer, this will install two sets of high-quality, freely distributable fonts. One set is the the URW fonts from Ghostscript. This includes 45 typefaces which are compatible with those included with most PostScript printers. The second is the Bitstream Vera font family, widely used on Linux and by many of the included templates.
Зачем нужны слои
В публикации нам будет необходимо провести сложную работу по форматированию. Это надо сделать с текстом указаний на первой странице со сведениями об издании, шапки (заголовка), подрубрики (подзаголовка). Это сложная работа, особенно если издание будет на нескольких языках и если необходимо для каждого языка осуществлять монтаж (форматирование). Вместо этого можно использовать для текста на разных языках, свои раздельные слои. Можно скрывать и показывать слои разных языков. Такой подход удобен при макетировании страниц. На один уровень можно разместить фоновый рисунок, на другой — текст. Таким образом мы получим текст на фоне рисунка.
Перейдите в пункт меню Окна>Слои. В открывшемся окне вы увидите уже существующие слои, которые содержат все ваши объекты. Если вы снимите галочку с «глаза», все объекты этого слоя исчезнут, у вас останется пустая страница. Чтобы изменить название слоя, кликните в него и введите свое название. Внизу крайняя кнопка служит для создания нового слоя, следующая кнопка для удаления текущего слоя. Объекты которые вы размещаете на странице будут располагаться на текущем слое, который в данный момент выделен в этом окне.
Возможности
Дальше давайте поговорим о возможностях программы Scribus. Описать все функции мы не успеем, но основное все же выделим:
- Поддерживается работа с различными языками программирования, используемыми для разметки веб-страниц.
- Качество, которое достигается при работе с данным приложением, удовлетворительно даже для печати на больших форматах.
- Мы можем импортировать различные текстовые и графические форматы, а потом экспортировать все это в любой удобный тип документа.
- Есть инструменты для рисования линий, многоугольников, окружностей, прямоугольников и так далее.
- Также присутствует широкий функционал для коррекции цвета.
Разобраться со всем этим обилием функций не так просто, но задачу можно облегчить. Просто переходите на YouTube и просматривайте там какой-нибудь наиболее интересный обучающий курс по приложению. В результате уже через несколько минут общая картина прояснится.
Open source desktop publishing app
Scribus is a graphic and design program for your Windows desktop. It is a heavily packed software solution that contains some impressive features which will enable you to create and design your own magazines, newsletters, posters, and many other document types.
This is a notable and practical alternative to the expensive paid suite of Adobe InDesign. It provides the same exquisite color management options, making it an even more ideal tool for your print documents and interactive PDFs. It is an open-source project thus, you will be able to download and use it free of charge.
Is Scribus any good?
Although it’s completely free, Scribus offers some publishing power including support for CMYK color, separations, ICC color management, and versatile PDF creation. Although the interface isn’t as slick as it could be, it works excellently across platforms so it hasn’t been designed with any one particular operating system in mind.
One thing that isn’t so easy to master on this design tool though is formatting. You may encounter several formatting issues when importing text as everything has to be done manually. Even just changing fonts doesn’t happen in real-time. You have to change them and preview how they will look in another window.
However, you can drag and drop elements with ease and export documents in EPS, SVG, and PDF format. Although importing PDF and EPS will be a hassle as you will need GhostScript to do so and this isn’t easy for beginners to scripting.
Is Scribus as good as InDesign?
Frankly, Scribus is far from being as feature-rich as Adobe InDesign but its offers are enough to suffice for your indie publishing venture or personal project needs in a more affordable way. Some functions that can only be experienced in other programs if you purchase them are available to use here free of charge.
Thanks to its enthusiastic developer community, it’s able to consistently provide updates with new features and ensures its stability. Unfortunately, it doesn’t have the capacity to open files from other desktop publishing software such as InDesign or QuarkXPress yet.
A promising solution for basic publishing needs
Scribus has a lot of potential especially with the zealous developer community that it has. It is an adequate design solution for your basic publishing needs that enables you to produce professional-grade work at a cheaper price. Although it can be extremely complicated to use at times, it’s still a great alternative for other expensive publishing suites like VivaDesigner, Affinity Designer, Swift Publisher, etc.
Making the Most of Scribus
Scribus is a complex piece of software, and not surprisingly we frequently get feedback on the Scribus List from those who have been struggling to manually carry out some operation for which there are built-in tools. This section will serve to try to help you be aware of these tools as you begin your projects.
Document and Workspace
Two adjustments here can serve to make using Scribus easier. The first is the units of the display. For the best precision of placement and utility of the various spin boxes, consider using small units, such as millimeters (mm) or points (pt). This can be quickly set or reset using the widget in the lower left corner of the main window, which shows the current units of display. Set the units for future Documents in File > Preferences > Document.
Secondly, be aware that the placement of your Document on the workspace background (scratch space) is adjustable. Go to File > Document Setup > Display or File > Preferences > Display to adjust where your Document sits in this Scratch Space.
Grids and Guides
Designing the layout of a Document involves creating an aesthetically pleasing distribution of elements, and this in turn requires precise placement and alignment of various objects on the page. Using Grids and Guides will help with making best use of the space you have available and help with precise placement.
The default behavior is for Grids and Guides to be hidden. Show them with View > Show Grid and View > Show Guides. You will find adjustments of the Grid in File > Document Setup > Guides, where you can also specify whether to show or hide Grid and Guides. If you want to change settings for all future Documents, go to File > Preferences > Guides. If you have activated View > Guides with the default settings you will see there are no Guides to see. You must create these with Page > Manage Guides, where you can make as many horizontal and vertical Guides as you wish.
Also be aware of Page > Snap to Grid and Page > Snap to Guides which will help by «magnetically» attaching an object to the Grid or Guides.
Layers
Many Documents because of their simplicity will gain nothing from the use of Layers, yet it is good to remember that this capability exists. In a complex layout with many different kinds of elements, use of Layers will allow you to focus on one Layer of objects without concern about disturbing those on another Layer. An entire Layer can be made invisible and what’s more can be excluded from printing, a feature perhaps very useful for a collection of annotations which will not become part of the ultimate output.
Learn more about the whys and hows of Layers here and .
Master Pages
You may be creating a Document in which there are a collection of set elements such as headings, borders, or page numbers, which will be constant from page to page. You might be setting up Master Pages for a weekly or monthly newsletter. Master Pages, once created and edited, remain as a constant background feature, on top of which editable elements are placed. A Document can have more than one kind of Master Page, but each page can only use one kind.
See Working with Master Pages and Get Started With Scribus:6.
OK, So Begin
Scribus 1.4.x
You can immediately know you are working with these versions by the fact that, when you startup Scribus, you automatically get the New Document requester, which also will allow you to alternatively open a pre-existing file. You also get several additional options, including starting with more than one page.
The most advanced SVN version is currently 1.5.0svn, which looks a little different from this.
Scribus 1.5.0
Please note that the development version may include incomplete features and bugs: use it with caution. One thing you won’t be able to do is load a file saved with 1.5.0 using earlier versions.
The evolution of the File Format
With each release the files have a number of parameters for your work that were not a part of earlier versions. The biggest effect on the user is that current Scribus releases can load files created with older versions, but will only save it in the newer format. Unfortunately, older versions cannot load newer files, and an error will result.
So, if you need to share Scribus files with someone else, use the same version they do.
An Issue That Will Arise When Switching Formats
As Scribus continues to be developed, there has been a change in the display of text inside text frames. For a given font, the characters may be displayed closer to the top border of the frame, and there may be differences in the required space below the character as well as some differences in line spacing. Therefore, expect some tweaking of text frames when you load old files in newer versions of Scribus (even if the developers try hard to minimize those differences; also notice that they are more likely to happen if you’re using releases which are not defined as stable).
This is another reason to stay with the same Scribus version while working on an individual project, and for that matter, not updating your version while you are working on something important — you will still be able to do your work, but will add these additional fixes.
Colour Basics
Scribus give you the choice creating colours using two different colour models: RGB and CMYK. A colour model is just a way of selecting a colour.
RGB
There is actually a third model, called «Web Safe RGB» but that isn’t used much as most displays these days can use all of the possible RGB values. Basically you can forget the «Web Safe RBG» model unless you have very specific requirements.
CMYK
CMYK is an acronym for «Cyan, Magenta, Yellow and Key» and is the standard used in the printing industry. If you expect to get your document printed professionally you should try and use CMYK colours. Even if you are printing using a home/office printer you should think about using CYMK. (Look at the colour cartridge(s) in your printer. If one is light blue, one is purple or dark blue, and one is yellow then you’re using something like CMYK.)
English
Scribus video tutorials on www.showmedo.com
The list of videos is as follows:
- Introduction to Scribus
- Inserting Text
- Inserting an Image
- Text Around an Image PT1
- Text Around an Image PT2
- Layers in Scribus
- Levels in Scribus
- Styles
- Drop Cap Style
- Scribus PDF Forms
- Scribus Attaching Text To a path
- Scribus Using Scalable Vector Graphics
- Scribus multiple columns and svg images
- Scribus Coloured Text Boxes
- Scribus Converting Shapes
- Scribus Tables
- Scribus Templates
- Text Over Images
- Text Around Image pt3
- Text around image pt4
- Links in a Scribus Document
- Generating a Table of Contents
- Text effects (like drop shadows)
- Using the calendar wizard
- Working with OpenOffice documents
- Tips on importing writer documents
- Linking text boxes
- manipulating shapes
- Drop Caps Revisited
- Scribus Gradient Text Effect
- Text To Outlines
- Scribus-ScrapBook
- Outlines and Scrapbook a Practical Example
- Scribus Templates
- Scribus-Blender-Overview
- Scribus-Blender-Intro
- Scribus-Blender-Interface
- Scribus-Managing-3D-Objects
- Scribus-Blender-Mesh-Modelling
- Scribus-Blender-Button-Window
- Background to transparency
The video tutorials have been put on to an autorun CD but this will only work on a windows machine.
they can be down loaded from the following addresses. Listen to the instruction file on haw to open the 7zip files.
You will also need 7zip to open the zip files.
If the movies won’t play trying installing VLC Media Player they should play in VLC
Общий обзор функций
Scribus поддерживает большинство основных форматов растровых изображений , включая TIFF , JPEG и PSD . Векторные рисунки можно импортировать или открывать для редактирования напрямую. Длинный список поддерживаемых форматов включает Encapsulated PostScript , SVG , Adobe Illustrator и Xfig . Профессиональные функции настройки шрифта / изображения включают цвета CMYK и управление цветом ICC . Он имеет встроенный скриптовый движок с использованием Python . Он доступен на 60 языках.
Печать высокого уровня достигается с помощью собственного внутреннего драйвера PostScript уровня 3 , включая поддержку встраивания шрифтов и дополнительных настроек шрифтов TrueType , и OpenType . Внутренний драйвер поддерживает полные конструкции PostScript уровня 2 и большое подмножество конструкций уровня 3.
Поддержка PDF включает прозрачность, шифрование и большой набор спецификации PDF 1.5, включая слои (OCG), а также PDF / X -3, включая интерактивные поля форм PDF, аннотации и закладки.
Текущий формат файла, называемый SLA, — XML . Старые версии SLA основывались на XML. Текст можно импортировать из OpenDocument (ODT) текстовых документов (например, из LibreOffice Writer), OpenOffice.org XML ( OpenOffice.org Writer в SXW файлы), Microsoft Word «s DOC , PDB , и HTML форматы (хотя некоторые ограничения применяются). Файлы ODT обычно можно импортировать вместе со стилями абзацев, которые затем создаются в Scribus. Поддерживаются HTML-теги, изменяющие текст, например полужирный и курсив . Документы Word и PDB импортируются только как обычный текст.
ScribusGenerator — это расширение Scribus, похожее на слияние почты .
Скоро появится Scribus 1.6 (в виде ветки разработки Scribus 1.5)
В Scribus 1.5.1 добавлена поддержка PDF / X-4.
Первоначально Scribus не поддерживал должным образом сложный рендеринг скриптов и поэтому не мог использоваться с текстом Unicode для языков, написанных на арабском , иврите , индийском языке и системах письма Юго-Восточной Азии , даже несмотря на то, что он поддерживал кодировку символов Unicode. В августе 2012 года было объявлено, что третья сторона разработала систему для поддержки сложных индийских скриптов. В мае 2015 года было объявлено, что проект ScribusCTL начал улучшать сложную компоновку путем интеграции механизма формирования текста OpenType HarfBuzz в официальную ветку Scribus 1.5.1svn. В июле 2016 года было объявлено, что механизм верстки текста был переписан с нуля в рамках подготовки к поддержке сложных скриптов, которые появятся в Scribus 1.5.3 и более поздних версиях. В декабре 2016 года Scribus объявил, что они получили поддержку расширенной функции OpenType в 1.5.3svn, а также сложных сценариев и направления RTL.
В Scribus 1.4.7 не было поддержки альтернативных глифов OpenType, поэтому лигатуры, например, не вставлялись автоматически; это стало доступно с версии 1.5.3.
