Easeus data recovery wizard free
Содержание:
- What Customers Say About EaseUS Data Recovery
- Recovery performance
- Your Last, Best Option
- Практическое восстановление данных
- Recover Deleted Files from an SD Card/USB Drive/External Hard Drive
- Conclusion
- How to Recover Deleted Files from an SD Card for Free?
- What is the best free SD card recovery software?
- How can I recover deleted files from the SD card on Mac?
- How to recover deleted files from SD card on Android?
- Can I recover data from a corrupted SD card?
- How can I recover data from a formatted SD card?
- How to Fix a Corrupted SD Card?
- Why is my SD card not showing up?
- Part 2. Recover Permanently Deleted Files on Mac Without Software (2 Ways)
- Getting Started With EaseUS
- Tutorial: Recover Lost Data with Easy File Recovery Freeware
- Download EaseUS Portable Data Recovery Tool And Restore Data
- Why Trust Me?
- Conclusion
- How to Recover Deleted Files on Mac — 3 Solutions
- Download EaseUS Data Recovery Wizard Crack Alternative — Latest Official Version v13.0
- Why Files Corrupt After Data Recovery
- Not Everything Can Be Saved
- Top 9. Puran Data Recovery
- Simple Protect
- How to Recover Deleted Files on Windows 10 Without Software — 2 Ways
- USB Data Recovery Preparation — What to Do When You’ve Lost USB Files
- Recover Any Files
- EaseUS Data Recovery Wizard Free
What Customers Say About EaseUS Data Recovery
«I have successfully recovered the file using EaseUS with the superb good talent and expert customer team (Jesse) assistance. I truly appreciated EaseUS help and efforts in taking the trouble to look into my faulty disk issue. Thank You.»
«Amazing…I had all my files — with years’ worth of information — and Vasilli recovered the files and REPAIRED the drive! I began using the product on a Mac, but the files, while recovered, were all over the place under different names. It would have taken me forever (literally) to get it organized again. I contacted Support, and they recommended setting up a remote session on a Windows computer. I took the company up on their offer, and my Thumb Drive was repaired, and it looks like all the files have been recovered! This is hard to believe! I cannot give this company a higher rating. Thank you!»
Recovery performance
Recovery Wizard Pro was surprisingly slow. Scanning the 16GB USB device took around 10 minutes, far longer than expected. This could be due to the performance of deep scanning techniques, but these are par for the course in recovery software.
Rather than perform the same scan every time, however, the tool features the option to save a scan session. Whether this acknowledges the slow scan time or not isn’t clear, but it is a welcome option, enabling you to instantly load up the previous scan when restarting the software. For added convenience, the scan tool also includes pause and stop buttons for interrupting the process when necessary.
Perhaps crucially, EaseUS Data Recovery Wizard Pro missed files uncovered by lesser tools. This puts the software in quite a difficult position. Given that the free trial option is 30 days of scans but no actual recovery, why would anyone spend $69.95 or more for a tool that recovers less than a free alternative?
There are numerous self-help channels available. (Image credit: EaseUS)
Your Last, Best Option
No data recovery apps is perfect. Like its rivals, EaseUS lists files that it can’t recover, and we wish it automatically tried to display preview images of every file it lists for recovery—instead of automatically previewing graphic files and making us click on a button before trying to preview most document formats. Compared to this app’s benefits, these minor flaws seem trivial, however and the app os an impressive contrast to its rival app Stellar Data Recovery. EaseUS Data Recovery Wizard is our clear Editor’s Choice for data-recovery software.
Like What You’re Reading?
Sign up for Lab Report to get the latest reviews and top product advice delivered right to your inbox.
This newsletter may contain advertising, deals, or affiliate links. Subscribing to a newsletter indicates your consent to our Terms of Use and Privacy Policy. You may unsubscribe from the newsletters at any time.
Thanks for signing up!
Your subscription has been confirmed. Keep an eye on your inbox!
Sign up for other newsletters
Практическое восстановление данных
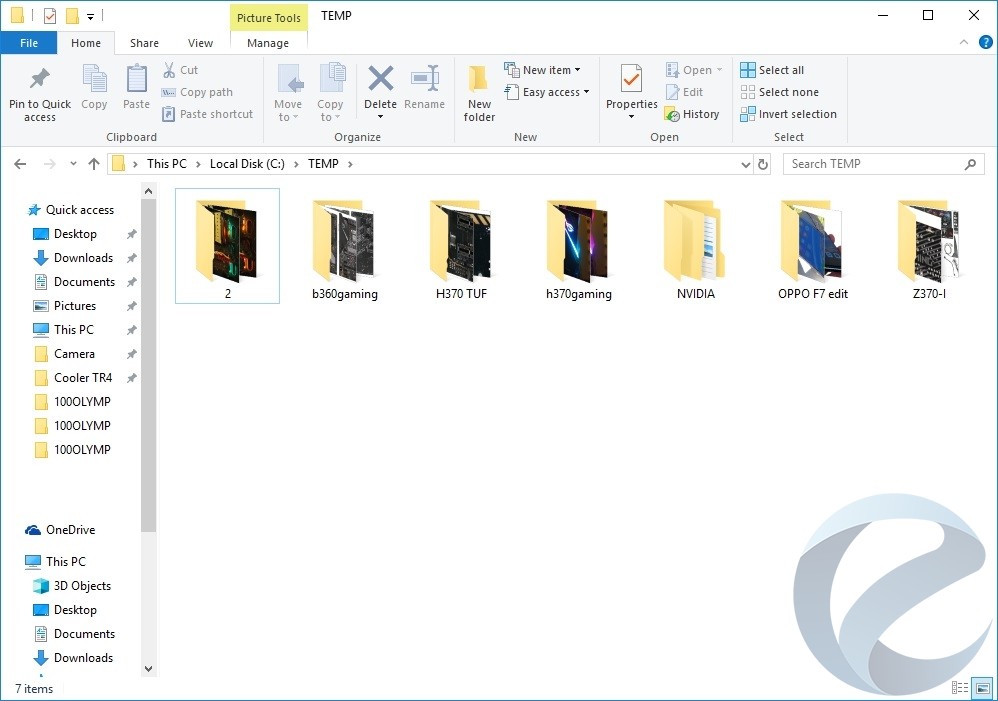
Оригиналы и обработанные версии фотографий для обзоров бы храним в директории С:\Temp, в которой до начала тестирования Data Recovery Wizard у нас присутствовал следующий набор папок с файлами.
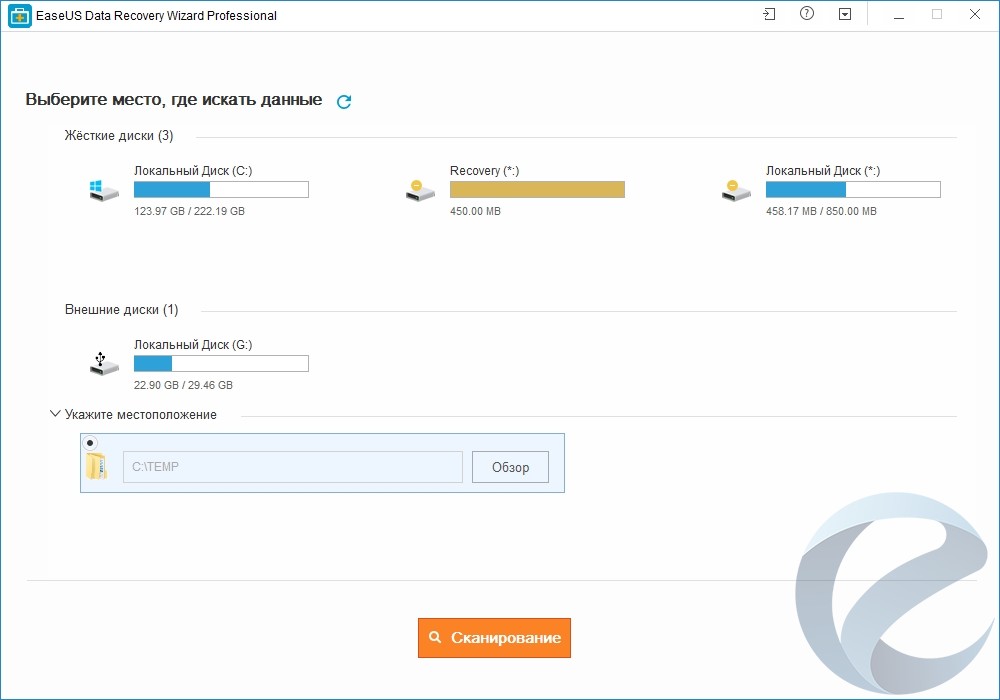
В самой программе Data Recovery Wizard мы указываем нужно нам место поиска удаленных и потерянных файлов и нажимаем кнопку «Сканирование».
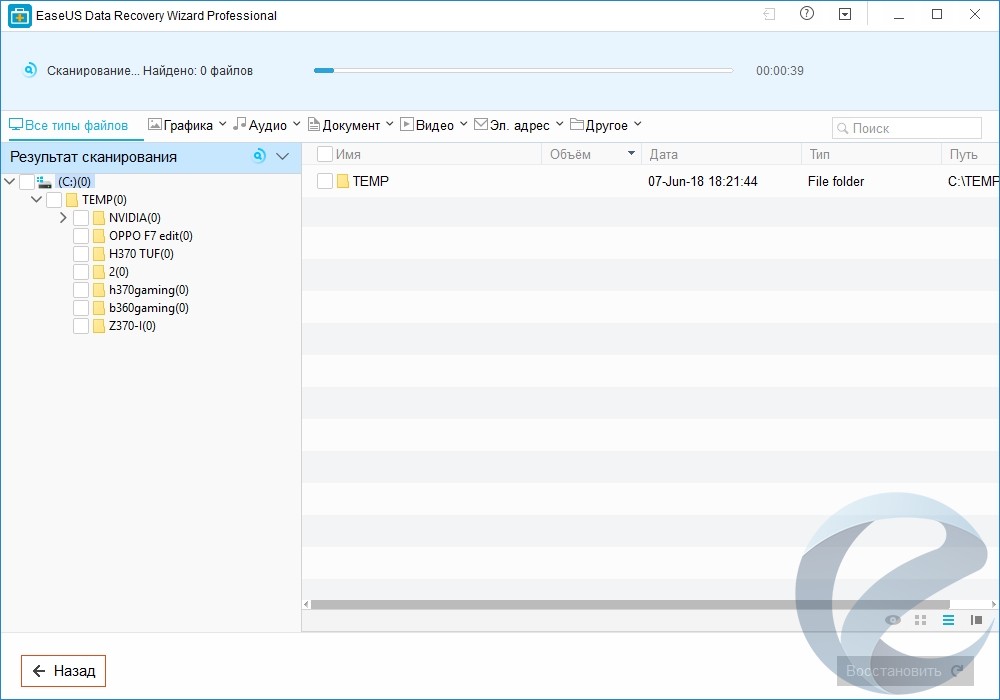
Процесс поиска удаленных и утерянных файлов не столь быстр, как хотелось бы. Скорость этих операций ограничена производительностью накопителя.
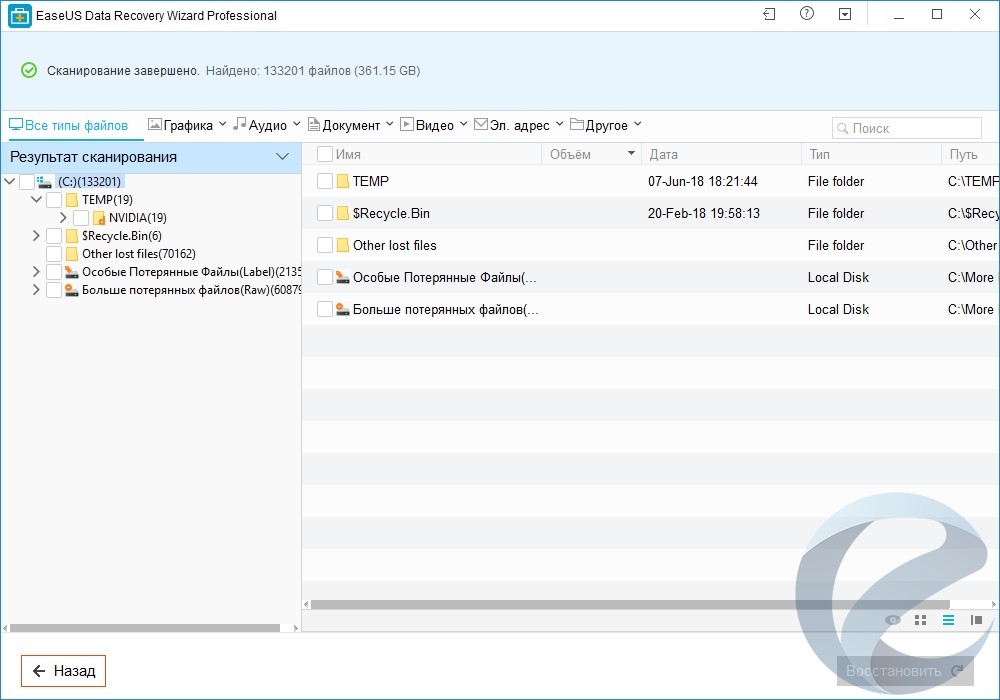
Примерно через 30 минут анализа данных программа Data Recovery Wizard смогла обнаружить множество файлов, которые в результате работы были удалены нами. Разумеется, что не все файлы могут быть распознаны. Этот вопрос во многом зависит от того, насколько сильно была перезаписана новая информация на накопителе, с которого происходит восстановление.
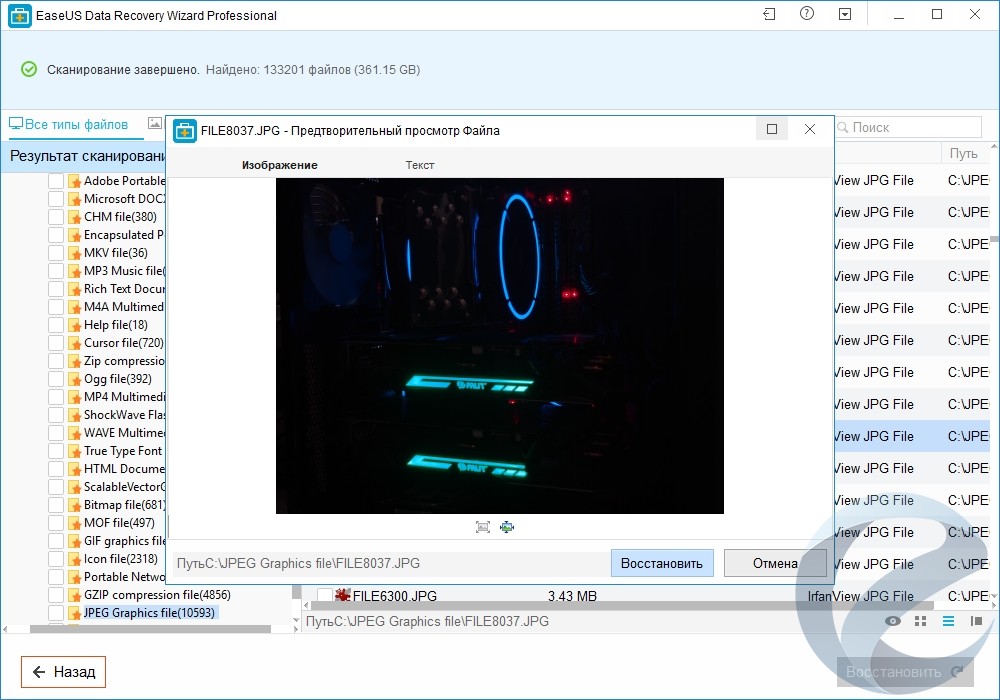
Для оценки целостности файлов в случае программы Data Recovery Wizard помогает предпросмотр. Например, нас волновали именно старые удаленные фотографии для обзоров, с которыми мы когда-то работали, но удалили их сознательно по завершению работ над обзорами. С помощью предпросмотра мы обнаружили несколько оригинальных изображений кулера PCcooler GI-R68X, обзор которого готовился задолго до даты публикации от 13 мая 2018 года. Сразу же после подготовки того обзора оригиналы фотографий были удалены, и с тех пор прошло 2 месяца. За это время на наш накопитель в тестовом стенде мы копировали много новых фотографий, устанавливали несколько бенчмарков и игр для тестирования других комплектующих. И, как оказалось, спустя 2 месяца программа Data Recovery Wizard смогла найти и восстановить эти данные.
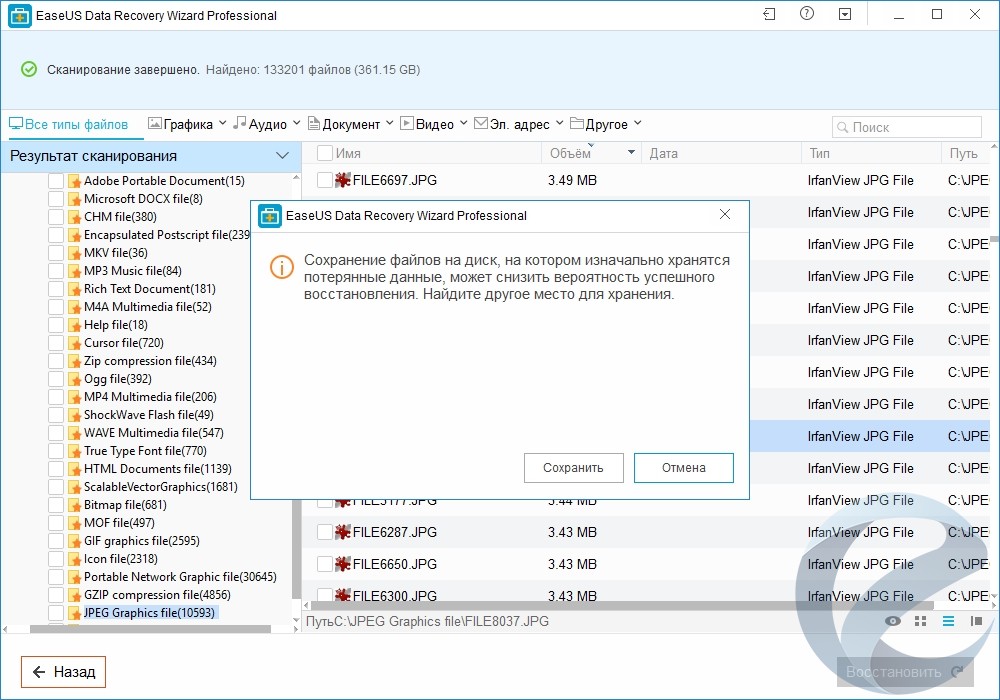
Что касается самого процесса восстановления, то в случае нахождения нужного вам файла, требуется выбрать его в предпросмотре и нажать кнопку «Восстановить». Появится новое предупреждающее окно с информационным сообщением о том, что сохранение восстановленных файлов следует производить на другой накопитель. Это сделано для того, чтобы записью восстановленных данных пользователь не перезаписал те удаленные и утерянные файлы, которые он хотел бы восстановить тоже.
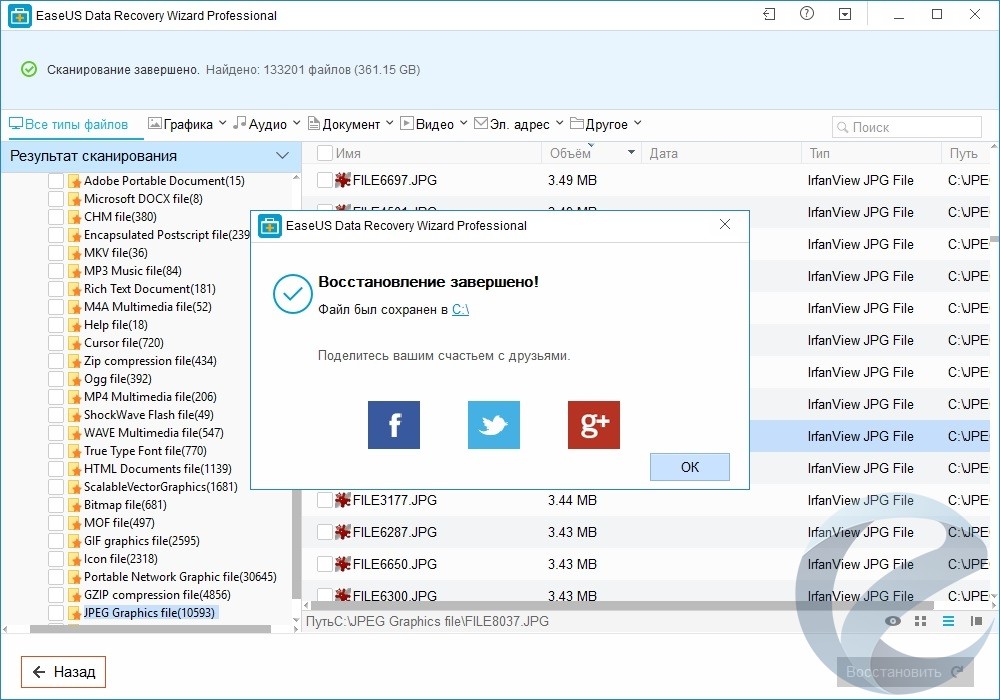
В нашем случае же это не столь критично, поскольку операция восстановления нашей фотографии кулера носит тестовый характер. Поэтому мы сохраняем найденное и восстановленное изображениеPCcooler GI-R68X на этот же накопитель. После восстановления файла программа рапортует об успешной операции и предлагает поделиться эти счастьем с друзьями. На самом деле, если учесть, что программа Data Recovery Wizard действительно помогает восстановить нужные файлы, то это наглядный показатель выполнения заявленных возможностей данным ПО.
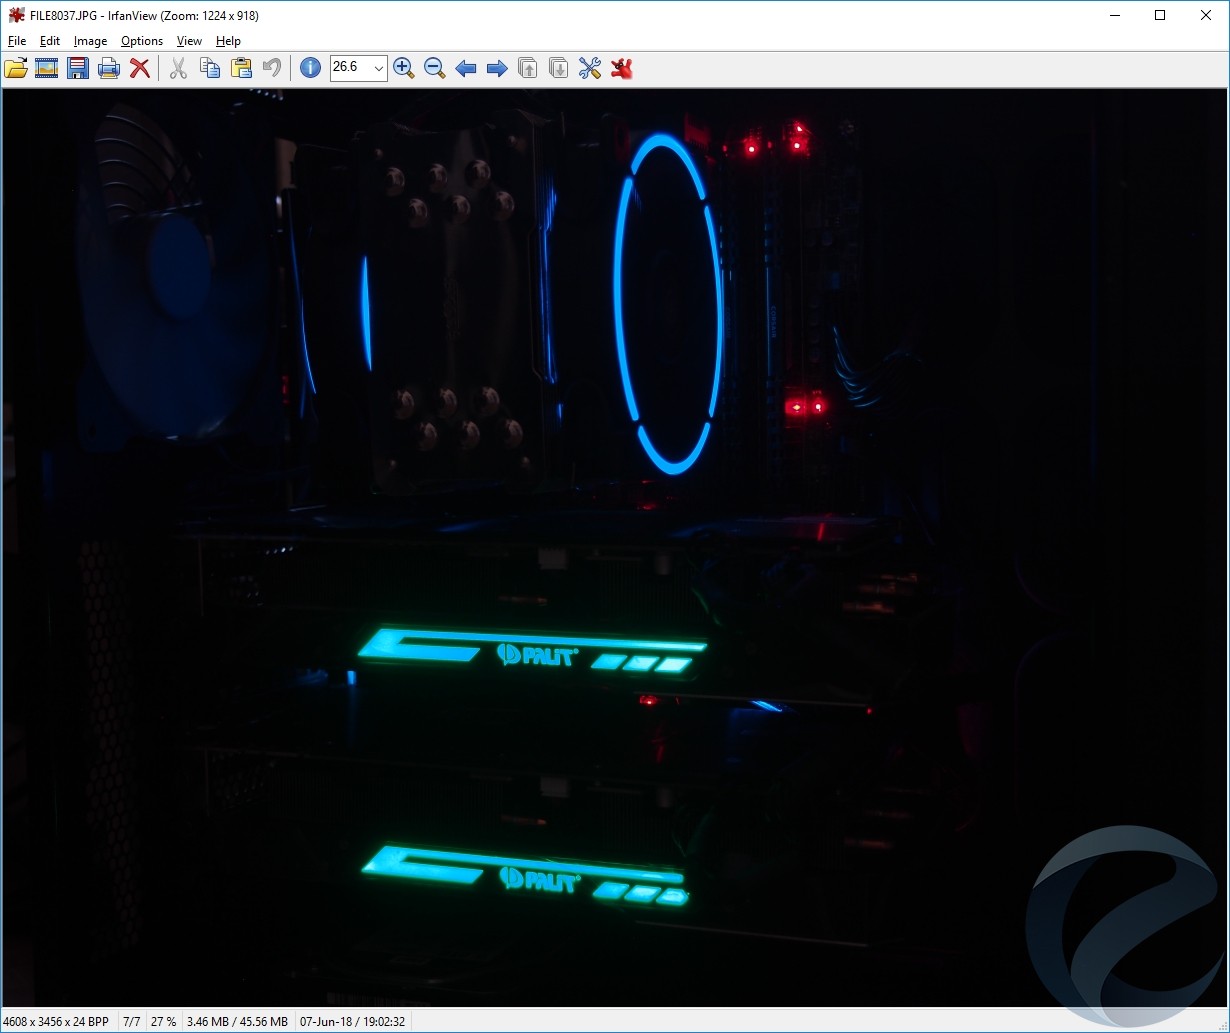
В качестве подтверждения целостности восстановленного файла демонстрируем его просмотр в графическом редакторе. Как видите, фотография тестового стенда с кулеромPCcooler GI-R68X отображается целостно и без потерь изображения.
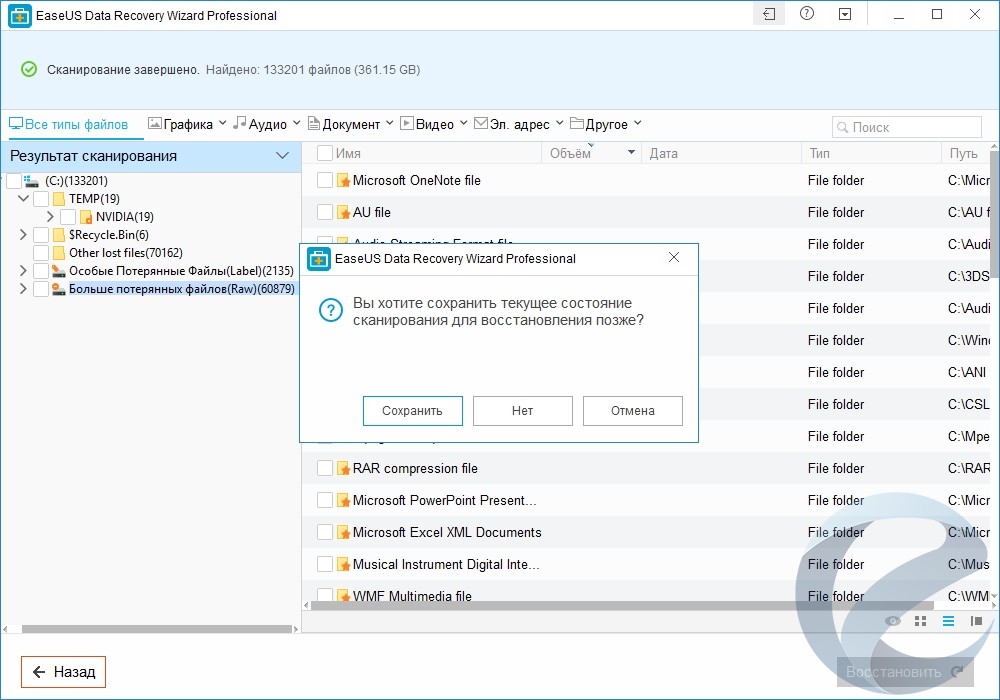
Также, если вы решите завершить процесс восстановления, то программа спросит вас перед закрытием рабочего окна о сохранении состояния сканирования. Это позволит сэкономить время на последующем восстановлении данных, минуя этап сканирования накопителя.
Recover Deleted Files from an SD Card/USB Drive/External Hard Drive
SD cards, USB flash drives, and external hard drives are widely used because they are popular means of providing extended storage to a wide variety of devices. They are handy for transferring files from PC to PC. But data loss cases often happen when you use these storage devices. You don’t need to worry about these cases, you can solve the problems here.
1
Recover Deleted Files from SD Card
SD cards are often used in digital cameras to save your pictures and photos. You may accidentally delete files from an SD card before transferring them to longer-term storage. The best way to retrieve deleted data from an SD card used in a camera or phone is with SD card recovery software. To recover deleted files from an SD card.
-
Step 1.
Connect the SD card to your computer with an SD card reader.
-
Step 2.
Wait for your computer to recognize the SD card.
-
Step 3.
Open the SD card data recovery software on your Windows PC.
-
Step 4.
Recover deleted files from the SD card with the data recovery software.
-
Step 5.
Copy the recovered files to the SD card if you want.
2
Recover Deleted Files from USB Drive
Have you ever lost data because you unplugged a USB drive while some files were still transferring? If the answer is yes, this part would do you a great favor. Follow the details here to recover deleted files from USB drives on Windows computers.
-
Step 1.
Connect the USB flash drive to your computer.
-
Step 2.
Wait for your PC to recognize the USB drive.
-
Step 3.
Open the USB drive recovery software on your PC.
-
Step 4.
Recover deleted files from the USB drive with the pen drive recovery software.
-
Step 5.
Copy the recovered files to the pen drive if desired.
Conclusion
You have discovered ten of the best SD card recovery software in this post. You can recover photos, images, and videos from your SD card with any of the software. If you are not sure about their advantages and disadvantages, you should check the comparison table.
How to Recover Deleted Files from an SD Card for Free?
To recover deleted files from an SD card for free, follow these steps:
- 1. Download and install EaseUS SD card recovery software for Windows.
- 2. Connect the SD card to your computer and start the app.
- 3. Run SD card recovery software and scan the card.
- 4. Check found SD card data.
- 5. You can check and preview found files by double-clicking each one of them. Then, click Recover to save found SD card files to a secure location on your PC or external storage.
What is the best free SD card recovery software?
Top 10 best free SD card recovery software:
- 1.
- 2. Recuva
- 3. Stellar Data Recovery
- 4. Disk Drill
- 5. R-Studio
- 6. Acronis Revive
- 7. Remo Recover
- 8. Recover My Files
- 9. Puran Data Recovery
- 10. TestDisk
According to the comparison, EaseUS SD card recovery software is the best one. You can download it now and restore SD card data easily and quickly.
How can I recover deleted files from the SD card on Mac?
To recover deleted files from SD Card on Mac:
- 1. Insert your SD card into your Mac computer.
- 2. Download and run EaseUS Mac SD card recovery software.
- 3. Select your SD card and click the Scan button.
- 4. Preview the files you need and click Recover to recover files from the SD card on Mac.
How to recover deleted files from SD card on Android?
Use EaseUS SD Card Recovery for Android to recover deleted files on Android SD card:
- 1. Install and run EaseUS MobiSaver for Android.
- 2. Connect your Android phone with an SD card to your computer.
- 3. Scan the SD card on the Android phone to find the lost data.
- 4. Preview and recover deleted files from SD card on Android phone
Can I recover data from a corrupted SD card?
Yes, you can recover data from a corrupted SD card using EaseUS SD card recovery software:
- 1. Connect the corrupted SD card to your computer.
- 2. Launch EaseUS Data Recovery Wizard and choose the SD card to scan.
- 3. Scan the memory card for corrupted SD card recovery.
- 4. Preview and click the Recover button to restore data from the SD card.
How can I recover data from a formatted SD card?
You can recover formatted SD card with EaseUS SD card recovery software with the steps below:
- 1. Connect your SD card to the computer.
- 2. Download and run EaseUS Data Recovery Wizard. Select the SD card to scan for files.
- 3. EaseUS SD card recovery program will list all the recoverable files.
- 4. Preview and recover files from formatted SD cards.
How to Fix a Corrupted SD Card?
When it comes to the word «corrupt», it’s mostly associated with pen drives, SD cards, and a few special categories of humans. If your SD card, pen drive, or flash drive stops working, you can lose a lot. To fix your corrupted SD card, we have the following 8 tips:
Also read: 8 Ways to Fix Corrupted/Damaged SD Card
- 1. Change the card reader, adapter, or USB port
- 2. Run Windows Repair Tool
- 3. Change the drive letter
- 4. Run CHKDSK to check and repair SD card bad sectors
- 5. Reinstall the SD card driver
- 6. Format the RAW SD card
- 7. Format the half-capacity SD Card
- 8. Create a new SD card partition on unallocated space
So, those are the short tips on how to fix or repair a corrupted SD card. You can use them to revive your external drive or any internal logical volume. If you found this helpful or you have any suggestions to make, drop your thoughts and feedback below.
Why is my SD card not showing up?
Due to an outdated memory or SD card driver, your computer may not be able to read or detect the memory/SD card properly. If nothing is wrong with your memory card or SD card, you’ll be able to read and find all your personal data on the card by using another mobile phone or PC. If the memory card or SD card is still undetectable, fix the memory card not detected error with EaseUS.
Part 2. Recover Permanently Deleted Files on Mac Without Software (2 Ways)
If you emptied a Mac Trash on a MacBook, Mac Mini, or Mac Pro, how to recover permanently deleted files without software? There two ways to retrieve permanently deleted Mac files without software. One is using Mac Terminal. The other is using Time Machine.
Tip 1. Recover Deleted Files on Mac Through Terminal
If you want to recover deleted files on Mac without software, using Terminal is a great choice. But Terminal command can only recover deleted files from Trash on Mac.
1. Go to «Finder» > «Applications» > «Utilities» and double-click «Terminal».
2. Type command cd .Trash and press the «Return» key on your Mac (xxx means the name of the deleted file).
3. Input «mv xxx../» and hit «Return». (xxx means the name of the deleted file)
4. Type «Quit» in the Terminal to exit the Terminal window.
Tip 2. Recover Deleted Files on Mac Through Time Machine
Just like the built-in backup option in Windows, Mac has the same component called Time Machine. If you have enabled Time Machine backup, you can recover deleted data on Mac via a recent backup even you have emptied the Trash. If you have emptied Mac Trash without any backup, you can turn to Mac data recovery software to get back permanently deleted Mac data. Steps to restore Mac files from Time Machine:
1. Launch Time Machine on your Mac. You can click on the icon in the menu bar and choose «Enter Time Machine» or search for Time Machine using Spotlight.
2. You can find the specific files you want to restore using the onscreen up and down arrows to locate it. Then you can preview it by pressing Space Bar.
3. Finally, click the «Restore» button, and then the deleted file will be returned to its original location.
Getting Started With EaseUS
EaseUS impressed me from the start in testing. I got started by copying an audio CD to a BIN/CUE file combination for burning to a backup CD, and then deleting the files from my hard disk and emptying the recycle bin. EaseUS got it back in perfect condition, while its rival Stellar Data Recovery reported that it had recovered the file, but instead brought back only a useless fragment of the BIN file.
Similar Products
On the same hard disk, EaseUS easily found and recovered at least a dozen graphics files that Stellar didn’t find at all. Both EaseUS and Stellar offer optional deep scans that can take hours to search every sector on a drive for recoverable files, but only EaseUS lets you search and preview files that the app has already found, while the deep scan continues in the background. Stellar makes you wait until the deep scan is complete.
On a 2TB spinning-platter drive that I used for testing, EaseUS required ten hours for a full scan, while Stellar needed a whopping 34 hours. Since I was able to find the files I wanted long before EaseUS completed its scan, its ability to recover while scanning was vastly more convenient than Stellar’s refusal to let me recover files or do anything else in the program while it made its scan.

When you launch EaseUS Data Recovery Wizard it starts by displaying a list of locations on your system where the app can search for lost data—drive letters, the Recycle Bin, the Desktop, or any specific folder. Click a location and the Scan button, and it goes to work, automatically creating a full file list and a list of deleted files during its initial scan. With Stellar, in contrast, you have to wait while it resorts its file list if you want a list of deleted files. EaseUS, also unlike Stellar, lets you use a Filtermenu to limit the search to specific file types, or to zero in on files modified in the last three days, or in the three days before that, or other date ranges. And the same menu lets you zero in on different file sizes, such as under 100KB or between 100MB and 1GB. Stellar doesn’t have these options. When the app finishes scanning your drive for data, it displays a well-organized file list, with deleted files listed separately from other files, and an optional preview pane.

Tutorial: Recover Lost Data with Easy File Recovery Freeware
- Important
- 1. When you lose data on a storage device, stop using that device immediately. This is to reduce the chance
- of your lost data being overwritten.
- 2. Try and recover data from your storage device as soon as you can.
- 3. When you’ve recovered your files, save those files on a device other than the one you lost it on. This is to prevent further losses in the further.
Step 1. Launch EaseUS Data Recovery Wizard, hover on the partition which you want to recover data from, and click «Scan».
Step 2. Wait for the scan to complete. Then, select the files you’d like to recover.
Step 3. After selecting the files, click Recover and choose a location to save the recovered files at. Make sure not to pick your storage device that made you lose your files.
Download EaseUS Portable Data Recovery Tool And Restore Data
EaseUS Data Recovery Wizard WinPE Edition is designed for portable data recovery when your computer failed to boot. You can create a WinPE portable disk to recover your lost files with it from a dead laptop, failed Windows PC or unbootable hard drive. Besides, this software has many highlights:
01
Easy-to-use:
Easily create bootable media to make your existing operating system run for the moment to recover lost data.
02
No Re-installation:
Never need to reinstall Windows system and EaseUS Data Recovery Wizard, and save much time and cost.
03
Safe Guarantee:
100% safe to recover deleted files without overwriting original data. Just launch EaseUS Data Recovery Wizard program.
04
Quick and Effective:
Restore deleted files fast when Windows system is unable to launch. Also, recover when the hard drive is dead.
Download for Win Download for Mac
Step 1. Create a bootable disk
Prepare an empty USB. If you have important data on it, copy the data to another device. When you create a bootable disk, the data on the USB will be erased. EaseUS Data Recovery Wizard WinPE Edition will help you create a bootable disk.
Connect the USB drive to PC, launch EaseUS Data Recovery Wizard WinPE Edition. Select the USB drive and click «Create» to create a bootable disk.
Step 2. Boot from the bootable USB
Connect the bootable disk to PC that won’t boot and change your computer boot sequence in BIOS. For most users, it works well when they restart their computer and press F2 at the same time to enter BIOS. Set to boot the PC from «Removable Devices» (bootable USB disk) or «CD-ROM Drive» (bootable CD/DVD) beyond Hard Drive. Press «F10» to save and exit.
Step 3. Recover files/data from a PC/laptop hard drive that won’t boot
When you boot from the USB, you can run EaseUS Data Recovery Wizard from the WinPE bootable disk. Select the drive you want to scan to find all your lost files.
Click «Scan» to start the scanning process.
Recover data from the computer or laptop. After the scan completed, you can preview all recoverable files, select the targeted files, and click the «Recover» button to restore your files. You’d better save all of the recovered data to another place to avoid data overwriting.
Why Trust Me?
 My name is Victor Corda. I’m quite a curious guy, especially when it comes to technology. I’ve scoured through dozens of forums and websites for ways to get the most out of my gadgets. There are times when I make everything work wonderfully, and there are times when I just make things worse. I’ve been through that worst-case scenario: Losing all of my valuable files.
I researched to find out if I could retrieve those lost files and tried a number of data recovery programs. There are a number of free recovery programs; JP actually reviewed a list of free data recovery tools you can choose from.
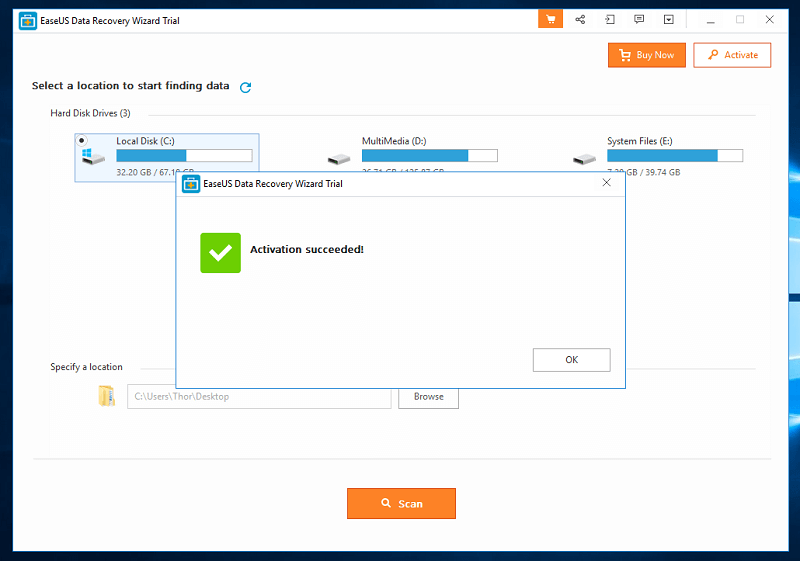
But sometimes you need more power; there are times when free tools just don’t cut it. So before you spend money on data rescue software, we’ll be the ones to test it out for you. I’ve tested both the Windows and Mac versions of EaseUS Data Recovery Wizard Pro with pre-designed data loss scenarios similar to what you may be facing. In order to assess every feature of the program, I activated the program with a valid license shared from our SoftwareHow team.
Last but not least, I reached out to the EaseUS support team for questions (as you can see from the “Reasons Behind My Ratings” section) to evaluate the helpfulness of their support team. I hope all of those validate my expertise in reviewing EaseUS Data Recovery Wizard Pro.
Conclusion
EaseUS Data Recovery Wizard Pro is a powerful data rescue tool that finds deleted files and recovers them. A lot of things could go wrong in data-loss situations like, including files already being overwritten before being recovered. This makes the files completely unrecoverable. The best way to preserve deleted files is by limiting the use of that storage device and recovering the deleted files as soon as possible.
That said, EaseUS Data Recovery Wizard Pro worked perfectly. After scanning, it successfully found all my test files and I was able to recover them without a problem. All the files were in working order and had no errors whatsoever. If you’ve accidentally deleted some files, or mistakenly formatted a storage device, give EaseUS a try. It’s simply one of the most effective data recovery tools available.
How to Recover Deleted Files on Mac — 3 Solutions
When you have deleted a wrong file on Mac and realize that you have made a mistake right away, you can recover this file instantly from the Trash Bin, with data recovery software, or using Time Machine. You can give them a try before you spend time and money on other unreliable solutions.
1
Restore Deleted Files on Mac from Trash (Not Emptied Yet)
As soon as you have deleted a file on Mac, the very first thing you need to do is check the Trash Bin. Every time you find that some files are missing from your Mac, you can access Mac Trash the restore the deleted files.
-
Step 1.
Open the Trash Bin icon on your desktop, and you can see all the deleted files there.
-
Step 2.
Find the Mac files you want to recover, drag them to the desktop.
-
Step 3.
You can also right-click on them and select the «put back» option to retrieve deleted files on Mac from Trash.
2
Recover Deleted Files on Mac (Even Emptied the Trash)
Once you have emptied the Trash, you are unable to bring back files with the «put back» option. You must turn to third-party Mac data recovery software. EaseUS Data Recovery Wizard has the Mac version that allows you to recover lost files on your Mac even if they have been permanently deleted from the Trash.
-
Step 1.
Select the location where your important data and files were deleted and click the «Scan» button.
-
Step 2.
The software will run both quick scan and deep scan and work hard to find as many deleted files as possible.
-
Step 3.
The scan results will be displayed in the left pane. Just select the file(s) and click «Recover».
Download EaseUS Data Recovery Wizard Crack Alternative — Latest Official Version v13.0
Unlike the crack users, the users of genuine EaseUS Data Recovery Wizard provided by EaseUS software can get inside access for an upgrade whenever there’s a new version released. Stop the cracked version and download the latest official version here and enjoy the new features immediately:
Download for Win Download for Mac
Now EaseUS Data Recovery Wizard has been updated to v13.0 with new UI design, faster scanning speed with better data recovery quality:
| Features | Updates |
|---|---|
|
|
Why Files Corrupt After Data Recovery
EaseUS Data Recovery Wizard is recognized as the top-notch data recovery software in the industry, and its customers are spreading all the globe. Many people appreciate its help for the file recovery in every data loss situation, such as deleting, formatting, disk partition showing RAW, and so on. In spite, quite a few of them still encountered trouble — they can recover lost files but can’t open some, saying that files corrupted after data recovery.
Why do files get corrupted after recovery by using EaseUS data recovery software or its other competitors, like Recuva or iCare? The possible cause is that new data overwrite the files. In this way, you can’t open recovered files because they’re corrupted.
Not Everything Can Be Saved
All data-recovery apps list files for possible recovery that turn out not to be fully recoverable, and sometimes you have no way of knowing whether a file can be brought back until you tell the program to try. With graphics and some document files, you can tell at a glance whether the file is recoverable. If the app’s preview pane displays the file in recognizable form as you scroll down the list of files, then you can get the file back. But with word-processing documents, spreadsheets, and songs, whether you’re using EaseUS or Stellar, you’ll have to click on a Preview button and wait to to see if a recognizable file pops up or if the song you want to recover starts playing back in the preview pane.
Just as EaseUS did a better job of recovering files, it also did a better job of not listing files as recoverable that in fact it couldn’t recover at all. For example, on the SSD I used for testing, Stellar offered to recover some files that it listed as HTML files, but which were in fact fragments of completely different filetypes. EaseUS didn’t list these phantom files at all, making it easier to sort through its file list to find files that I could actually bring back to life.
EaseUS, unlike Stellar, lets you save a recovered file to the same drive from which it recovered it. It warns you before you do this, because when you save a recovered file to the same drive, you may inadvertently overwrite other lost data that you might want to recover. Stellar won’t let you save a recovered file to same drive, so you may have to rush out and buy a USB drive if you don’t have a spare drive to save to. Stellar’s policy is safest, but if you’re only recovering a few files, and you don’t mind the small chance that you’ll overwrite something that you may want to recover later, then EaseUS’s policy is far more convenient.

Top 9. Puran Data Recovery
Applies to: Windows only
Puran Data Recovery is a free utility that can help you recover maximum data from damaged media like scratched CDs, DVDs, Blu Rays and damaged pen drives, memory cards, etc. If you are able to see a list of files in any media, data recovery can recover those files. It ignores any bad sector that comes in while copying data from a file and continues copying until the end of that file. Hence, recovering maximum undamaged data.
Pros
- Skips bad sectors automatically while recovering files
- Supports optical drives like CDs, DVDs, and Blu Rays
- Drag and drop is supported
- Totally free
Simple Protect
Simple Protect protects data element only. It saves disk space. If there is any new data written to source drive, the lost protected data might be accidentally overwritten, resulting in permanent data loss.
1. Enable & Disable Simple Protect
Check the button next to Simple Protect to enable it.
Uncheck the button next to Simple Protect to disable it. Yes is to disable the protection but save the previous previously set protected objects. No is to cancel the disable operation. Yes, and reset it is to disable the protection and remove all the previously set protected objects.
3. Restore & Delete Protected Objects
Protected files will be automatically displayed in To Restore Files once they are moved to trash. Click Restore to retrieve the lost files after files are moved to trash and trash are emptied. Click Delete to permanently delete the protected files.
How to Recover Deleted Files on Windows 10 Without Software — 2 Ways
Here are two other solutions that you can take to recover deleted files on Windows PC or laptop without software.
1
Recover Deleted Files from Recycle Bin
Recycle Bin is a system folder in the Windows operating system that temporarily keeps the files, folders, documents, web pages that you delete. Deleted items are stored in the Recycle Bin and still occupy disk space. They can be restored if you realized you removed some necessary files.
-
Step 1.
Find the Recycle Bin on your Windows 10.
-
Step 2.
Choose the files you need to restore.
-
Step 3.
Right-click the files and select «Restore» to recover your data on Windows 10.
USB Data Recovery Preparation — What to Do When You’ve Lost USB Files
USB drives are widely used to transfer and save files as they’re portable, while also fast at reading and writing data. However, if you experience data loss on your USB drive, due to improper operations or unexpected errors, what should you do?
#1. Immediately stop using the USB drive on which the files were lost
- 1. Don’t use the USB drive that held the lost files, as they are likely to still be stored there even though you can’t see them. But, there is a good chance they could be overwritten if you continue using the drive.
- 2. Instead, use one of the 5 USB data recovery solutions outlined below.
#2. Five ways to get back lost files on a USB drive
- — 97% Success Rate
- — 80% Success Rate
- — 80% Success Rate
- — 50% Success Rate
- — 20% or Less Success Rate
For beginners, we recommend using the USB File Recovery Software option explained in Method 1, as this is the easiest and most straightforward way to recover your files.
Recover Any Files
Recover any deleted, formatted or lost file as long as it can be scanned. More than 1000 file types are supported.
Document
Rescue any deleted documents: Office files including Word, Excel, Powerpoint, PDF, HTML, and more.
File formats supported >
File formats supported
DOC/DOCX, XLS/XLSX, PPT/PPTX, PDF, CWK, HTML/HTM, INDD, EPS, etc.
Graphics
Just recover all lost, deleted, or hidden images from your devices. No impact on the quality of photos.
File formats supported >
File formats supported
JPG/JPEG, TIFF/TIF, PNG, BMP, GIF, PSD, CRW, CR2, NEF, ORF, SR2, MRW, DCR, WMF, RAW, SWF, SVG, RAF, DNG, etc.
Video
Restore video files, and bring back your movies, TV series, gaming recordings, and any valuable moments.
File formats supported >
File formats supported
AVI, MOV, MP4, M4V, 3GP, 3G2, WMV, MKV, ASF, FLV, SWF, MPG, RM/RMVB, MPEG, etc.
EaseUS Data Recovery Wizard Free
The first alternative we recommend you try is EaseUS Data Recovery Wizard Free version. It is feature-rich, the same as EaseUS Data Recovery Wizard Pro. The free version allows you to recover up to 2GB of files. If you have less than 2GB of data, this is the best alternative to EaseUS Data Recovery Wizard Pro.
Pros:
- Support hundreds of file formats, including all the common file types
- Recover data from deleted, hidden, lost, or RAW partition
- A corrupted file fixing feature is available
- Sort and filter lost files efficiently
- Preview files before recovery
- Support data recovery up to 2GB of data
Cons:
The free version doesn’t support data recovery with a bootable USB drive when the system or hard drive fails.