Creating your first repository using github desktop
Содержание:
- Типичный процесс использования десктопного клиента
- 10 шагов для работы с проектом
- Преимущества
- Основные термины Git
- Also see
- Miscellanea
- Part 4: Publishing your repository to GitHub
- GitHub’s Logos
- Беглый взгляд на программу
- Install Git on Mac
- Introduction
- Part 3: Contributing to projects with GitHub Desktop
- Part 2: Configuring and customizing GitHub Desktop
- Управление конфликтами слияния
- Languages and Tools
- Our Learning Paths
- Сервис для хостинга проектов GitHub
- Open Source Licenses and Notices
- ? What’s the big difference?
- Страницы GitHub
- Bitcoin username registration
- Регистрация на GitHub
- Install Git on Windows
- Step 2. Create a Branch
- DevOps with GitHub
Типичный процесс использования десктопного клиента
В этом разделе мы научимся использовать десктопный клиент GitHub для управления процессом Git.
Note: Вместо работы в Wiki GitHub (как делали в предыдущем разделе по GitHub ), будем работать в обычном Git-репозитории. В Wiki GitHub есть некоторые ограничения, когда дело касается отправки запросов.
Для настройки репозитория Git используя клиента GitHub Desktop:
- Скачаем и установим GitHub Desctop. Запускам приложение и авторизуемся. (По идее у нас уже есть аккаунт на GitHub, но есть нет, то создаем его).
- Заходим на страницу github.com и ищем наш репозиторий, созданный в предыдущем разделе. Открываем именно репозиторий, а не страницу Wiki. (Если не практические занятия из прошлого раздела не сделаны, то создаем новый репозиторий).
- Нажимаем кнопку и выбираем
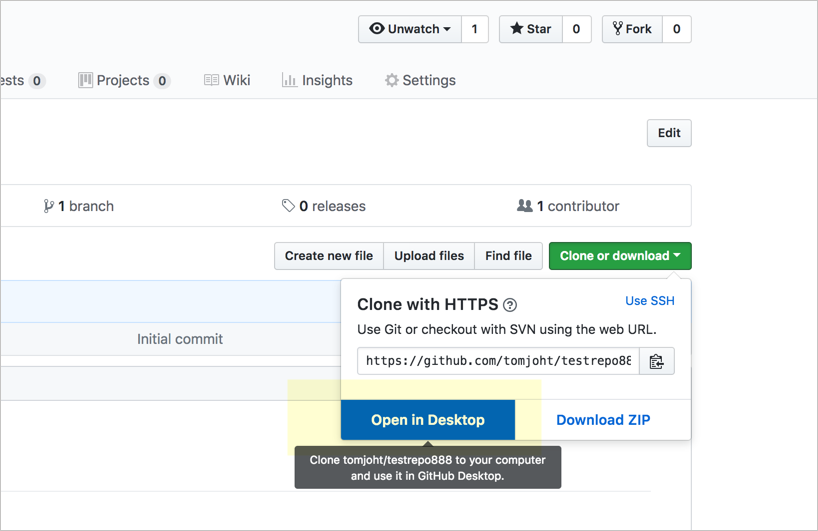 Кнопка Onen in Desktop
- Открываем приложение GitHub Desktop и переходим в .
- В диалоговом окне выбираем Open GitHub Desktop.app. GitHub Desktop должен запуститься с диалоговым окном «Клонировать репозиторий», содержащим запрос, где клонировать репозиторий. При желании локальный путь можно изменить.
- Переходим на вкладку URL и вставляем URL-адрес клона. В поле Local Path выбираем, куда клонировать репозиторий. Например:
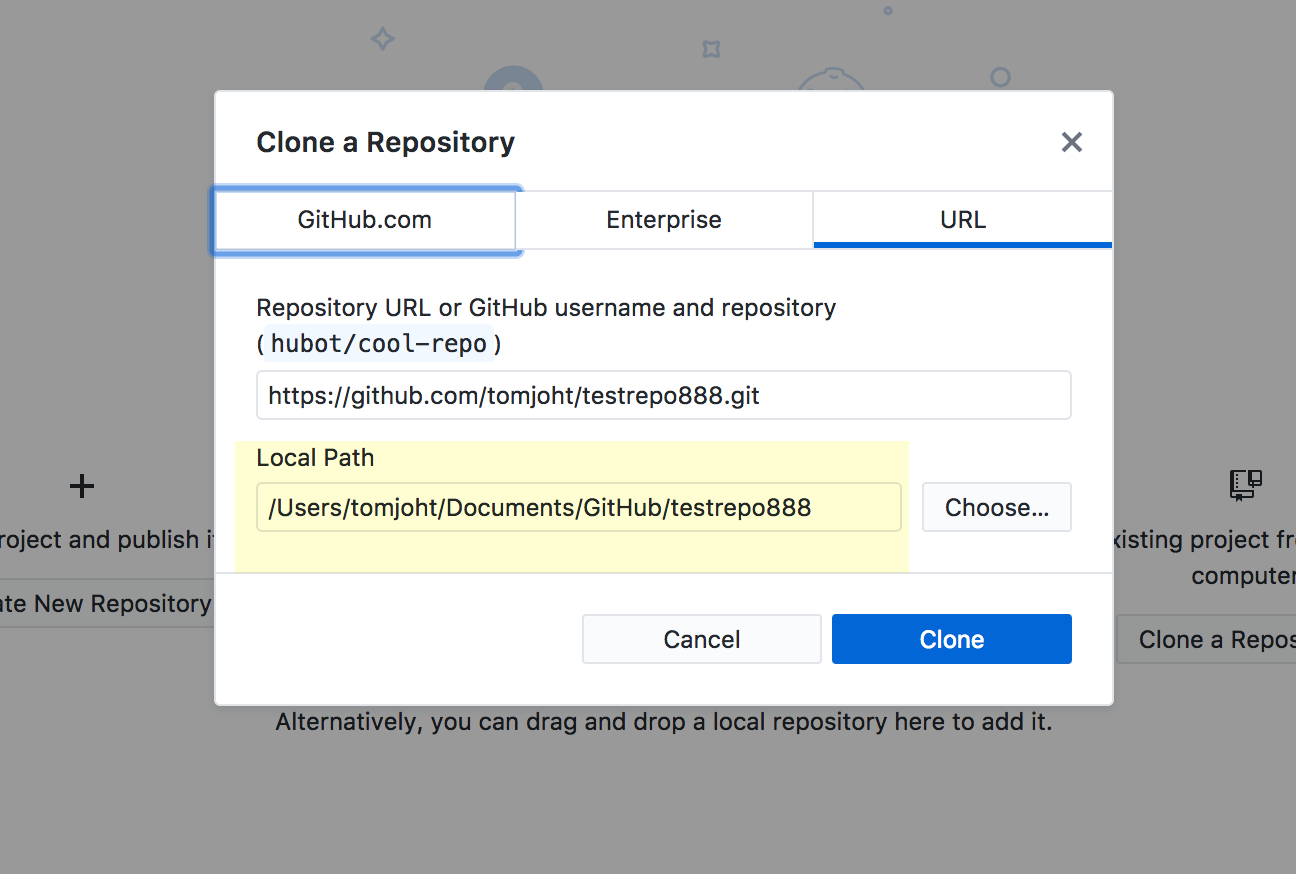 Выбор адреса клонирования репозитория
- Нажимаем
- Переходим в клонированный репозиторий и, либо добавляем простой текстовый файл с некоторым содержимым, либо вносим изменения в существующий файл.
- Возвращаемся в GitHub Desktop. Видим, что новый файл добавлен список незафиксированных изменений в левой колонке.
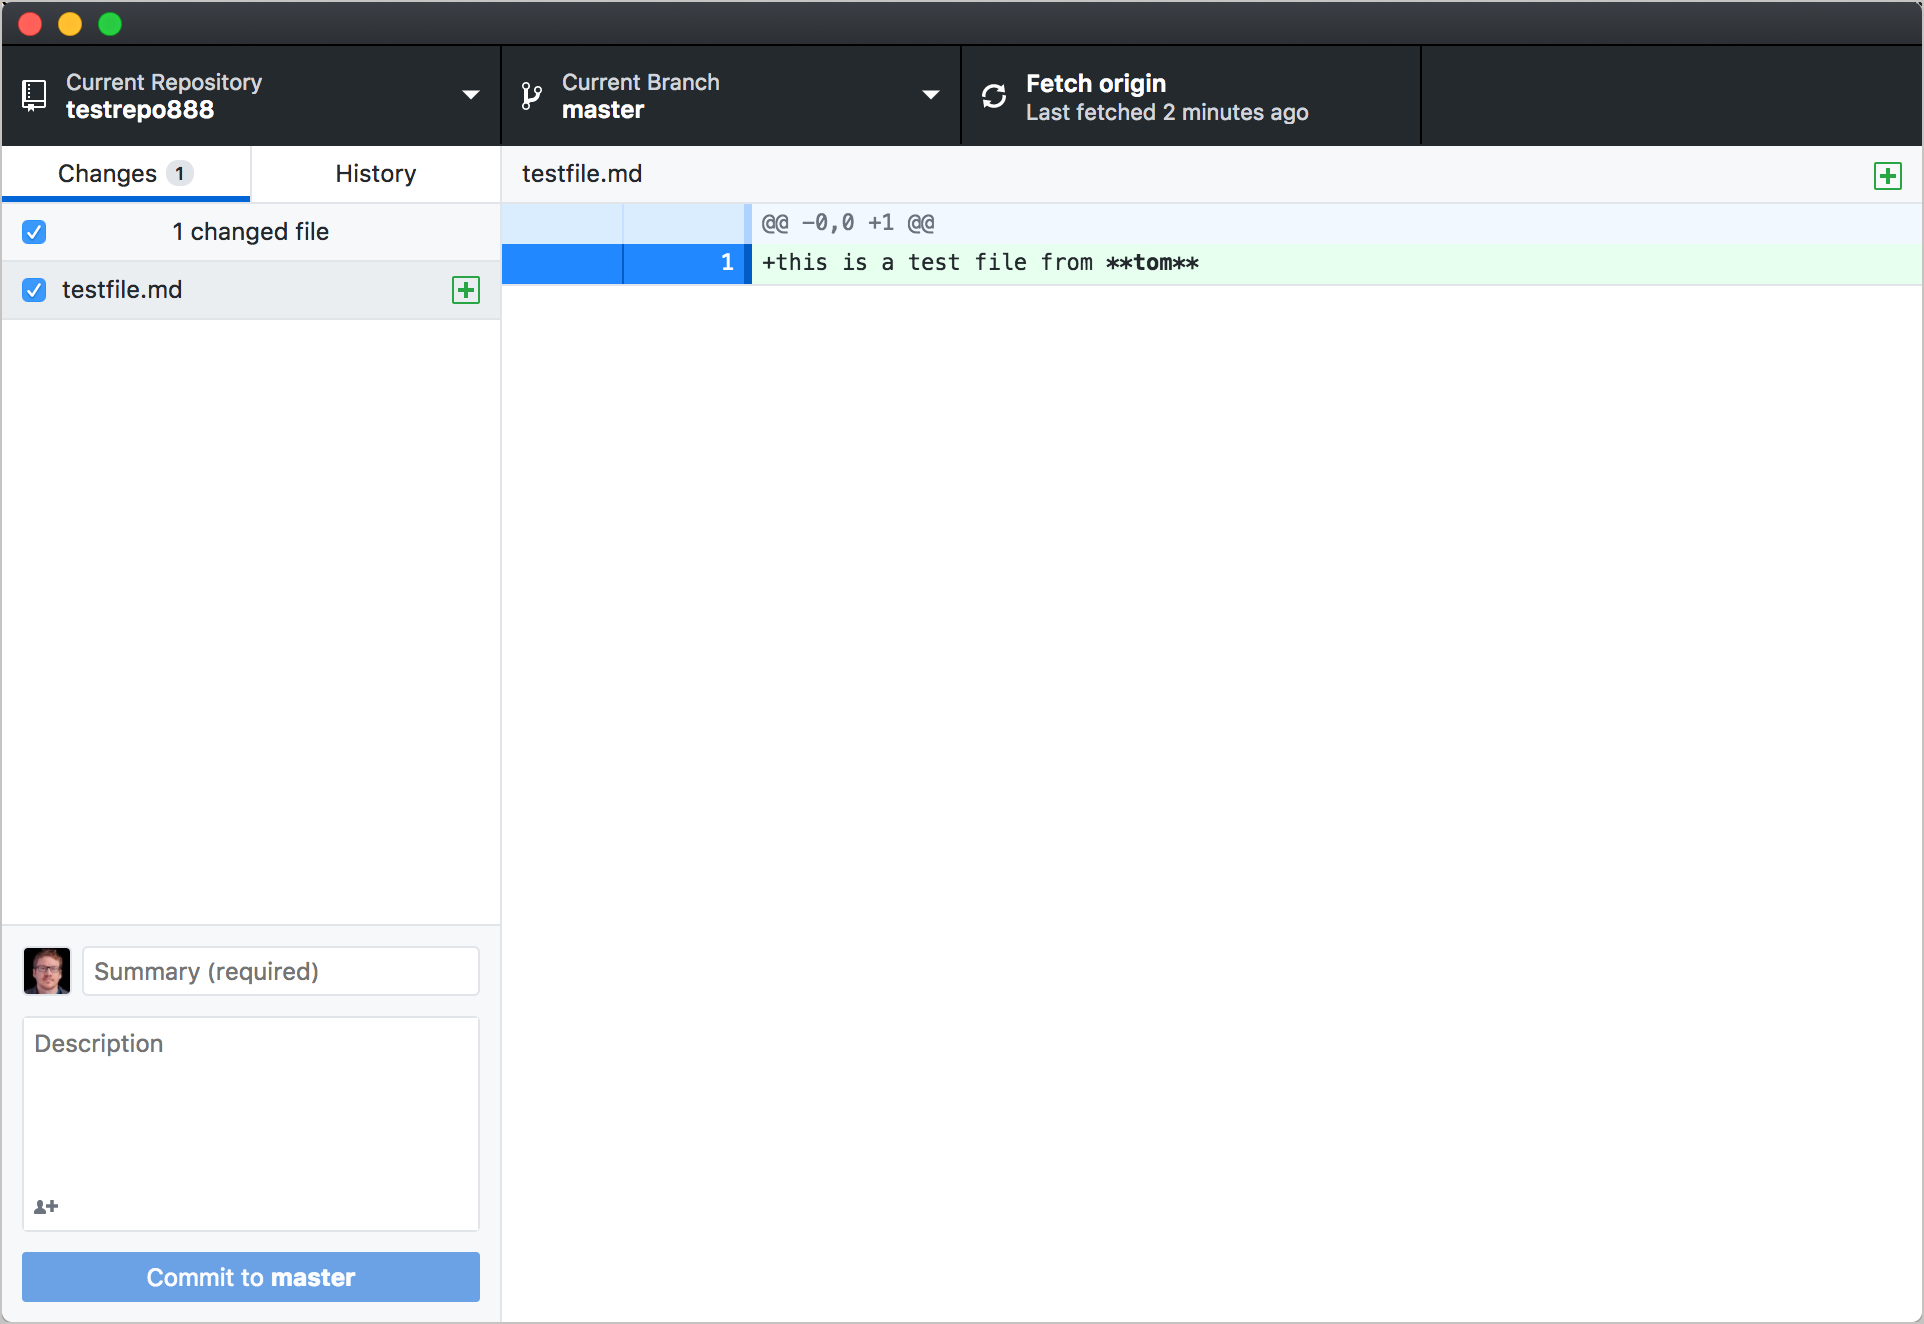 Незафиксированные изменения
В списке измененных файлов зеленый знак означает добавление нового файла. Желтый круг означает изменения существующего файла.
В левом нижнем углу клиента GitHub Desktop (где написано Summary и Description) вводим описание коммита и кликаем Commit to master.
Когда мы фиксируем изменения, на левой панели исчезает список незафиксированных изменений. Однако изменения мы зафиксировали только локально. Коммит еще нужно отправить в удаленный (origin) репозиторий. («Origin» — это псевдоним, который относится к удаленному хранилищу.)
Наверху кликаем Push origin

Если посмотреть репозиторий в сети, то увидим, что внесенные изменения были перенесены в основную ветку в источнике. Можно перейти на вкладку History в клиенте GitHub Desktop (вместо вкладки Changes) или перейти в меню View > Show History, чтобы просмотреть ранее внесенные изменения.
Note: Многие предпочитают использовать терминал вместо графического интерфейса GitHub для рабочего стола, графический интерфейс упрощает визуальное восприятие изменений, внесенных в репозиторий. При желании можно комбинировать использование командной строки и клиента рабочего стола.
10 шагов для работы с проектом
Создаем локальную копию вашего проекта
Для github project_url можно найти нажав зеленую кнопку «Clone or download» на странице проекта.
Обновляем локальную копию — подгружаем изменения, которые внесли другие участники в эту ветку
Узнаем название вашей текущей ветки, смотрим какие файлы были изменены локально, смотрим какие комиты (commits) вы не отправили на общий сервер
Выкидываем все ваши локальные изменения
Применять осторожно, можно выстрелить в ногу.
Примечание: современные IDE хранят историю изменения файлов локально, так что ничего страшного. Стреляйте.
Создаем ветку, обычно по имени задачи в JIRA
Примечание: ветка создается от той ветки в которой вы в настоящий момент находитесь (см. предыдущий пункт), поэтому как правило надо сначала переключиться в ветку master. Если есть измененный файлы, то ничего страшного — они никуда не пропадут.
Переключаемся в ветку master:
Создаем новую ветку:
Если вы хотите внести изменения в ветку, которую пилит ваш товарищ, то надо сначала обновиться, а потом переключиться в его ветку
Периодически подсасываем изменения, которые другие участники внесли в основную ветку, чтобы потом не огрести проблем с несостыковками
После внесения локальных изменений их надо так сказать «закомитить». Надо отметить, что git вносит изменения (создает новый commit) в вашу локальную версию, на сервер ничего не отправляет. Для отправки на сервер есть другая команда. Лично я комичу из IDE. Но можно и руками.
Сообщаем git какие файлы мы хотим закомитить:
Или сразу все файлы
Коммитим:
Отправляем файлы в репозиторий на сервере
Примечание — git ругается, что не знает куда отправлять — смотри примечание к пункту 2.
Отправляем изменения на просмотр (review) другим участникам. Это UI штука, к git отношения не имеет. В github, например, надо просто в UI перейти в свою ветку и создать Pull request (PR)
Сливаем ваши изменения в основную ветку. Тут есть несколько вариантов. По умолчанию git просто встроит все ваши комиты в общую ветку. То есть все увидят ваши нелепые попытки исправить несобирающийся билд, падающие тесты и просто вечерние комиты, которые вы сделали, чтобы не потерять результаты кропотливого дневного труда. Это хорошо, если вы эксбиционист, но как правило жедательно все комиты собрать в один и встроить в общую ветку именно одним комитом (т.н. squash commit) — так другим будет легче разобраться что же вы сделали перед тем, как что-то пошло не так и откатить ваши изменения. Поэтому желательно делать squash:
В интерфейсе github есть зеленая кнопочка «squash & commit». Через UI переходим в свою ветку, создаем Pull request (PR), а потом в интерфейсе PR выбираем и жмете «squash & commit».
Переходим в основную ветку (master)
, обновляемся
, делаем squash commit. Все изменения, из нашей ветки появятся как локальные, но уже в основной ветке. Смотрим что мы наваяли. Посмотреть изменения — пункт 3. Комитим — пункт 8, отправляем на сервер — пункт 9. Можно делать squash commit не в основную ветку, а завести новую, сделать в нее squash commit и из нее сделать merge в основную (смотри следующий пункт).
Ваши комиты в этом случае не склеятся в один. Переходим в основную ветку (master)
, обновляемся
, делаем обычный commit
, отправляем на сервер — пункт 9.
Можно сделать rebase ветки и, например, склеить все ваши комиты в один.
Преимущества
Мы рассмотрели только базовое использование Git, GitHub, GitHub Desktop, но уже можем выделить достаточно много преимуществ (на самом деле их намного больше, как и возможностей)
- Возможность фиксировать состояния проекта на необходимых этапах, и иметь доступ к ранним версиям
- Умение пользоваться Git очень часто встречается в вакансиях — будет вашим преимуществом
- На любом устройстве, в любой момент можете получить доступ до актуального проекта
- Возможность делиться своим проектом с другими пользователями GitHub
- Иметь проекты на GitHub большой плюс при поиске работы
- Возможность пользоваться всеми преимуществами Git без командной строки
Основные термины Git
Репозиторий (Repository) — каталог файловой системы, в котором хранятся файлы разработки.
Удаленный репозиторий (Ориджин, Origin) — репозиторий, находящийся на сервере. Это общий репозиторий, в который приходят все изменения.
Локальный репозиторий — репозиторий, расположенный на локальном компьютере разработчика. Именно с ним работает программист.
Клон (Clone) — копия Origin в локальный репозиторий.
Форк (Fork) — копия репозитория. Форк позволяет разработчику вносить изменения без риска испортить исходный код.
Коммит (Commit) — запись изменений в локальный репозиторий.
Пуш (Push) — отправка всех неотправленных коммитов в удаленный репозиторий.
Пул (Pull) — получение последних изменений с удаленного репозитория.
Пулреквест (Pull Request) — запрос на слияние форка репозитория с основным репозиторием. Пулреквест может быть принят или отклонен владельцем репозитория.
Also see
- How to set up a GitLab server and host your own Git repositories (TechRepublic)
- Git: A cheat sheet (TechRepublic)
- How to connect your GitLab account to the LabCoat Android app (TechRepublic)
- GitHub shocks top developer: Access to 5 years’ work inexplicably blocked (ZDNet)
- Hybrid cloud: A cheat sheet (TechRepublic)
- Hybrid cloud: A guide for IT pros (TechRepublic download)
- Top cloud providers 2019: AWS, Microsoft, Azure, Google Cloud; IBM makes hybrid move; Salesforce dominates SaaS (ZDNet)
- Best cloud services for small businesses (CNET)
- Microsoft Office vs Google Docs Suite vs LibreOffice (Download.com)
- Cloud computing: More must-read coverage (TechRepublic on Flipboard)
Miscellanea
- If you configure the Software to work with one or more accounts on the GitHub.com website or with an instance of GitHub Enterprise, your use of the Software will also be governed by the GitHub.com website Terms of Service and/or the license agreement applicable to your instance of GitHub Enterprise.
- The failure of GitHub to exercise or enforce any right or provision of this EULA shall not constitute a waiver of such right or provision.
- This EULA constitutes the entire agreement between you and GitHub and governs your use of the Software, superseding any prior agreements between you and GitHub (including, but not limited to, any prior versions of the EULA).
- You agree that this EULA and your use of the Software are governed under California law and any dispute related to the Software must be brought in a tribunal of competent jurisdiction located in or near San Francisco, California.
- Please send any questions about this EULA to support@github.com.
Part 4: Publishing your repository to GitHub
When you create a new repository, it only exists on your computer and you are the only one who can access the repository. You can publish your repository to GitHub to keep it synchronized across multiple computers and allow other people to access it. To publish your repository, push your local changes to GitHub.
-
Click Publish repository in the menu bar.
- GitHub Desktop automatically fills the «Name» and «Description» fields with the information you entered when you created the repository.
- Keep this code private lets you control who can view your project. If you leave this option unselected, other users on GitHub will be able to view your code. If you select this option, your code will not be publicly available.
- The Organization drop-down menu, if present, lets you publish your repository to a specific organization that you belong to on GitHub.
-
Click the Publish Repository button.
-
You can access the repository on GitHub.com from within GitHub Desktop. In the file menu, click Repository, then click View on GitHub. This will take you directly to the repository in your default browser.
GitHub’s Logos
The license grant included with the Software is not for GitHub’s
trademarks, which include the Software logo designs. GitHub reserves
all trademark and copyright rights in and to all GitHub trademarks.
GitHub’s logos include, for instance, the stylized designs that
include «logo» in the file title in the «logos» folder.
The names GitHub, GitHub Desktop, GitHub for Mac, GitHub for
Windows, Atom, the Octocat, and related GitHub logos and/or stylized
names are trademarks of GitHub. You agree not to display or use
these trademarks in any manner without GitHub’s prior, written
permission, except as allowed by GitHub’s Logos and Usage Policy: https://github.com/logos.
Беглый взгляд на программу
Если приложение GitHub Desktop установлено правильно, мы сможем найти его на нашем компьютере. программа запуска.

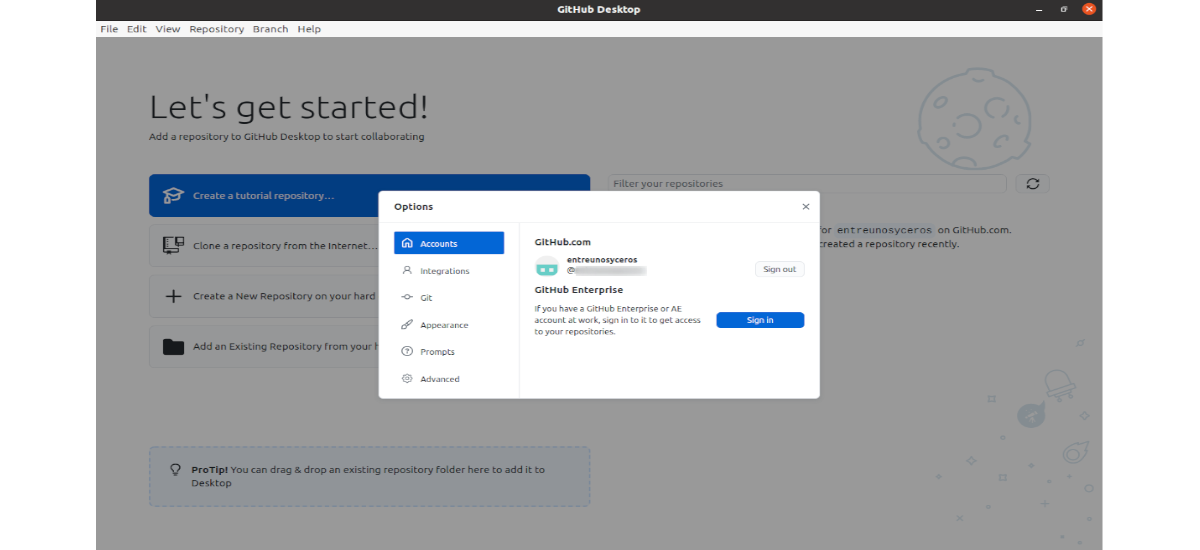
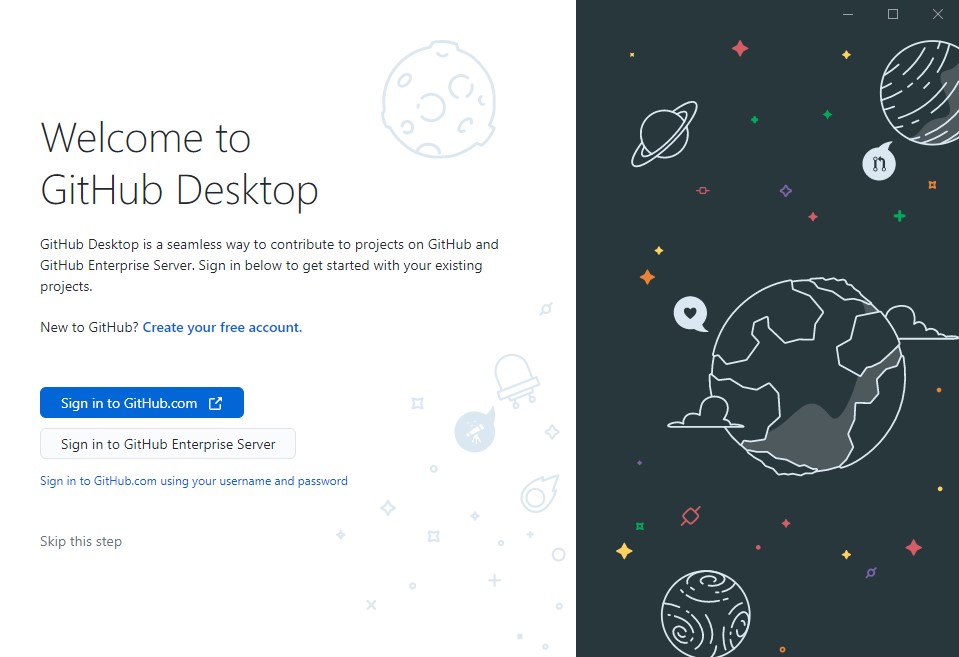
При первом запуске приложения перед нами откроется следующее окно.
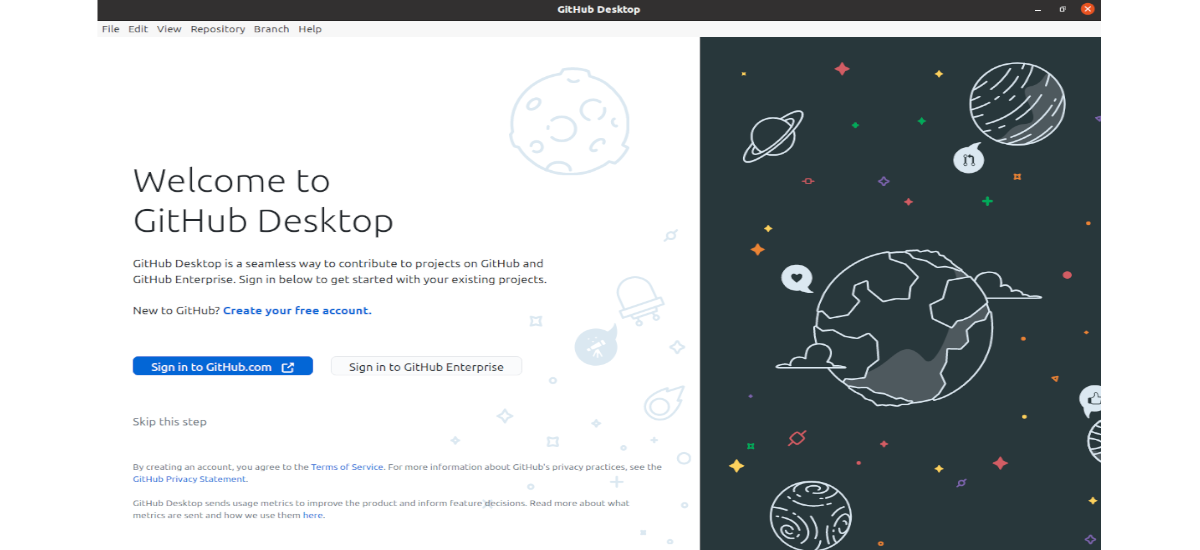
Если у вас есть учетная запись на GitHub.com, нажмите кнопку «Войдите на GitHub.com’и если у вас есть учетная запись GitHub Enterprise, нажмите кнопку’Войдите в GitHub Enterprise».
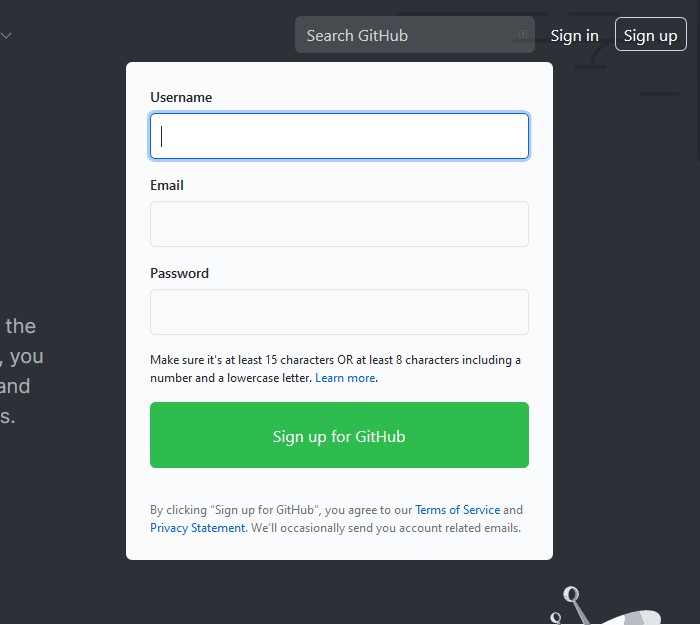
Если вы новичок и хотите создать учетную запись, нажмите на ссылку «Создайте свою бесплатную учетную запись’. Если вы не хотите получать доступ или создавать учетную запись, щелкните ссылку «Пропустите этот шаг’. Если мы нажмем на ‘Создайте свою бесплатную учетную запись’, в браузере появится следующая страница.

После предоставления действительной информации в форме нам нужно будет только подтвердить учетную запись по электронной почте, которую они нам отправят.
Авторизуйте приложение
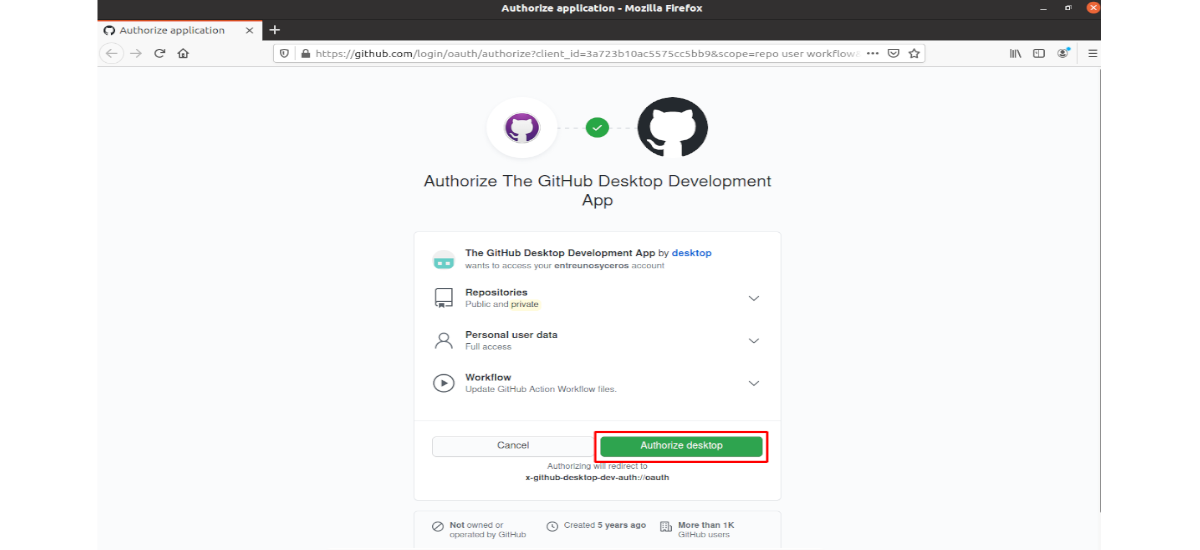
На открывающейся странице указаны четыре характеристики приложения для авторизации:
- Приложение для разработки на GitHub для настольных ПК → для доступа к учетной записи GitHub с рабочего стола Ubuntu с помощью приложения GitHub Desktop.
- Repositorios → репозитории могут быть общедоступными или частными.
- Персональные данные пользователя → полностью доступен через GitHub Desktop.
- Рабочий процесс → который обновит файл GitHub, который обновляется локально в рабочем процессе.
Если мы нажмем кнопку ‘Авторизовать рабочий стол», Эти четыре функции будут включены для нашей учетной записи GitHub, поэтому мы можем использовать их с помощью GitHub Desktop..
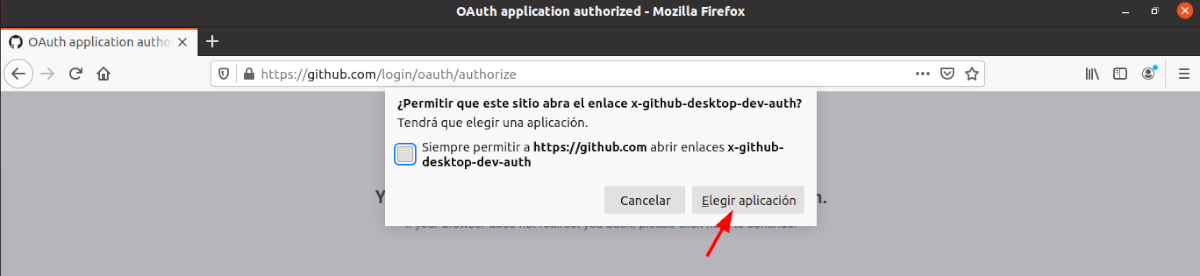
Появится следующее всплывающее окно с запросом разрешения на разрешите github.com открывать ссылку x-github-desktop-dev-auth.
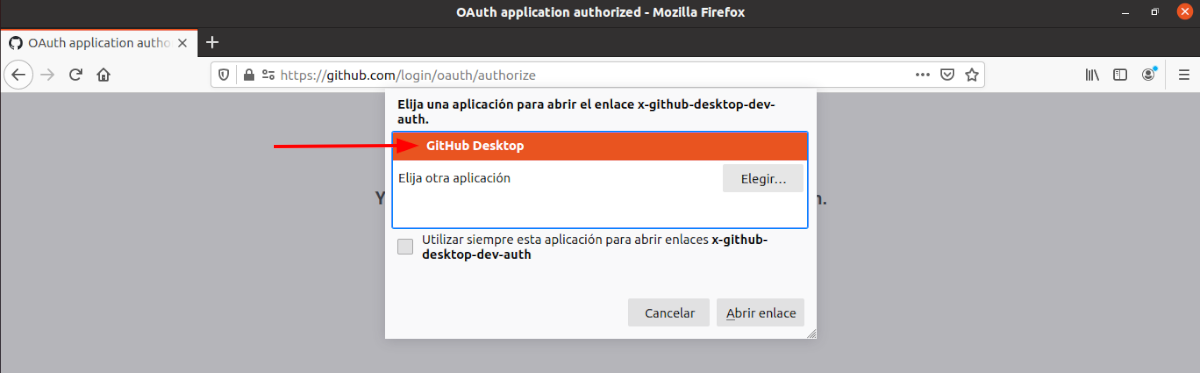
Нам придется нажмите кнопку ‘Выберите приложение’выбрать настольное приложение’GitHub Desktop» и нажмите кнопку ‘Открыть ссылку».
Джем Гит
Теперь, если мы снова откроем установленное приложение GitHub Desktop, появится следующая форма для настройки Git.
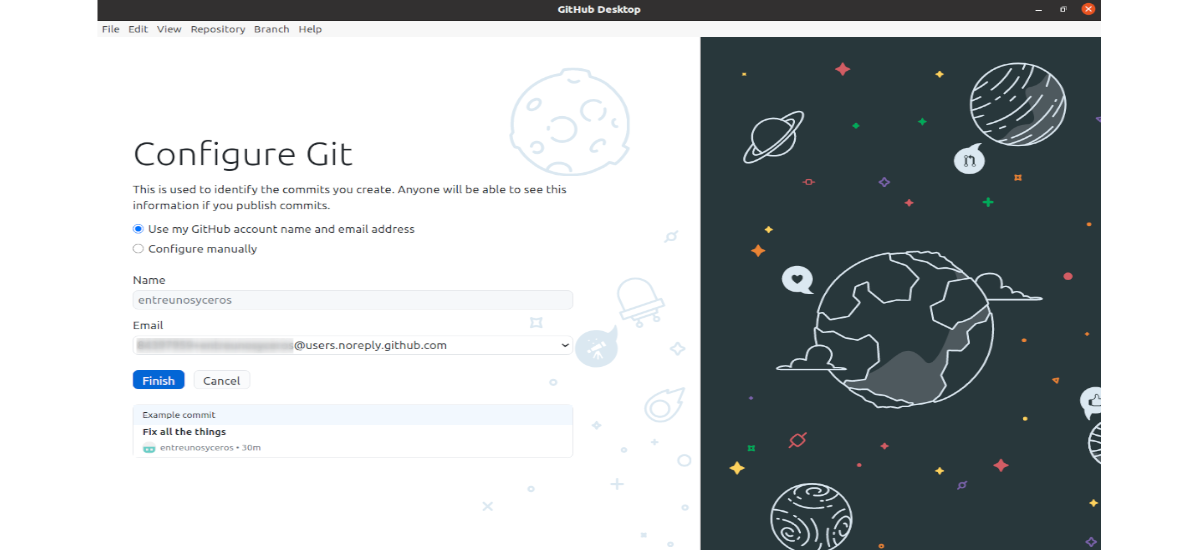
Здесь появятся имя пользователя и адрес электронной почты учетной записи GitHub, которую мы создали при создании учетной записи GitHub.. Эта информация появится автоматически, если все настроено правильно. После этого приложение должно запуститься, когда вы нажмете ‘Завершить».
Инициар Ла Аппликация

Если рабочий стол GitHub установлен и правильно настроен в Ubuntu, появится окно, подобное приведенному выше. Мы также найдем строку меню в верхней части окна приложения, с помощью которой можно выполнять различные типы задач, связанных с репозиториями.
GitHub Desktop может быть очень полезным приложением для пользователей GitHub. Это будет помогает легко контролировать все задачи, связанные с репозиторием. Пользователи, которые хотят узнать больше об этом проекте, могут проконсультироваться по репозиторий проекта на GitHub.
Install Git on Mac
Most versions of MacOS will already have installed, and you can activate it through the terminal with . However, if you don’t have Git installed for whatever reason, you can install the latest version of Git using one of several popular methods as listed below:
Install Git From an Installer
- Navigate to the latest macOS Git Installer and download the latest version.
- Once the installer has started, follow the instructions as provided until the installation is complete.
- Open the command prompt «terminal» and type to verify Git was installed.
Note: is a popular and recommended resource for downloading Git on a Mac. The advantage of downloading Git from is that your download automatically starts with the latest version of Git. The download source is the same macOS Git Installer as referenced in the steps above.
Install Git from Homebrew
Homebrew is a popular package manager for macOS. If you already have Homwbrew installed, you can follow the below steps to install Git:
- Open up a terminal window and install Git using the following command: .
- Once the command output has completed, you can verify the installation by typing: .
Introduction
GitHub Desktop is an application that enables you to interact with GitHub using a GUI instead of the command line or a web browser. GitHub Desktop encourages you and your team to collaborate using best practices with Git and GitHub. You can use GitHub Desktop to complete most Git commands from your desktop with visual confirmation of changes. You can push to, pull from, and clone remote repositories with GitHub Desktop, and use collaborative tools such as attributing commits and creating pull requests.
This guide will help you get started with GitHub Desktop by setting up the application, authenticating your account, configuring basic settings, and introducing the fundamentals of managing projects with GitHub Desktop. You will be able to use GitHub Desktop to collaborate on projects and connect to remote repositories after working through this guide.
You might find it helpful to have a basic understanding of Git and GitHub before getting started with GitHub Desktop. For more information, see the following articles.
- «Using Git»
- «Learning about GitHub»
- «Getting started with GitHub»
GitHub Desktop is an open source project. You can see the roadmap, contribute to the project, or open an issue to provide feedback or feature requests. For more information, see the repository.
Part 3: Contributing to projects with GitHub Desktop
After installing, authenticating, and configuring the app, you are ready to start using GitHub Desktop. You can create, add, or clone repositories and use GitHub Desktop to manage contributions to your repositories.
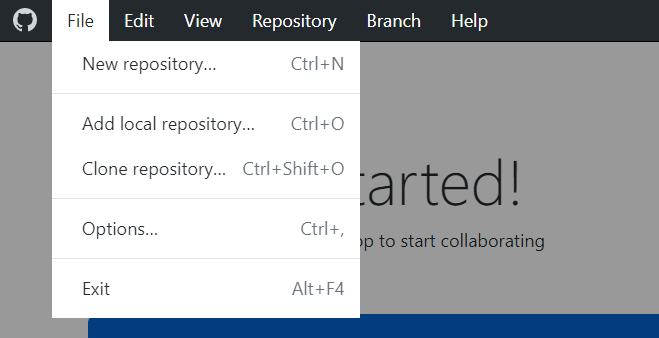
You can create a new repository by selecting the File menu and clicking New repository…. For more information, see «Creating your first repository using GitHub Desktop.»
You can add a repository from your local computer by selecting the File menu and clicking Add Local Repository…. For more information, see «Adding a repository from your local computer to GitHub Desktop.»
You can clone a repository from GitHub by selecting the File menu and clicking Clone Repository…. For more information, see «Cloning and Forking Repositories from GitHub Desktop.»

You can use GitHub Desktop to create a branch of a project. Branches isolate your development work from other branches in the repository, so that you can safely experiment with changes. For more information, see «Managing branches.»
After you make changes to a branch, you can review them in GitHub Desktop and make a commit to keep track of your changes. For more information, see «Committing and reviewing changes to your project.»

If you want to access your changes remotely or share them with other people, you can push your commits to GitHub. For more information, see «Pushing changes to GitHub.»
You can use GitHub Desktop to create issues or pull requests to collaborate on projects with other people. Issues help you keep track of ideas and discuss possible changes to projects. Pull requests let you share your proposed changes with others, receive feedback, and merge changes into a project. For more information, see «Creating an issue or pull request.»»
You can view your own or your collaborator’s pull requests in GitHub Desktop. Viewing a pull request in GitHub Desktop lets you see any proposed changes and make additional changes by opening the project’s files and repositories in your default text editor. For more information, see «Viewing a pull request in GitHub Desktop.»
When you make changes to your local repositories or when other people make changes to the remote repositories, you will need to sync your local copy of the project with the remote repository. GitHub Desktop can keep your local copy of a project in sync with the remote version by pushing and pulling commits. For more information, see «Syncing your branch.»
Part 2: Configuring and customizing GitHub Desktop
After you install GitHub Desktop, you can configure and customize the app to best suit your needs.
You can connect or remove accounts on GitHub or GitHub Enterprise, choose a default text editor or shell, edit your Git configuration, change the appearance of GitHub Desktop, customize system dialog boxes, and set privacy preferences in the GitHub Desktop Preferences window. For more information, see «Configuring basic settings.»

You can connect or remove accounts on GitHub or GitHub Enterprise, choose a default text editor or shell, edit your Git configuration, change the appearance of GitHub Desktop, customize system dialog boxes, and set privacy preferences in the GitHub Desktop Options window. For more information, see «Configuring basic settings.»

Управление конфликтами слияния
Предположим, мы внесли изменения в свою локальную копию файла в хранилище, а кто-то другой изменяет этот же файл, используя интерфейс браузера GitHub.com. Изменения противоречат друг другу. Что происходит?
Когда нажимаем Push origin от клиента GitHub Desktop, увидим сообщение о том, что хранилище было обновлено с момента последнего извлечения:
Кнопка, которая раньше говорила «Push origin», теперь говорит «Pull origin». кликаем «Pull origin». Теперь получаем еще одно сообщение об ошибке, которое говорит:
Если решим зафиксировать свои изменения, то увидим сообщение, которое гласит:
GitHub Desktop отображает восклицательный знак рядом с файлами с конфликтами слияния. Откройте файл конфликта и найдите маркеры конфликта ( и ). Например, такие:
В командной строке можно запустить , чтобы увидеть, какие файлы имеют конфликты.) Содержимое в показывает локальные изменения. Содержание ниже показывает изменения, внесенные в другом месте.
Устраняем все конфликты, изменив содержимое маркеров, а затем удалив маркеры. Например, обновите содержимое до этого:
Теперь нужно снова добавить файл в Git. В GitHub Desktop внесем изменения в обновленные файлы. Кликаем Push origin. Обновления на локальном компьютере отправляются на удаленный компьютер без каких-либо конфликтов.
Languages and Tools
Introduction to HTML
If you are looking for a quick and fun introduction to the exciting world of programming, this course is for you. Learn fundamental HTML skills and build your first webpage in less than an hour.
GitHub Pages
Introduction to Node with Express
Node.js gives you the ability to run JavaScript files on the server-side. Express is a library for Node.js, that allows you to make requests to different «endpoints» and get a response back.
Node
Express
JavaScript
JSON
API
Go from Hello World to writing a short random quote generator using Python.
Python
Learn how to create a dice-rolling app with Python!
Python
Intermediate NodeJS Course
This tutorial expands on concepts in the intro to Node.js and Express.js course. You will learn how to use a database (MongoDB) to Create, Read, Update, and Delete data.
node.js
express.js
mongoose.js
JavaScript
MongoDB
Learn the basics of Ruby. Make a hello world program, then include if/else statements
Ruby
TensorFlow Image Processing
Get started with Machine Learning (ML)/Neural Network (NN) tools
TensorFlow
Python
Machine learning
Neural network
Predict Pokemon stats with the help of the TensorFlow library
TensorFlow
Python
Machine learning
Neural network
Java is an object oriented programming language, which is popular for multi-platform apps.
Java
Introduction to PHP
PHP is a server-side programming language that can insert dynamic code into your HTML. PHP is used in popular content management systems, such as WordPress and Drupal.
PHP
Introduction to Design Thinking
Design Thinking is a human-centric approach to creating solutions. This course will teach you the principles of Design Thinking and walk you through applying its five phases to your projects.
Setting up a Reason React App
Hello and welcome!
In this lab we will cover the basic setup needed to build Reason React applications, covering testing, documenting them, building, and releasing them!
reason
bucklescript
reason-react
react
Learn the basics to create an Express server and follow the REST principles.
NodeJS
JavaScript
Express
Server
In this course you will learn how to create an Android application that displays a TomTom Map
android
tomtom-sdk
maps
Notating with LilyPond
LilyPond is an open source technology for notating music in plain text files. In this course, we’ll cover the fundamentals of music notation in LilyPond.
Introduction to React
In this course, you will learn the basics of React.js through building a gradebook web application to manage assignments, students, and grades.
Common Continuous Integration Team Scenarios
The course guides participants through situations commonly encountered when integrating continuously as a team.
CI
Continuous Integration
Git
DevOps
Team Work
Our Learning Paths
First Day on GitHub
Welcome to GitHub! We’re so glad you’re here. We know it can look overwhelming at first, so we’ve put together a few of our favorite courses for people logging in for the first time
-
What is GitHub?
-
Introduction to GitHub
-
Git Handbook
First Week on GitHub
After you’ve mastered the basics, learn some of the fun things you can do on GitHub. From GitHub Pages to building projects with your friends, this path will give you plenty of new ideas.
-
Discover GitHub Pages
-
GitHub Pages
-
Reviewing pull requests
DevOps with GitHub Actions
Learn how to do DevOps on GitHub with the power of GitHub Actions! This path will guide you through leveraging GitHub Actions to go from code to cloud.
-
GitHub Actions: Hello World
-
GitHub Actions: Continuous Integration
-
GitHub Actions: Publish to GitHub Packages
Сервис для хостинга проектов GitHub
Крупнейшим сервисом для хранения Git-проектов является GitHub.

Этот сервис позволяет размещать проекты любой сложности. В частности, на GitHub размещен исходный код ядра Linux.
В 2018 году Microsoft купила GitHub за 7,5 млрд долларов.
До апреля 2020 г. на GitHub можно было бесплатно размещать только открытые проекты.
Сейчас можно размещать бесплатно как открытые, так и закрытые проекты. На сервисе GitHub по состоянию на май 2021 г. было зарегистрировано 65 миллионов программистов.
На GitHub есть система звезд, которые выставляются репозиториям. По количеству звезд можно находить самые востребованные проекты.
Open Source Licenses and Notices
The open source license for the Software is included in the «Open
Source Notices» documentation that is included with the Software.
That documentation also includes copies of all applicable open
source licenses.
To the extent the terms of the licenses applicable to open source
components require GitHub to make an offer to provide source code in
connection with the Software, such offer is hereby made, and you may
exercise it by contacting GitHub:
https://github.com/contact.
Unless otherwise agreed to in writing with GitHub, your agreement
with GitHub will always include, at a minimum, these Application
Terms. Open source software licenses for the Software’s source code
constitute separate written agreements. To the limited extent that
the open source software licenses expressly supersede these
Application Terms, the open source licenses govern your agreement
with GitHub for the use of the Software or specific included
components of the Software.
? What’s the big difference?
The control mechanism is also quite different. There are two general ways to support multiple node installations with hot switching capabilities. The first is to modify the system any time you switch versions, or bypass it by using a file to mimic the node executable and redirect accordingly. This always seemed a little hackish to me, and there are some quirks as a result of this implementation.
The second option is to use a symlink. This concept requires putting the symlink in the system , then updating its target to the node installation directory you want to use. This is a straightforward approach, and seems to be what people recommend…. until they realize just how much of a pain symlinks are on Windows. This is why it hasn’t happened before.
In order to create/modify a symlink, you must be running as an admin, and you must get around Windows UAC (that annoying prompt). Luckily, this is a challenge I already solved with some helper scripts in node-windows. As a result, NVM for Windows maintains a single symlink that is put in the system during installation only. Switching to different versions of node is a matter of switching the symlink target. As a result, this utility does not require you to run every time you open a console window. When you do run , the active version of node is automatically updated across all open console windows. It also persists between system reboots, so you only need to use nvm when you want to make a change.
Overall, this project brings together some ideas, a few battle-hardened pieces of other modules, and support for newer versions of node.
Страницы GitHub
На GitHub есть еще полезная услуга, которая называется GitHub Pages
Вы получаете один сайт для каждой учетной записи GitHub и неограниченное количество сайтов для проектов.
Для создания страниц Github нужно создать репозиторий с именем аккаунта. Адрес этой страницы будет иметь вид:
https://username.github.io
Адреса проектов будут иметь вид:
http://username.github.io/repository
На этих сайтах можно размещать только статические страницы (HTML, CSS). Основное назначение — описание проектов.
Все эти возможности GitHub делают данный сервис весьма полезным для работы программиста.
Bitcoin username registration
This feature is not going to work on the live Bitcoin network until the OP_RETURN length is increased from 40 to 80 bytes, which will happen in Bitcoin Core v0.11, currently scheduled for release on July 1 2015. Until then, we’ll use the Bitcoin testnet, but username registrations will be discarded when the move to the live network happens.
Our DHT can’t resolve arguments over which mutable key owns a given username — we need something capable of distributed consensus (like a blockchain) for that.
The idea of using OP_RETURN comes from telehash’s blockname project, but while blockname registers domain names on the blockchain, we’re registering username<->key mappings instead. The format is:
e.g.
Note that OP_RETURN transactions are limited to 80 bytes, which limits usernames in this scheme to 27 bytes.
As a convenience, this repository will include a database of registered usernames that is updated regularly. This doesn’t make GitTorrent any more centralized — you can run the same scripts yourself on a downloaded blockchain to make sure that this repository does not lie. This is just to save everyone from downloading tens of gigabytes of blockchain to process.
By the way, storing full Bitcoin history is not necessary. We just need to scan every transaction once, and can discard each transaction after we’ve scanned it once and determined whether it contained a valid username registration that we record. We just need to scan through all unprocessed blockchain transactions once, and record where we got up to so that we don’t have to look at them again after that.
Регистрация на GitHub
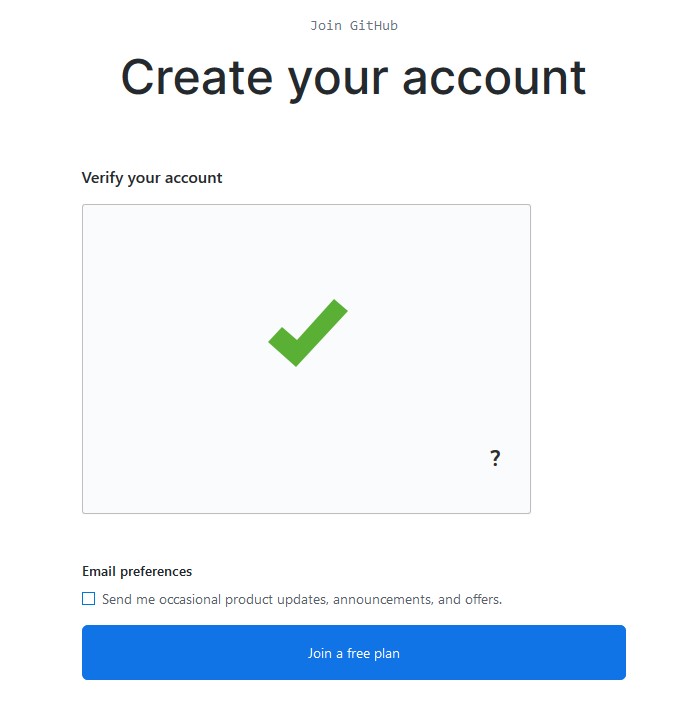
На главной странице заполняем форму справа и нажимаем “Sign up for GitHub”
Проходим проверку и нажимаем “Join a free plan”
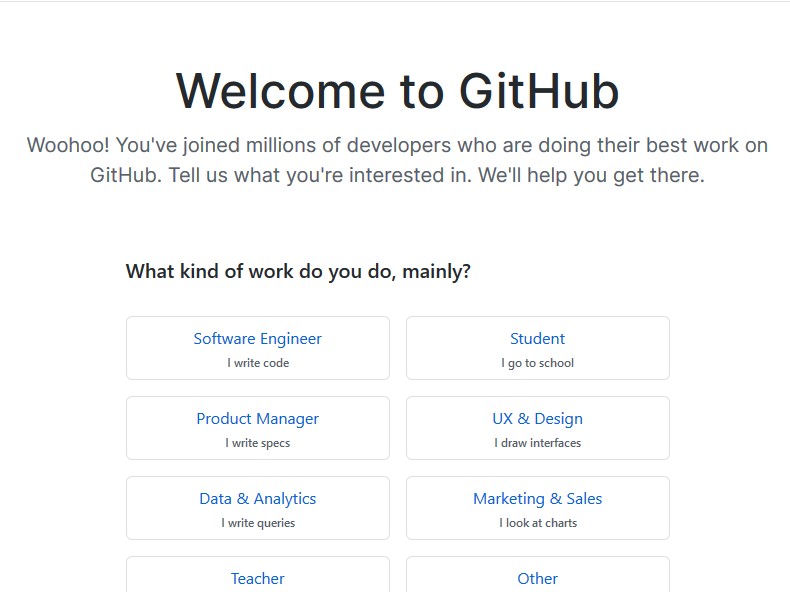
На следующей странице можно заполнить небольшую анкету (можно не заполнять)
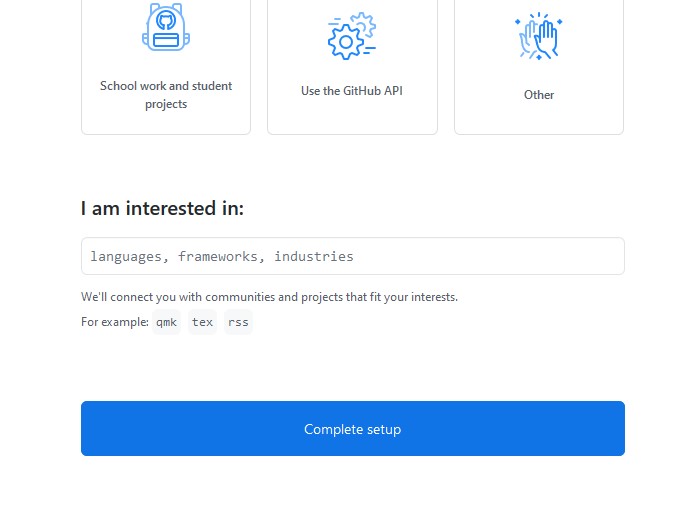
На этой же странице спускаемся в самый низ и нажимаем “Complete setup”
Проверяем свою почту. Если письмо пришло, переходим к следующему пункту.
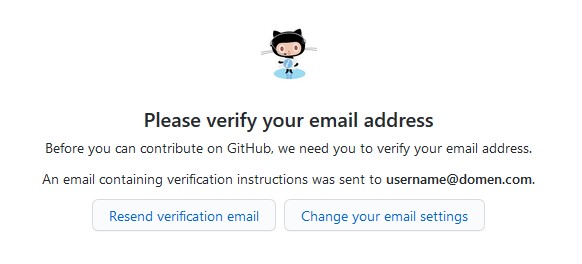
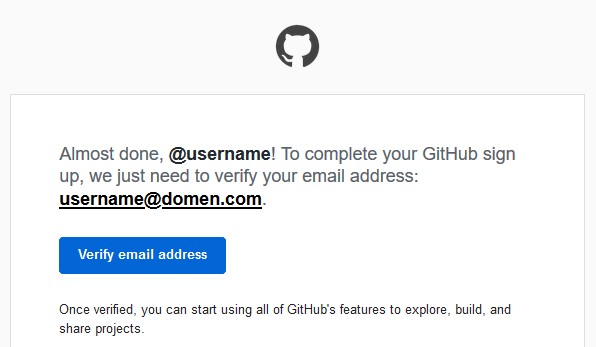
Аккаунт GitHub успешно создан
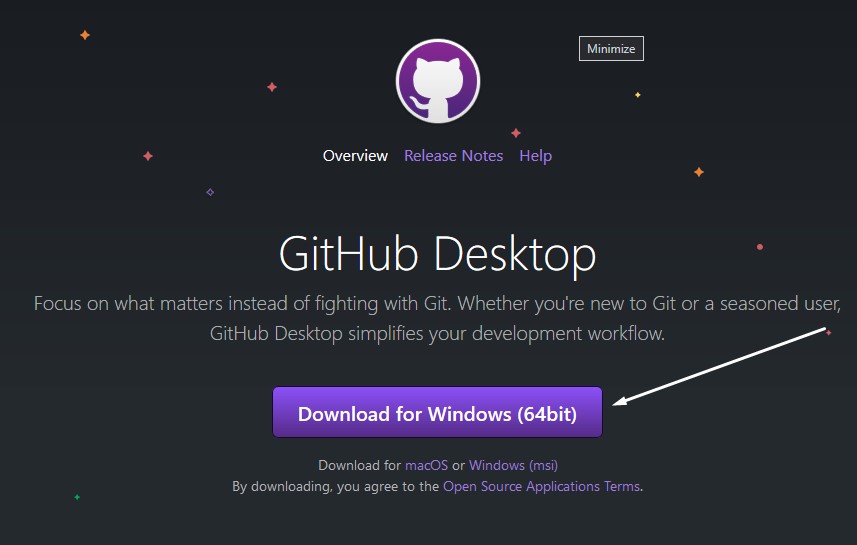
Установка GitHub Desktop
Нажимаем “Download for Windows (64bit)” (операционная система может отличаться)
Запускаем скачанный файл. После установки в появившемся окне нажимаем “Sign in to GitHub.com”
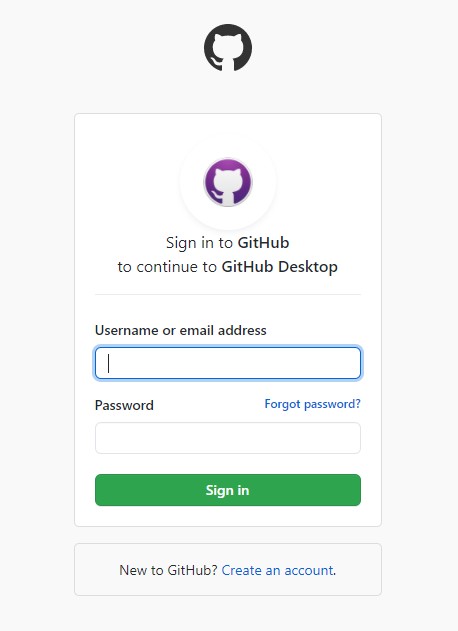
В открывшемся окне браузера вводим в форму свои данные, как при регистрации, и нажимаем “Sign in”
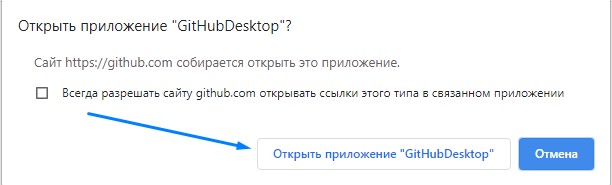
Если браузер запросит, то подтвердить, что нужно “Открыть приложение GitHub Desktop”
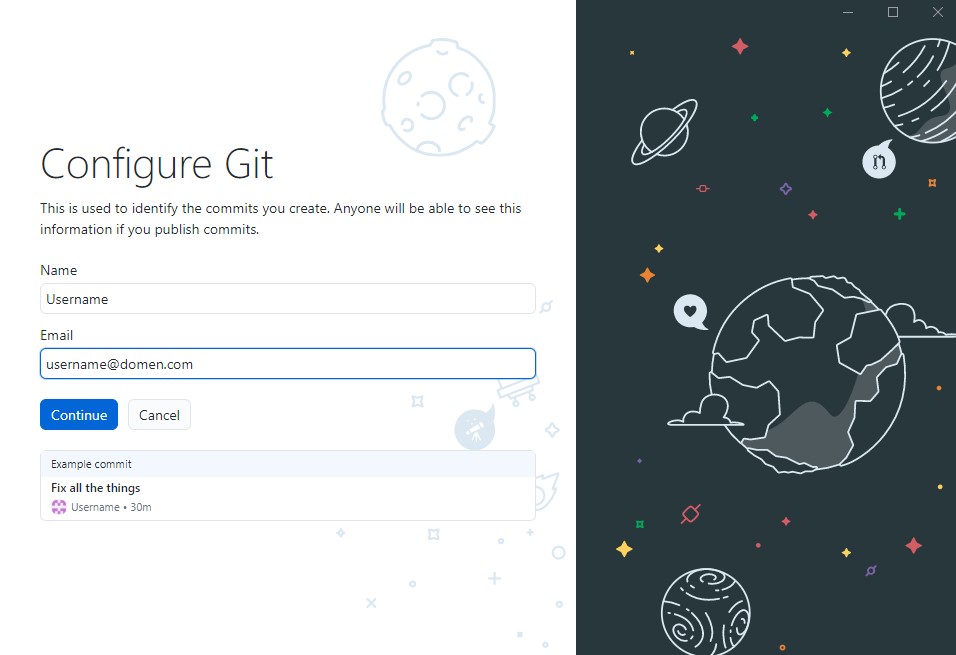
Далее регистрационные данные перенесутся в форму конфигурации (настроек) Git — нажимаем “Continue”
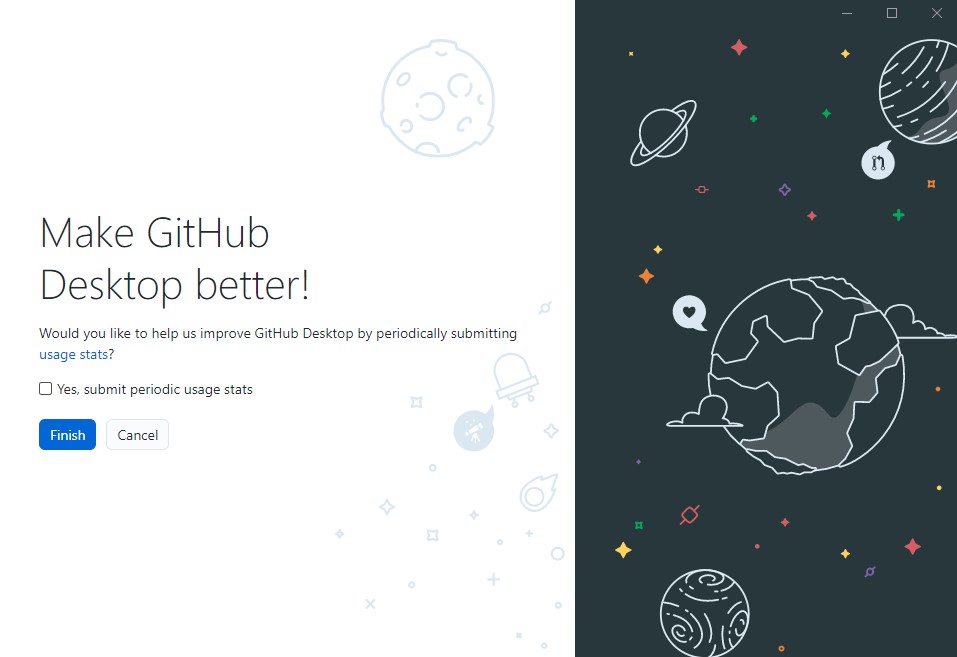
Отключаем пункт “Yes, submit periodic usage stats”, если не хотите периодически передавать статистику работы GitHub Desktop и нажимаем “Finish”
Далее видим начальное окно GitHub Desktop
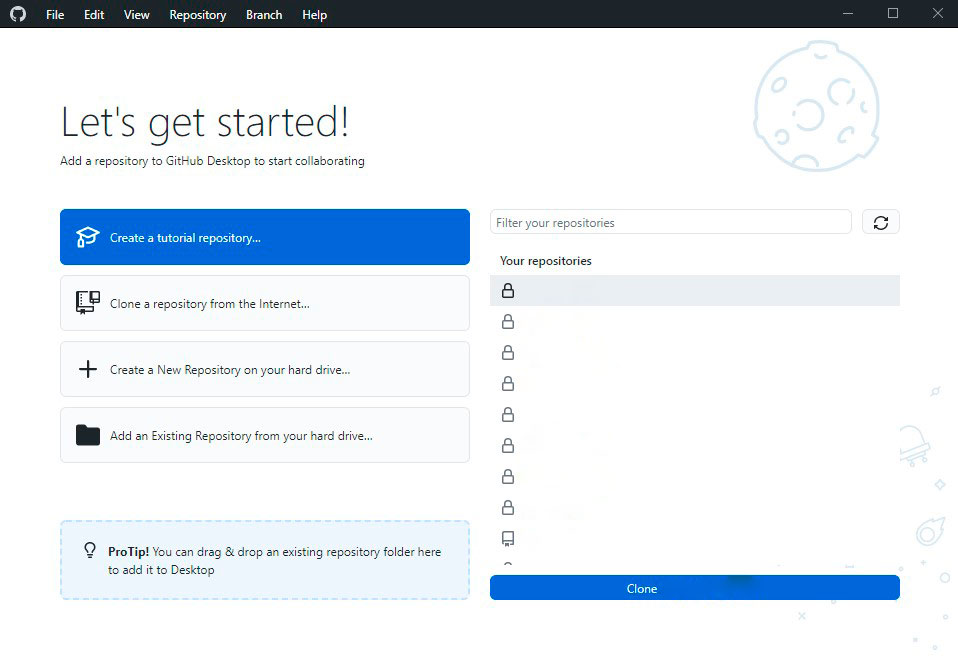
“Create a tutorial repository…“ — создать обучающий репозиторий
“Clone repository from the Internet…“ — клонировать (скопировать/скачать) репозиторий из GitHub к себе на компьютер
“Create a New Repository on your hard drive…“ — создать новый репозиторий на вашем жестком диске (на вашем компьютере) и добавить систему Git в проект
“Add an Existing Repository from your hard drive…“ — добавить на GitHub репозиторий, который уже есть на вашем компьютере и использует Git
Справа будут отображаться ваши репозитории, которые уже загружены на GitHub, но если только что зарегистрировались, то список будет пуст.
Install Git on Windows
- Navigate to the latest Git for Windows installer and download the latest version.
- Once the installer has started, follow the instructions as provided in the Git Setup wizard screen until the installation is complete.
- Open the windows command prompt (or Git Bash if you selected not to use the standard Git Windows Command Prompt during the Git installation).
- Type to verify Git was installed.
Note: is a popular and recommended resource for downloading Git for Windows. The advantage of downloading Git from is that your download automatically starts with the latest version of Git included with the recommended command prompt, . The download source is the same Git for Windows installer as referenced in the steps above.
Step 2. Create a Branch
Branching is the way to work on different versions of a repository at one time.
By default your repository has one branch named which is considered to be the definitive branch. We use branches to experiment and make edits before committing them to .
When you create a branch off the branch, you’re making a copy, or snapshot, of as it was at that point in time. If someone else made changes to the branch while you were working on your branch, you could pull in those updates.
This diagram shows:
- The branch
- A new branch called (because we’re doing ‘feature work’ on this branch)
- The journey that takes before it’s merged into
Have you ever saved different versions of a file? Something like:
Branches accomplish similar goals in GitHub repositories.
Here at GitHub, our developers, writers, and designers use branches for keeping bug fixes and feature work separate from our (production) branch. When a change is ready, they merge their branch into .
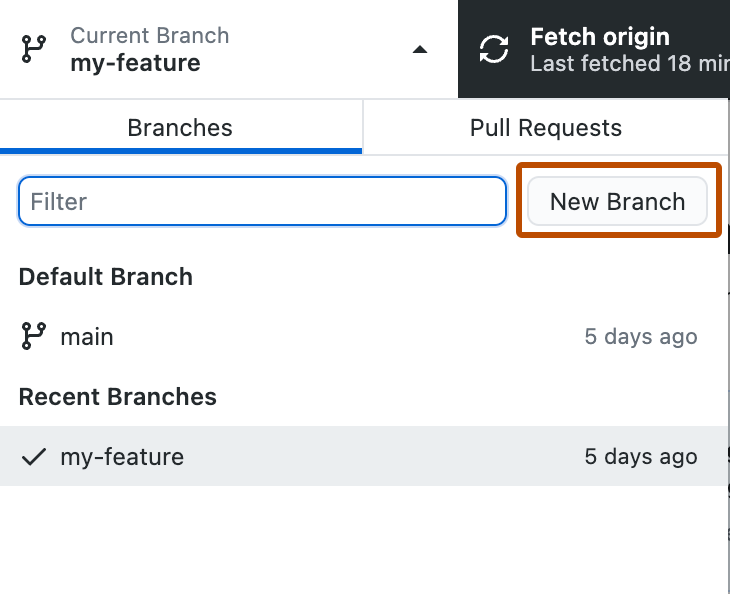
To create a new branch
- Go to your new repository .
- Click the drop down at the top of the file list that says branch: main.
- Type a branch name, , into the new branch text box.
- Select the blue Create branch box or hit “Enter” on your keyboard.

Now you have two branches, and . They look exactly the same, but not for long! Next we’ll add our changes to the new branch.
DevOps with GitHub
Continuous integration with CircleCI
Learn how to automatically test changes made to your project, freeing you up to write more amazing code.
Continuous Integration
Continuous integration with Travis CI
Learn about the principles of continuous integration with GitHub and Travis CI.
continuous integration (CI)
test-driven development (TDD)
YAML
protected branches
commit status
Getting started with GitHub Apps
Add your own GitHub feature, automate workflows, and more with GitHub Apps.
webhooks
API
GitHub Apps
Probot
Installing
CodeQL U-Boot Challenge (C/C++)
Learn to use CodeQL, a query language that helps find bugs in source code. Find 9 remote code execution vulnerabilities in the open-source project Das U-Boot, and join the growing community of security researchers using CodeQL.
