Dwg trueview
Содержание:
- Предварительный просмотр и печать
- четверг, 6 апреля 2017 г.
- Prevent a Desktop Shortcut from Being Installed
- Install Autodesk Design Review 2013 Silently
- FAQ
- Obtaining and Installation
- General Installation Notes
- Электронные пометки в 2D и 3D проектах
- Finally getting into it
- Рабочий процесс цифрового проектирования
- Prevent Checking for Updates
- Prevent a Desktop Shortcut from Being Installed
- Prevent Checking for Updates
- Install Autodesk Design Review 2013 Manually
- Uninstall Autodesk Design Review 2012
- Install Autodesk Design Review 2012 Silently
- Collaborating with Design Review
- What Are the Dangers of Downloading Torrents?
- Install Autodesk Design Review 2012 for Mass Deployment
Предварительный просмотр и печать
- Перед выводом на печать файлы можно просматривать; кроме того, для печати существуют такие опции, как вписывание в страницу, вывод текущего вида, комбинирование листов, печать нескольких страниц и диапазонов.
- Печать может осуществляться в исходном или явно заданном масштабе.
- Печать DWF-файлов возможна без дополнительных адаптеров объектов, файлов внешних ссылок и стилей печати.
- При печати обеспечивается такая же визуальная верность, как и в САПР Autodesk.
- Поддерживается крупноформатная печать.
- Чертежи, карты и модели могут выводиться в цветном и черно-белом вариантах, а также в оттенках серого.

Предварительный просмотр и печать
четверг, 6 апреля 2017 г.
Design Review умер. Да здравствует Design Review!
Я не просто так перефразировал в заголовке известную фразу. Все мы помним, что Autodesk в какой-то момент перестал обновлять Design Review и последней стала версия Autodesk Design Review 2013. Но вот прошло пять лет и вышла новая версия Design Review.
Правда, видимо для того, чтобы не путать пользователей и не провоцировать лишние вопросы, программа больше не имеет номера, называется просто Autodesk Design Review.
Программа доступна на 11 языках, включая русский (об этом ниже).
Что нового в Autodesk Design Review
Ни интерфейс, ни функциональные возможности программы не поменялись

Но что же все-таки нового:
- Реализована поддержка работы приложения на платформе Windows 10
- На ленте Ресурсы добавились кнопки запуска «облачных» служб и приложений A360, BIM 360 и AutoCAD 360
- В приложение интегрирован Инфоцентр (Autodesk InfoCenter)
- Из приложения удалена поддержка службы печати HP Instant Printing
В остальном Design Review остался привычным и удобным инструментом для просмотра и работы с файлами DWF и многими другими.
Что такое Design Review и формат DWF
Бесплатная программа Autodesk Design Review предназначена для просмотра, нанесения пометок, печати и отслеживания изменений в файлах 2D-чертежей и 3D-моделей. Программа позволяет работать с файлами следующих форматов: DWF, DWFx, DWG, DXF, PDF, bmp, jpg, gif, pcx, pct, png, rlc, tga, tif, mil, cal и многими другими.
Текущая версия программа выпускается на 11 языках, но обратите внимание, что дистрибутив русской версии вынесен отдельно

Дело в том, что на русский язык программа была переведена в 2013 году силами активистов Сообщества пользователей Autodesk, во главе этого проекта стоял Илья Глуханюк.
Что такое формат DWF, чем он отличается от DWG и для чего он нужен, лучше всего рассказал все тот же Илья Глуханюк в своем легендарном докладе «От DWG до DWF один шаг», с которым он выступал на всех САПРяжениях-2013. Посмотрите, не пожалеете!
Немного истории. Как появился формат DWF
Формат DWF придумал Брайан Мэтьюс (Brian Mathews), который теперь занимает должность вице президента (VP) и технического директора (CTO) в Autodesk. Первым шагом компании к обмену чертежными данными через интернет стал плагин WHIP! для браузера Netscape Navigator. В то время Internet Explorer еще не отвоевал рынок. Изначально разработчики Autodesk хотели назвать свои файлы для обмена чертежными данными whip (.whp). Но, вице президент по AutoCAD Джон Линч (John Lynch) побоялся, что пользователи не будут ассоциировать эти файлы с Autodesk, поэтому название поменяли на Drawing Web Format (DWF). После того, как стало возможным генерировать такие файлы не только с помощью программ от Autodesk, но и с помощью сторонних приложений, название эволюционировало в привычное Design Web Format (DWF).
Первой бесплатной версией Design Review (прародителем программы были продукты DWF Composer и DWF Viewer) стала Design Review 2007, вышедшая в феврале 2007 года. До выхода версии 2007 года программа была платная и стоила $199 за рабочее место!
Позже в 2012 году Autodesk прекратил развитие продукта и последней версией стал Design Review 2013. Причину закрытия продукта объяснили тем, что вся его функциональность перейдет в «облачный» сервис Autodesk 360.

Однако, полного замещения не случилось, и теперь разработчики возродили продукт, немного обновив его.
При этом совершенно понятно, что это временное «воскрешение из мертвых» и, рано или поздно, этот продукт будет полностью снят с поддержки и разработки, как только «облачный» сервис доведут до ума. А пока пользуемся!
Важно: для завершения установки Autodesk Design Review может потребоваться перезагрузка компьютера. Перед началом установки рекомендуется сохранить все открытые файлы и закрыть все работающие приложения
Prevent a Desktop Shortcut from Being Installed
The commands detailed in this section are case sensitive.
Download SetupDesignReview2013.msi.zip from the Design Review website: http://www.autodesk.com/designreview-download-network. Extract the zip file. The default install path is C:\Program Files\Autodesk\ or C:\Program Files (x86)\Autodesk\.
By default, the installer creates a DesignReview.exe shortcut on the desktop which corresponds to the install internal property (ADSK_DESKTOPSHORTCUT_1) value being equal to 1. To disallow setup from creating this shortcut, the property value has to be set to 0. To change this value when setup is run from a DOS prompt, use this command:
MsiExec /i SetupDesignReview2013.msi ADSK_DESKTOPSHORTCUT_1=0
MsiExec allows many properties to be set at the end of a command. All these properties are always UPPERCASE. For a full list of MsiExec.exe generic command-line options, from the DOS prompt, use this command:
MsiExec.exe /?
This information is also available on Microsoft’s website: http://msdn2.microsoft.com/en-us/library/aa367988.aspx.
Install Autodesk Design Review 2013 Silently
The commands detailed in this section are case sensitive.
When Design Review 2013 is installed silently, previous versions of Design Review can be uninstalled automatically. Previous versions of Import Plug-ins cannot be uninstalled automatically, and must be uninstalled prior to installing Design Review 2013.
Download SetupDesignReview2013.msi.zip from the Design Review website: http://www.autodesk.com/designreview-download-network. Extract the zip file. The default install path is C:\Program Files\Autodesk\ or C:\Program Files (x86)\Autodesk\.
- Uninstall previous versions of the DGN and JT Importer Plug-ins prior to installing Design Review 2013.
- Before installing the product you must download and install these Microsoft software components:
- Microsoft Visual C++ 2010 SP1 Redistributable Package (x86) available from Microsoft’s website: http://www.microsoft.com/download/en/details.aspx?id=8328
- Microsoft .NET Framework 4 available from Microsoft’s website: http://www.microsoft.com/downloads/en/details.aspx?FamilyID=9cfb2d51-5ff4-4491-b0e5-b386f32c0992
- Choose one of these silent install options:
- Double-click the MSI file to start the installer. Follow the prompts to proceed with the installation. The installer will close when installation is done.
- From a DOS prompt, use this command:
MsiExec.exe /qn /i SetupDesignReview2013.msi
This silent installation method installs the product using the default install path. When setup is done, a shortcut for Design Review will be created on the desktop.
- To change the location where the product is installed, use this command:
MsiExec.exe /qn /i SetupDesignReview2013.msi INSTALLDIR=»MyInstallPath»
Replace «MyInstallPath» with the location where you want the product installed.
This silent installation method installs the product using the specified path. When setup is done, a shortcut for Design Review will be created on the desktop.
FAQ
Autodesk Design Review is a free program for creating and viewing DWF files. In this software, you can view, mark, print, and track changes made to 2D and 3D files without using original design software.
Is Autodesk Design Review free?
Yes, the program is completely free.
DOWNLOAD FOR FREE
What file formats does the program support?
The program supports such file formats – DWF, DWFx, DWG and DXF (you need to install the free DWG TrueView software); Adobe PDF; as well as .bmp, .jpg, .gif, .pcx, .pct, .png, .tif and others.
Can I save data in a PDF format?
You can view the PDF file and print the markup in this format. But it isn’t yet possible to save data as PDF.
Is there is a version of Autodesk Design Review for Mac?
No, this program is compatible with Windows only.
Obtaining and Installation
Design Review can be downloaded from the Autodesk website but before you can begin you must provide Autodesk with a few personal and professional details. For what is now free software this seems counter productive as it acts as a barrier to distribution. If you are a software vendor and you want your software tool to become ubiquitous so that your format becomes dominant in the industry (i.e. like Flash and PDF) your software needs to be easily accessible and preferably available from a range of download sites (i.e. download.com).
Just to make things even more convoluted you must take note of a serial number discretely printed on the download page, then browse to another web page altogether to obtain the highly recommended Service Pack 1 installer. Maybe it is just me but if you are going to the effort of heavily publicising your now free product wouldn’t it also be a good idea to help this flood of new users out by slipstreaming the service pack into the installer and removing the need for a serial number? Hopefully with the release of Autodesk Design Review 2008 in April these things get cleared up, because if Design Review is to really take off (which I think it could) it has to be painless to attain and install. And please Autodesk if you are listening drop the idea of a ‘Service Pack’ for a product with a yearly update cycle, either get it right the first time or integrate an automated update mechanism within the program like most software vendors are doing these days.
General Installation Notes
- Design Review 2013 silently and automatically uninstalls previous versions of Design Review, Autodesk DWF Viewer, and Autodesk DWF Composer. Design Review 2013 will prompt you to uninstall instances of Volo View manually.
- Log files are generated when you use the Design Review website to download and install the product. Log files are also generated if the installation from the website was unsuccessful. During installation, log files are placed in the %temp%\AutodeskDesignReview2013Logs folder. After installation, the log files are moved to the \Logs folder. In most cases, the default install directory is «C:\Program Files\Autodesk\Autodesk Design Review 2013\Logs». (Installing Design Review using the standalone MSI, EXE, or bundle installer generates a log file in the folder %temp%: Autodesk Design Review 2013.log.)
- To open DWG files with Design Review, you must have the free Autodesk DWG TrueView installed. Older versions of Design Review are not compatible with newer versions of DWG TrueView. Solution: Install versions of Design Review and DWG TrueView that have the same product year.
- The in-product Help file is available in English only.
-
When installing Design Review and Autodesk DWG TrueView the installation order is not important. However, in some cases, the DWGImporter.dll might not be registered correctly. Solution: Register the DWGImporter.dll manually.
- From the Windows taskbar, choose Start > Run.
- In the text box, type regsvr32 «C:\Program Files\Autodesk\Autodesk Design Review\DWGImporter.dll»
- Press Enter. This should register the DLL.
Электронные пометки в 2D и 3D проектах
- В вашем распоряжении — полный набор функций для нанесения электронных пометок там, где требуется внести изменения в 2D и 3D чертежи, карты и модели.
- Комментарии оформляются с помощью привычных функций рисования.
- При создании аннотаций и пометок можно использовать штампы и пользовательские обозначения.
- Существует возможность создания персонализированного каталога обозначений из различных источников, в том числе библиотек блоков, опубликованных в формате DWF из AutoCAD и других САПР Autodesk.
- Пользовательские обозначения, тексты, штемпели, прямоугольники и эллипсы можно масштабировать и поворачивать.
- Пометки, нанесенные на 3D модели, видны и при их просмотре в исходных САПР.
Электронные пометки в 2D и 3D проектах
Finally getting into it
Things get a lot better once you move past the overly painful installation process. On opening Autodesk Design Review you are presented with a clear set of options that help you get working with documents or learn the program.
Interface wise Design Review feels like Adobe Reader crossed with an slim version of AutoCAD. To avoid cutting into the functionality of other products Design Review is not intended as a content creation tool and instead focuses on the viewing and annotating of documents primary created by CAD or BIM software such as Autodesk Revit. Those familiar with Autodesk products will feel right at home with the interface as it borrows significantly from AutoCAD right down to the appearance of many icons. For existing Autodesk users this is great for productivity but for those used to a competitor’s product or who have not used CAD coming to grips with some Autodesk axioms can take a lot of time and patience.
Design Review supports 2D/3D files in DWF format and a wide variety of 2D raster file types such as TIFF and JPEG. Design Review can also import DWG and DXF data into a new or existing DWF file. This is a useful capability to have during collaboration as it means the DWF becomes a bi-directional platform for information, quite unlike PDF which are fairly static without the purchase of a costly editing tool like Adobe Acrobat Professional.
 The File -> Open dialog illustrating most of the supported formats
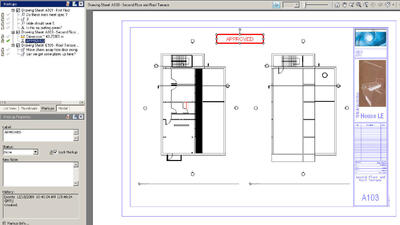
When a DWF file is opened you can browse through the various layers, objects and views. This allows the user to quickly locate or hide aspects of the document when taking measurements or annotating. Like most Autodesk products Design Review utilises side-panel to display the properties of a selected object and a run-down of a document’s annotations. Again this is all very familiar territory if you are an Autodesk user but somewhat overwhelming if new to the product line or CAD in general.
Рабочий процесс цифрового проектирования
Как правило, файлы DWF формируются при создании чертежа или модели в таких программах Autodesk, как AutoCAD, Inventor и Revit. Перед публикацией файла DWF автор определяет, какие элементы (модель, листы, слои, блоки, именованные виды и т. п.) включаются в публикуемый файл DWF. Определив содержимое, он публикует исходный файл в формат DWF, а затем отправляет DWF группе рецензентов для проверки цифрового проекта.
- Получение. Рецензенты получают файл DWF от автора публикации, открывают его в Design Review для проверки содержимого (такого как 2D-чертеж, 3D-модель или изображение).
- Просмотр. Рецензенты добавляют цифровые комментарии и пометки в файл DWF с использованием выносных элементов, текста, фигур, размеров, отметок и пользовательских обозначений, сохраняя изменения в файле DWF.
- Возврат. Рецензенты отправляют файл DWF с пометками автору публикации.
- Пересмотр. Проектировщик импортирует файл DWF с пометками с помощью ПО публикации и, просматривая комментарии в контексте, быстро вносит изменения в исходный проект.
- Повторная публикация. После исправления исходного проекта в ПО публикации проектировщик повторно публикует обновленный файл DWF, новую подшивку или модель, чтобы повторно начать процесс цифрового проектирования.
Prevent Checking for Updates
By default the application will periodically check for updates and display marketing dialogs. Administrators can now disable that functionality during the install by applying these parameters to the setup.ini file in the section in the EXE_PARAM:
EXE_PARAM=ADR_DONOTSHOWAGAIN=1 ADR_NEXT_INITIAL_CHECK=1 PREFERENCELOCKED=1
The expected result should show the registry settings for HKLM\Software\Autodesk\Design Review\Settings\AutoUpdate as follows:
- DoNotShowAgain=1
- InitialCheck=1
- Locked=1
Autodesk Design Review 2012 should not check for updates now and you should not see the marketing dialog box when you first run the application.
Administrators who wish to disable the functionality through the MSI instead can use these parameters:
ADR_DONOTSHOWAGAIN=1 ADR_NEXT_INITIAL_CHECK=1 PREFERENCELOCKED=1
Users with an account that does not have write permission on HKLM, will not be able to override the preset behavior.
Prevent a Desktop Shortcut from Being Installed
The commands detailed in this section are case sensitive.
Download SetupDesignReview2012.msi.zip from the Design Review website: http://www.autodesk.com/designreview-download-network. Extract the zip file. The default install path is C:\Program Files\Autodesk\ or C:\Program Files (x86)\Autodesk\.
By default the installer creates a DesignReview.exe shortcut on the desktop which corresponds to the install internal property (ADSK_DESKTOPSHORTCUT_1) value being equal to 1. To disallow setup from creating this shortcut, the property value has to be set to 0. To change this value when setup is run from a DOS prompt, use this command:
MsiExec /i SetupDesignReview2012.msi ADSK_DESKTOPSHORTCUT_1=0
MsiExec allows many properties to be set at the end of a command. All these properties are always UPPERCASE. For a full list of MsiExec.exe generic command-line options, from the DOS prompt, use this command:
MsiExec.exe /?
This information is also available on Microsoft’s website: http://msdn2.microsoft.com/en-us/library/aa367988.aspx.
Prevent Checking for Updates
By default, the application will periodically check for updates and display marketing dialogs. Administrators can now disable that functionality during the install by applying these parameters to the setup.ini file in the section in the EXE_PARAM:
EXE_PARAM=ADR_DONOTSHOWAGAIN=1 ADR_NEXT_INITIAL_CHECK=1 PREFERENCELOCKED=1
The expected result should show the registry settings for HKLM\Software\Autodesk\Design Review\Settings\AutoUpdate as follows:
- DoNotShowAgain=1
- InitialCheck=1
- Locked=1
Autodesk Design Review 2013 should not check for updates now and you should not see the marketing dialog box when you first run the application.
Administrators who wish to disable the functionality through the MSI instead can use these parameters:
ADR_DONOTSHOWAGAIN=1 ADR_NEXT_INITIAL_CHECK=1 PREFERENCELOCKED=1
Users with an account that does not have write permission on HKLM, will not be able to override the preset behavior.
Install Autodesk Design Review 2013 Manually
You can choose between two manual installation methods: the Bootstrap Installer and the Executable Installer.
The first method for a manual install, the Bootstrap Installer, is available here: http://www.autodesk.com/designreview-download. It is a flexible way to download and install the application and any missing prerequisites the computer may need. The Bootstrap Installer is the quickest method, since it only installs what is needed without requiring you to download the entire Executable Installer. The Bootstrap Installer uses only default values, which means it is a typical installation being installed to C:\Program Files\Autodesk\ or C:\Program Files (x86)\Autodesk\.
When the Design Review 2013 installer detects an earlier version of Design Review, the earlier version will be uninstalled automatically before Design Review 2013 is installed. If detected during the install, previous versions of the DGN and JT Import Plug-ins will also be automatically uninstalled.
The second method for a manual install, the Executable Installer, requires you to download the entire executable installer file. The EXE file is available here: http://www.autodesk.com/designreview-download-network
- Launch the EXE file and click Setup.
- The Design Review 2013 Installation Wizard opens. Click Install.
- On the License Agreement page, choose your Country or Region and review the Autodesk License and Services Agreement. You must accept this agreement to proceed with the installation. Click I Accept, and then click Next.
Note: If you do not accept the agreement and want to terminate the installation, click Cancel.
Optional: Change the configuration settings. On the Configure Installation page, below the Autodesk Design Review 2013 checkbox, you can display configuration options by clicking the triangular icon. If you do not modify the configuration:
- A typical installation is used, installing the most common application features for each product, including all required prerequisites.
- Design Review 2013 is installed to the default install path of C:\Program Files\Autodesk or C:\Program Files (x86)\Autodesk\. (If desired, use the Browse button to select a different install path.)
Click Install.
You are notified that the product has been installed. Click Finish.
Uninstall Autodesk Design Review 2012
Uninstalling Design Review 2012 removes all of the product’s installation files from the computer. Autodesk Design Review Plug-ins must be uninstalled separately.
- Use the Control Panel to display the Add or Remove Programs window (Windows XP) or the Uninstall or Change a Program window (Windows Vista and Windows 7).
- From the list of programs, select Autodesk Design Review 2012, and click Change/Remove (Windows XP) or Uninstall/Change (Windows Vista and Windows 7).
- Click Uninstall. The Uninstall Autodesk Design Review 2012 window displays.
- Click Uninstall.
- You are notified that the product has been successfully uninstalled. Click Finish.
Install Autodesk Design Review 2012 Silently
The commands detailed in this section are case sensitive.
When Design Review 2012 is installed silently, previous versions of Design Review can be uninstalled automatically. Previous versions of Import Plug-ins cannot be uninstalled automatically, and must be uninstalled prior to installing Design Review 2012.
Download SetupDesignReview2012.msi.zip from the Design Review website: http://www.autodesk.com/designreview-download-network. Extract the zip file. The default install path is C:\Program Files\Autodesk\ or C:\Program Files (x86)\Autodesk\.
- Uninstall previous versions of the DGN and JT Importer Plug-ins prior to installing Design Review 2012.
- Before installing the product you must download and install these Microsoft software components:
- Visual C++ 2005 SP1 Redistributable Package (x86) available from Microsoft’s website: http://www.microsoft.com/downloads/details.aspx?familyid=200B2FD9-AE1A-4A14-984D-389C36F85647&displaylang=en
- Visual C++ 2008 SP1 Redistributable Package (x86) available from Microsoft’s website: http://www.microsoft.com/downloads/details.aspx?displaylang=en&FamilyID=2051a0c1-c9b5-4b0a-a8f5-770a549fd78c
- Visual C++ 2010 Redistributable Package (x86) available from Microsoft’s website: http://www.microsoft.com/downloads/en/details.aspx?FamilyID=a7b7a05e-6de6-4d3a-a423-37bf0912db84
- Microsoft .NET Framework 4 available from Microsoft’s website: http://www.microsoft.com/downloads/en/details.aspx?FamilyID=9cfb2d51-5ff4-4491-b0e5-b386f32c0992
- Choose one of these silent install options:
- Double-click the MSI file to start the installer. Follow the prompts to proceed with the installation. The installer will close when installation is done.
- From a DOS prompt, use this command:
MsiExec.exe /qn /i SetupDesignReview2012.msi
This silent installation method installs the product using the default install path. When setup is done, a shortcut for Design Review will be created on the desktop.
- To change the location where the product is installed, use this command:
MsiExec.exe /qn /i SetupDesignReview2012.msi INSTALLDIR=»MyInstallPath»
Replace «MyInstallPath» with the location where you want the product installed.
This silent installation method installs the product using the specified path. When setup is done, a shortcut for Design Review will be created on the desktop.
Collaborating with Design Review
As the name of the product suggests its core functionality lies in reviewing designs. The review process takes place through a very capable callout system which enables users to highlight aspects of the design for commenting on or questioning. The DWF can be then saved and sent back to its original source for these questions to be answered. Design Review does a fairly good job of tracking all of this activity chronologically so it is easy to see who said what and when. However from a usability perspective it is a little confusing that when creating a comment it is referred to as a ‘Callout’ but on the side-panel these comments are listed as ‘Markups’. This is a small thing by why the terminology change when a single term could be consistently applied?
What Are the Dangers of Downloading Torrents?
Even though the program is completely free, you can still come across download links shared on dubious websites. How safe is it to download Autodesk Design Review from third-party resources?
Copyright Infringement
The main problem that users face when downloading unlicensed software is the violation of the US law. In fact, you steal a product created by another person. According to the American copyright law, you have to pay a fine of several thousand dollars, may be disposed of your property or serve a prison term.
Lack of Updates
Only licensed software owners can enjoy program updates. If you downloaded Autodesk 3D Design Review from an unofficial platform, you won’t get any updates and have to work with outdated tools.
Viruses
Your computer may be severely damaged if you install an illegal version of the software, as such files typically contain different viruses, which quickly get on your PC. If you think that your system is fully protected because you use the best free antivirus software, you are wrong, since Trojans have become really crafty and can outflank your antivirus.
Install Autodesk Design Review 2012 for Mass Deployment
The commands detailed in this section are case sensitive.
This installation method is meant to remotely install the Design Review 2012 on a large number of workstations.
Download SetupDesignReview2012.msi.zip from the Design Review website: http://www.autodesk.com/designreview-download-network. Extract the zip file. The default install path is C:\Program Files\Autodesk\ or C:\Program Files (x86)\Autodesk\.
- Create a network share and copy to it both the SetupDesignReview2012.msi and Microsoft’s vcredist_x86.exe package.
- If necessary, uninstall DGN Import Plug-in using this command:
%WINDIR%\SYSTEM32\Msiexec.exe /qn /uninstall {8F7A766B-9E2E-4895-B4B2-958D035F09B9}
- If necessary, uninstall JT Import Plug-in using this command:
%WINDIR%\SYSTEM32\Msiexec.exe /qn /uninstall {F4C0A7CD-3A4C-4275-9CF1-9CD5136E2FE2}
- Install Microsoft Visual C++ 2005 SP1 Redistributable Package (x86), vcredist_x86.exe, available from Microsoft’s website: http://www.microsoft.com/downloads/details.aspx?familyid=200B2FD9-AE1A-4A14-984D-389C36F85647&displaylang=en
To install this package in silent mode, use this command:
vcredist_x86.exe /q:a /c:»vcredist_x86.exe /q:a /c:»»msiexec /i vcredist.msi /qn /l*v %temp%\vcredist_x86.log»» «
- Install Visual C++ 2008 SP1 Redistributable Package (x86) available from Microsoft’s website: http://www.microsoft.com/downloads/details.aspx?displaylang=en&FamilyID=2051a0c1-c9b5-4b0a-a8f5-770a549fd78c
To install this package in silent mode, use this command:
vcredist_x86.exe /q:a /c:»vcredist_x86.exe /q»
- Install Microsoft Visual C++ 2010 Redistributable Package (x86) available from Microsoft’s website: http://www.microsoft.com/downloads/en/details.aspx?FamilyID=a7b7a05e-6de6-4d3a-a423-37bf0912db84
To install this package in silent mode, use this command:
vcredist_x86.exe /q
- Install Microsoft .NET Framework 4 available from Microsoft’s website: http://www.microsoft.com/downloads/en/details.aspx?FamilyID=9cfb2d51-5ff4-4491-b0e5-b386f32c0992
To install this package in silent mode, use this command:
«dotNetFx40_Full_setup.exe /q»
- Install Design Review 2012 using the SetupDesignReview2012.msi package.
For the default path, use this command:
MsiExec.exe /qn /i «\\MyNetworkShare\SetupDesignReview2012.msi»
Replace «MyNetworkShare» with the full path of the network share where the SetupDesignReview2012.msi is located.
For a custom path, use this command:
MsiExec.exe /qn /i «\\MyNetworkShare\SetupDesignReview2012.msi» INSTALLDIR=»MyInstallPath»
Replace «MyNetworkShare» with the full path of the network share where the SetupDesignReview2012.msi is located. Replace «MyInstallPath» with the location where you want the product installed.
These steps can be automated using a variety of scripting languages, or a batch file. Alternatively, mass deployment tools can be used, such as Microsoft’s Active Directory which is beyond the scope of this document.
