Pyqt5 tutorial
Содержание:
- Using the Custom Widget in Qt Designer
- Quality Assurance
- Install pyqt5
- Installing PySide2 and Shiboken2
- PySide
- Summary and Conclusion
- Пишем интерфейс
- System Tray and Notifications
- Customizing a QPushButton Using the Box Model
- Продвинутый вариант
- Basic differences
- Using your generated .ui file
- Defining the Widget’s Plugin Interface
- OpenPGP Public Keys
- Создание GUI (графического интерфейса пользователя)
- General considerations
- Features and Issues
- Действия
- Qt for Python
- Итоги
Using the Custom Widget in Qt Designer
PyQt4 includes a common plugin loader for Qt Designer that enables widgets written in Python, with corresponding plugin interfaces defined in the way shown above, to be automatically loaded by Qt Designer when it is run. However, in order for this to work, we need to place the modules containing the custom widget and its plugin class in the appropriate locations in the file system.
By default, modules containing plugin classes should be located in the python directory inside the directory containing the other Qt plugins for Qt Designer. For testing purposes, the PYQTDESIGNERPATH environment variable can be used to refer to the location of the modules containing the plugin classes.
The modules containing the custom widgets themselves only need to be located on one of the standard paths recognized by Python, and can therefore be installed in the user’s site-packages directory, or the PYTHONPATH environment variable can be set to refer to their location.
Quality Assurance
Python and C++ are two inherently different programming languages. How to apply Quality Assurance (QA) measures to a project strongly depends on the programming language; the differences between the Python bindings of Qt and Qt/C++ are less relevant.
A huge difference between Python and C++ is that Python uses so-called duck-typing and C++ uses static typing. Also in Python, types are dynamically assigned and changed at runtime, which can lead to various runtime errors on the boundary to external systems and when input types aren’t checked correctly.
In C++, many type errors and mistakes can be caught when compiling the application. Similar static analysis tools are available for Python, but many conditions can only be evaluated at runtime. Therefore, it’s even more critical to test Python code thoroughly.
Another essential difference between C++ and Python is how memory management works. Qt/C++ uses a parent-child relationship in its object to free up memory. Python, on the other hand, has a garbage collector. In C++ it’s straightforward to build applications with memory leaks when not being careful. Compared to C++ and even Qt’s memory management, Python is a lot easier to use, at the cost flexibility.
Moreover, it is impossible at the moment to certify Python code for safety-relevant applications such as required in the automotive or aerospace industries.
Testing
When it comes to testing, Python starts to shine again. Pythons duck-typing makes testing-related tasks such as writing mocks for classes and modules very easy and straightforward.
Moreover, Python as a scripting language does not need to be recompiled for running unit tests, which makes test-driven development (TDD) much faster and more fun to work with.
I also would like to highlight the Python testing framework Pytest at this point. Pytest makes writing tests as comfortable as possible. A simple unit test is no more than a Python function inside a Python file next to the source code of the Python module to test. Compared to that, writing a test in C++ is usually a lot more work.
When it comes to testing, keeping things simple is critical. Developers are lazy (that’s usually a good thing) so simpler test code increases the likelihood of tests to be written during development and not in the last minute before completing a project.
Install pyqt5
You need the package for Python and Qt Designer. You can get
both of these by running:
You will find the designer in the directory of
your Python environment and should be available in your as or .
On Mac, I found it can be run from your venv with .
These packages will also provide for converting Designer files to Python
files. It also includes many other utilities like , , , , and more.
If you are using Linux or a system that doesn’t have the packages
for you can usually find the Designer and other apps
in your system’s package repositories. For example, in Fedora
there is a package named .
You can test your installation by attempting to run the Hello World application
in the next section.
Installing PySide2 and Shiboken2
You are maybe wondering why PySide2 and not PySide?
It’s because PySide is for Qt 4 and PySide2 for Qt 5.
Same thing with Shiboken2 (for Qt 5) and Shiboken (for Qt 4).
Now that you have Python on your OS, let’s install PySide2 and Shiboken2.
It’s actually quite easy, just open a console and type the following:
python -m pip install PySide2
You’ll get this message:
Collecting PySide2

  Downloading https://files.pythonhosted.org/packages/e9/0c/9574f74fa125bacb101dfde825f944b567f838d48e56cf7ee02c7fe94e87/PySide2-5.13.2-5.13.2-cp35.cp36.cp37-none-win_amd64.whl (122.1MB)

     |████████████████████████████████| 122.2MB

Collecting shiboken2==5.13.2

  Downloading https://files.pythonhosted.org/packages/5a/c8/2b5c3e29755d862a504c8e225812d2049964a047f3656684577e9e472d8a/shiboken2-5.13.2-5.13.2-cp35.cp36.cp37-none-win_amd64.whl (2.1MB)

     |████████████████████████████████| 2.1MB

Installing collected packages: shiboken2, PySide2

Successfully installed PySide2-5.13.2 shiboken2-5.13.2
You have now PySide2 and Shiboken2 ready to be used.
There are installed at this location:
C:\soft\python37\Lib\site-packages
Shiboken2 won’t be used in this tutorial, indeed PySide2 comes already generated with all what we need.
To be more precise, Shiboken2 is like Boost.Python, that is a wrapper to generate API from C++ code and to be used with Python.
So we’ll use here PySides2 directly without compiling or generating it.
PySide
PySide – это проект программного обеспечения с открытым исходным кодом, который предоставляет привязку Python для фреймворка Qt. Проект PySide был инициирован Nokia и предлагает полный набор Qt c привязкой к нескольким платформам. Техника, используемая в PySide для переноса библиотеки Qt, отличается от PyQt, но API обоих похож. PySide в настоящее время не поддерживается на Qt 5. PySide доступен для Windows, Linux и Mac OS X. Следующая ссылка поможет вам настроить PySide на Windows и Mac OS X: http://qt-project.org/wiki/Category:LanguageBindings::PySide::Downloads.
Предварительные настройки для PySide такие же, как и для PyQt. Давайте посмотрим, как мы можем установить PySide на Ubuntu 16.04 LTS.
Установка PySide в Ubuntu 16.04 LTS
Пакет PySide доступен в репозиториях пакетов Ubuntu. Следующая команда установит модуль PySide и инструменты Qt на Ubuntu:
$ sudo apt-get install python-pyside pyside-tools
Давайте начнем работу с этими модулями, чтобы увидеть различия между ними.
Установка PyQt в Ubuntu 16.04 LTS
Если вы хотите установить PyQt в Ubuntu/Linux, используйте следующую команду. Эта команда установит библиотеку PyQt, ее зависимости и некоторые инструменты Qt:
$ sudo apt-get install python-qt4 pyqt4-dev-tools
Summary and Conclusion
The following graphic summarizes all the differences between Qt/C++ and Qt/Python.

Qt/Python and Qt/C++ comparison chart
Having Python as an option for writing the business logic of your Qt application is tremendous and drastically speeds up development. It certainly opens up new possibilities due to the enormous ecosystem of the Python programming language and community.
On the other hand, the Qt for Python bindings are less tested and contain more issues compared to the C++ equivalents. Moreover, Python is not a suitable programming language for safety-relevant applications. Little support for mobile and embedded applications might be another issue relevant for your use case.
In short, I can recommend trying out Qt/Python for your next application if you are not working in a safety critical environment and you are not interested in mobile support at the moment. With Qt, you are always free to use C++ for the performance critical tasks if necessary. I’m very sure your business and project will benefit from the Pythons development efficiency boost.
Your
Machine Koder
Spread the love
- 19
Shares
Пишем интерфейс
Установить PyQt можно через консоль — командой pip install pyqt5 , либо вбив PyQt5 в настройках интерпретатора.
Как мы уже писали выше — будет неплохо научиться писать интерфейсы через код, а не собирать его посредством подхода WYSIWYG. Для этого в PyQt есть встроенная среда для разработки графических интерфейсов (GUI) под названием QtDesigner. Сейчас же мы разберем простой пример, где мы «вручную» создадим элемент графического интерфейса — обычное окно. Для начала мы импортируем все виджеты из библиотеки pyqt — объекты для отображения интерфейса: from PyQt5.QtWidgets import QApplication, QWidget . QWidget — это базовый класс для всех элементов.
Далее пропишем объект-приложение. Это необходимо для возможности запуска приложения: app = QApplication(sys.argv) . Команда обязательная. Создаем объект класса — w = QWidget() . Теперь пропишем параметры нашего окна (в пикселях): w.resize(350, 250) . Следующий параметр позволяет нам запускать окно там, где необходимо на экране: w.move(500, 500) . Далее сделаем нужный заголовок: w.setWindowTitle(‘Storydigital.ru’) и сделаем его «видимым» командой show: w.show() . Запуск приложения осуществляется так: sys.exit(app.exec_())
Полный листинг:
import sys
from PyQt5.QtWidgets import QApplication, QWidget

if __name__ == '__main__':
    app = QApplication(sys.argv)

    w = QWidget()
    w.resize(350, 250)
    w.move(500, 500)
    w.setWindowTitle('Digital2.ru')
    w.show()

    sys.exit(app.exec_())
Результат:

System Tray and Notifications
Creating a system tray icon for your application can be
very useful. A common task is to keep an application
running even when the main window is closed while leaving
an icon in the system tray.
This example will demonstrate how to:
- Create a system tray icon
- Add a right-click context menu
- Add custom action handlers to the context menu items
- Capture window close event, ignore, and hide window (exit to system tray)
- Add an Exit option to the context menu of the system tray
- Generate a desktop notification
You can also create application that doesn’t have a main window
at all and lives entirely in the sytem tray. In that case,
don’t make your main widget a Q or a .
Instead, make it a
Customizing a QPushButton Using the Box Model
This time, we will show how to create a red . This would presumably be connected to a very destructive piece of code.
First, we are tempted to use this style sheet:
However, the result is a boring, flat button with no borders:
What happened is this:
Let’s improve the situation by specifying a border:
Things look already a lot better. But the button looks a bit cramped. Let’s specify some spacing between the border and the text using the . Additionally, we will enforce a minimum width, round the corners, and specify a larger font to make the button look nicer:
The only issue remaining is that the button doesn’t react when we press it. We can fix this by specifying a slightly different background color and use a different border style.
Продвинутый вариант
Теперь рассмотрим более сложный пример с наличием toolbar’а в нашем мини-приложении. Здесь дополнительно импортируется модуль QMainWindow для создания главного окна. Там где будут располагаться все элементы интерфейса. Создавая класс мы наследуемся именно от него — class Example(QMainWindow) . Так же мы вызываем метод класса — self.initUI() — он отвечает за инициализацию этого самого окна. В этом примере мы создаем кнопку в панели инструментов — self.toolbar = self.addToolBar(‘Exit’) . Пока у нас один «экшн» — это выход из программы. Он реализуется с помощью обработчика нажатия (triggered — проверка нажатия кнопки). Связываем событие нажатие с обработчиком. В нашем случае он стандартный. Полная конструкция выглядит так: exitAction.triggered.connect(qApp.quit)
Полный листинг:
import sys
from PyQt5.QtWidgets import QMainWindow, QAction, qApp, QApplication
from PyQt5.QtGui import QIcon
class Example(QMainWindow):

    def __init__(self):
        super().__init__()
        self.initUI()

    def initUI(self):
        # action - это то действие, которое будет выполняться при нажатии
        exitAction = QAction(QIcon('exit.png'), 'Exit', self)
        exitAction.setShortcut('Ctrl+Q')
        exitAction.triggered.connect(qApp.quit)

        self.toolbar = self.addToolBar('Exit')
        self.toolbar.addAction(exitAction)

        self.setGeometry(300, 300, 300, 200)
        self.setWindowTitle('SuperApp')
        self.show()


if __name__ == '__main__':

    app = QApplication(sys.argv)
    ex = Example()
    sys.exit(app.exec_())
Результат:

Basic differences
Before you start, familiarize yourself with the following differences between the Qt C++ and Python code:
C++ being an object-oriented programming language, we reuse code that is already defined in another file, using the #include statements at the beginning. Similarly, Python uses import statements to access packages and classes. Here is the classic Hello World example using the Python bindings for Qt (PySide2):
1 import sys
2 from PySide2.QtWidgets import QApplication, QLabel
3
4 if __name__ == "__main__"
5     app = QApplication(sys.argv)
6     label = QLabel("Hello World")
7     label.show()
8     sys.exit(app.exec_())
Notice that the application code begins with a couple of import statements to include the sys, and QApplication and QLabel classes from PySide2.QtWidgets.
Main function: Similar to a C++ application, the Python application also needs an entry point. Not because a Python application must have one, but because it is a good practice to have one. In the Hello World example that you looked at earlier, the entry point is defined by the following line:1 if __name__ == «__main__»:
2 #…
Note: This is just a good practice when writing an application, and in Python is just a formality when executing the current script directly. The variables declared inside the if-statement are considered as global variables.
- Qt Application: Qt provides classes that are meant to manage the application-specific requirements depending on whether the application is a console-only (QCoreApplication), GUI with QtWidgets (QApplication), or GUI without QtWidgets (QGuiApplication). These classes load necessary plugins, such as the GUI libraries required by an application.
- Qt Properties: Q_PROPERTY macros are used in Qt to add a public member variable with getter and setter function. Python alternative for this is the @property decorator before the getter and setter function definitions.
-
Qt Signals and Slots: Qt offers a unique callback mechanism, where a signal is emitted to notify the occurrence of a event, so that slots connected to this signal can react to it. Python alternative for this is to connect the signal to any function. To understand this better, look at this improved version of the Hello World example:
class MyWidget(QWidget):
    def __init__(self):
        super().__init__()

        self.hello = "Hallo Welt", "Hei maailma", "Hola Mundo", "Привет мир"

        self.button = QPushButton("Click me!")
        self.text = QLabel("Hello World")
        self.text.setAlignment(Qt.AlignCenter)

        self.layout = QVBoxLayout()
        self.layout.addWidget(self.text)
        self.layout.addWidget(self.button)
        self.setLayout(self.layout)

        self.button.clicked.connect(self.magic)

    @Slot()
    def magic(self):
        self.text.setText(random.choice(self.hello))

if __name__ == "__main__"
    app = QtWidgets.QApplication([])

    widget = MyWidget()
    widget.resize(800, 600)
    widget.show()

    sys.exit(app.exec_())
Notice that the QPushButton’s clicked signal is connected to the magic function to randomly change the QLabel text. You should always use the @Slot decorator just before the function definition if that function is a Slot, this is required to register all the members of your code to the QtMetaObject.
- C++ uses the keyword, this, to refer to the current object. In a Python context, it is self that offers something similar.
- Qt coding style recommends using camelCase for the variable and function names, whereas the Python style uses under_score.
- And more importantly, forget about {}, and ;.
Using your generated .ui file
We’ve created a very simple UI. The next step is to get this into Python and use it to construct a working application.
First save your file — by default it will save at the location you chosen while creating it, although you can choose another location if you like.
The file is in XML format. To use our UI from Python we have two alternative methods available —
- load into into a class using the method
- convert it to Python using the tool.
These two approaches are covered below. Personally I prefer to convert the UI to a Python file to keep things similar from a programming & packaging point of view.
Loading the .ui file directly
To load files we can use the module included with PyQt5, specifically the method. This takes the filename of a UI file and loads it creating a fully-functional PyQt5 object.
For PySide2 you can use a instance and call the method to accomplish the same thing.
- PyQt5
- PySide2
python
python
 A (very) simple UI designed in Qt Creator
As the method turns an instance object you cannot attach custom code. You can however handle this through a custom setup function
To load a UI from the block of an existing widget (e.g. a ) you can use for PyQt5.
python
The PySide2 loader does not support this approach — the second parameter is for the parent widget of the widget you’re creating. This prevents you adding custom code to the initialization of the widget, but you can work around this with a separate init function.
python
Converting your .ui file to Python
To generate a Python output file run from the command line, passing the file and the target file for output, with a parameter. The following will generate a Python file named which contains our created UI.
bash
If you’re using PyQt4 the tool is named `pyuic4`, but is otherwise completely identical.
You can open the resulting file in an editor to take a look, although you should not edit this file. The power of using Qt Creator is being able to edit, tweak and update your application while you develop. Any changes made to this file will be lost when you update it. However, you can override and tweak anything you like when you import and use the file in your applications.
Importing the resulting Python file works as for any other. You can import your class as follows. The tool appends to the name of the object defined in Qt Creator, and it is this object you want to import.
python
To create the main window in your application, create a class as normal but subclassing from both and your imported class. Finally, call from within the to trigger the setup of the interface.
python
This produces exactly the same result as before.
A (very) simple UI designed in Qt Creator
That’s it. Your window is now fully set up. Since the use of a .ui file abstracts out the UI-specific code, you can use this same pattern to load any interface you design.
Create GUI Applications with Python & Qt6
The easy way to create desktop applications
My complete guide, updated for 2021 & PyQt6. Everything you need build real apps.
More info

Downloadable ebook (PDF, ePub) & Complete Source code
To support developers in ` countryRegion ` I give a
]]% discount on all books and courses.
` activeDiscount`.`description ` I’m giving a
` activeDiscount`.`discount `% discount on all books and courses.
Defining the Widget’s Plugin Interface
Before the widget can be used in Qt Designer, we need to prepare another class that describes our custom widget and tells Qt Designer how to instantiate it. The approach used is the same as that used for C++ plugins; the only difference being that we derive our plugin class from a PyQt-specific base class. Nonetheless, we must still implement the interface required of custom widget plugins, even if we use Python instead of C++ to do so.
The __init__() method is only used to set up the plugin and define its initialized attribute.
from PyQt4 import QtGui, QtDesigner
from analogclock import PyAnalogClock

class PyAnalogClockPlugin(QtDesigner.QPyDesignerCustomWidgetPlugin):

    def __init__(self, parent = None):

        QtDesigner.QPyDesignerCustomWidgetPlugin.__init__(self)

        self.initialized = False
The initialize() and isInitialized() methods allow the plugin to set up any required resources, ensuring that this can only happen once for each plugin.
    def initialize(self, core):

        if self.initialized:
            return

        self.initialized = True

    def isInitialized(self):

        return self.initialized
The createWidget() factory method creates new instances of our custom widget with the appropriate parent.
    def createWidget(self, parent):
        return PyAnalogClock(parent)
The name() method returns the name of the custom widget class that is provided by the plugin.
    def name(self):
        return "PyAnalogClock"
The group() method returns the name of the group in Qt Designer’s widget box that the custom widget belongs to, and the icon() method returns the icon used to represent the custom widget in Qt Designer’s widget box.
    def group(self):
        return "PyQt Examples"

    def icon(self):
        return QtGui.QIcon(_logo_pixmap)
The _logo_pixmap variable refers to a QPixmap object. This is created by including an ASCII XPM image in the source code as the _logo_16x16_xpm variable, and instantiating the QPixmap in the following way:
_logo_pixmap = QtGui.QPixmap(_logo_16x16_xpm)
The toolTip() method returns a short description of the custom widget for use in a tool tip. The whatsThis() method returns a longer description of the custom widget for use in a «What’s This?» help message.
    def toolTip(self):
        return ""

    def whatsThis(self):
        return ""
Qt Designer treats container widgets differently to other types of widget. If the custom widget is intended to be used as a container for other widgets, the isContainer() method should return True, and we would need to provide another plugin class in addition to this one if we wanted to add custom editing support for this widget.
    def isContainer(self):
        return False
Since our custom widget is not a specialized container widget, this method returns False instead.
The domXml() method returns an XML description of a custom widget instance that describes default values for its properties. Each custom widget created by this plugin will be configured using this description. The XML schema can be found at http://doc.trolltech.com/designer-ui-file-format.html.
    def domXml(self):
        return (
               '<widget class="PyAnalogClock" name=\"analogClock\">\n'
               " <property name=\"toolTip\" >\n"
               "  <string>The current time</string>\n"
               " </property>\n"
               " <property name=\"whatsThis\" >\n"
               "  <string>The analog clock widget displays "
               "the current time.</string>\n"
               " </property>\n"
               "</widget>\n"
               )
Here, we provide tool tip and «What’s This?» property values. These will be used for widgets placed on forms in Qt Designer.
The includeFile() method returns the module containing the custom widget class. It may include a module path in cases where the module is part of a Python package.
    def includeFile(self):
        return "analogclock"
OpenPGP Public Keys
Source and binary executables are signed by the release manager or binary builder using their
OpenPGP key. Release files for currently supported releases are signed by the following:
- Pablo Galindo Salgado (3.10.x and 3.11.x source files and tags) (key id: 64E628F8D684696D)
- Steve Dower (Windows binaries) (key id: FC62 4643 4870 34E5)
- Łukasz Langa (3.8.x and 3.9.x source files and tags) (key id: B269 95E3 1025 0568)
- Ned Deily (macOS binaries, 3.7.x / 3.6.x source files and tags) (key ids: 2D34 7EA6 AA65 421D, FB99 2128 6F5E 1540, and Apple Developer ID DJ3H93M7VJ)
- Larry Hastings (3.5.x source files and tags) (key id: 3A5C A953 F73C 700D)
- Benjamin Peterson (2.7.z source files and tags) (key id: 04C3 67C2 18AD D4FF and A4135B38)
Release files for older releases which have now reached end-of-life may have been signed by one of the following:
- Anthony Baxter (key id: 0EDD C5F2 6A45 C816)
- Georg Brandl (key id: 0A5B 1018 3658 0288)
- Martin v. Löwis (key id: 6AF0 53F0 7D9D C8D2)
- Ronald Oussoren (key id: C9BE 28DE E6DF 025C)
- Barry Warsaw (key ids: 126E B563 A74B 06BF, D986 6941 EA5B BD71, and ED9D77D5)
You can import a person’s public keys from a public keyserver network server
you trust by running a command like:
or, in many cases, public keys can also be found
at keybase.io.
On the version-specific download pages, you should see a link to both the
downloadable file and a detached signature file. To verify the authenticity
of the download, grab both files and then run this command:
Note that you must use the name of the signature file, and you should use the
one that’s appropriate to the download you’re verifying.
(These instructions are geared to
GnuPG and Unix command-line users.)
Создание GUI (графического интерфейса пользователя)
Теперь самое время написать ваш первый графический интерфейс! В нашей виртуальной среде запустим Python и выполним следующие команды:
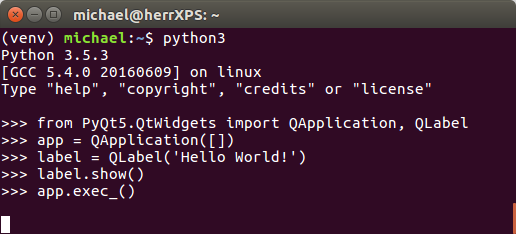
Сначала мы загружаем библиотеку PyQt при помощи оператора :
Затем мы создаем при помощи следующей команды:
Это обязательное требование библиотеки Qt: каждое приложение с графическим интерфейсом пользователя должно иметь ровно один экземпляр класса . До выполнения данной строки многие вещи в Qt просто не работают. Поэтому такая команда будет присутствовать в каждом вашем Qt приложении.
Скобки в данной команде представляют аргументы командной строки, переданные приложению. Поскольку наше приложение не использует никаких параметров, мы оставляем скобки пустыми.
Теперь, чтобы реально что-нибудь увидеть, мы создаем следующее сообщение:
Затем мы даем команду вывести это на экран:
Эта команда покажет небольшое окошко (его вид зависит от вашей операционной системы):
Последний шаг — передача управления библиотеке Qt и указание «запустить приложение, пока пользователь не закроет его». Это делается так:
Если все это сработало, как ожидалось, тогда супер! Вы только что создали при помощи Python и библиотеки Qt свое первое приложение с графическим интерфейсом.
General considerations
QString, QVariant and other types
Qt for Python does not provide access to QString and QVariant, meaning that we decided to use Python’s native types for them.
Internally we convert Python strings to QStrings and other types that could be accepted as QVariant, like dictionaries, lists and tuples.
Furthermore, the same idea is applied to QChar and QStringRef which are represented as Python strings and QStringList is converted to a Python lists of strings.
QDate, QDateTime, QTime, and QUrl’s __hash__() methods return a string representation so that identical dates (and identical date/times or times or URLs) will have identical hash values.
QTextStream’s bin(), hex(), and oct() functions have been renamed bin_(), hex_(), and oct_(), to avoid conflicting with Python’s built-ins of the same names.
QByteArrays, QStrings and Python strings
Previous versions of PySide included a wrong implementation regarding the behavior of QByteArrays, representing them as Python strings.
Currently, QByteArray is treated as a list of bytes without an encoding.
Please be aware that the equivalent type in Python will depend on its version, Python 2 uses «str» as type, and Python 3 uses «bytes».
To avoid confusion, a QString on the other hand, is represented as a human readable string with an encoding, which is represented in Python 2 as an «unicode» object,
and in Python 3 as a «str».
The following cases represent the conversion between these types:
Conversion between string and byte types should not be allowed implicitly.
So with a Qt API like:
void A::foo(QString a)
The following should happen in Python 3
b = bytes("hi", "utf-8")
c = b"hi"
d = "hi"
e = str("hi")
A.foo(b) # doesn't work
A.foo(c) # doesn't work
A.foo(d) # works
A.foo(e) # works
And vice versa when expecting a QString, and passing a QByteArray or bytes, the following should happen in Python 3
void A::bar(QByteArray) // or void A::bar(const char *)
b = "hi"
c = str("hi")
d = "hi".encode()
e = QByteArray("hi")
f = b"hi"
A.bar(b) # doesn't work
A.bar(c) # doesn't work
A.bar(d) # works
A.bar(e) # works
A.bar(f) # works
An explicit cast should be used when the user knows what kind of data they have, and what encoding they have / expect, in order to move from QString (Python 3 str, Python 2 unicode) to QByteArray ( Python 3 bytes, Python 2 str) and vice versa.
So if you have a QByteArray, and you know it contains unicode data, and you need to pass it to a function taking a QString, something like this should work in Python 3:
a = QByteArray("hi".encode())
b = bytes(a.data(), "utf-8")
A.foo(b.decode())
And for a function that takes a QByteArray, but you have a Python 2 unicode or Python 3 str, something like this should work:
# On python 3
a = "hi"
# On python 2
a = unicode("hi")
A.bar(a.encode())
Features and Issues
- PyQt / Qt for Python less used -> less tested
- Binding bugs on top Qt/C++ bugs
- some showstoppers, but infrequently
- most just annoying and undocumented (see my blog post)
Another vital factor to consider when choosing Qt/Python over Qt/C++ is the number of open issues and missing features. In short, since the Python bindings for Qt wrap the Qt/C++ bindings, you will get the problems of the Python binding on top of Qt’s issues.
Moreover, it’s worth mentioning that both Qt/Python bindings have combined fewer users than Qt/C++ and, therefore, bugs and issues are later or never discovered. For example, I found at least three problems when working on a bigger project with Qt and Python, which were related entirely to the Python bindings and not the Qt framework itself.
However, I found only a few real showstoppers, most of the bugs and issues I found where just undocumented behavior which could be worked around.
Действия
Чтобы кнопки делали что-либо, нам нужно связать их с определенными обработчиками. Определенные связи показаны сначала внизу, затем подробно описанные обработчики.
Сначала мы подключаем цифровые кнопки к своим обработчикам. В Qt Designer мы назвали все кнопки, используя стандартный формат, так, в pushButton_nX литера Х является числом. Это упрощает их итерацию и подключение.
Мы используем оберточную функцию на сигнале для передачи дополнительной информации с каждым запуском. В нашем случае, введенное число от 0 до 9 используя функцию range.
Python
for n in range(0, 10):
getattr(self, ‘pushButton_n%s’ % n).pressed.connect(lambda v=n: self.input_number(v))
|
1 2 |
forninrange(,10) getattr(self,’pushButton_n%s’%n).pressed.connect(lambdav=nself.input_number(v)) |
Следующий блок сигналов, который мы подключим, нужен для стандартных операций подсчетов, включая суммирование, умножение, вычитание и деление. Опять же, они подключены к общему слоту и состоят из завернутого сигнала для передачи операции (определенный тип операторов Python).
Python
self.pushButton_add.pressed.connect(lambda: self.operation(operator.add))
self.pushButton_sub.pressed.connect(lambda: self.operation(operator.sub))
self.pushButton_mul.pressed.connect(lambda: self.operation(operator.mul))
self.pushButton_div.pressed.connect(lambda: self.operation(operator.truediv)) # operator.div для Python2.7
|
1 2 3 4 |
self.pushButton_add.pressed.connect(lambdaself.operation(operator.add)) self.pushButton_sub.pressed.connect(lambdaself.operation(operator.sub)) self.pushButton_mul.pressed.connect(lambdaself.operation(operator.mul)) self.pushButton_div.pressed.connect(lambdaself.operation(operator.truediv))# operator.div для Python2.7 |
В дополнении к числам и операторам, у нас есть ряд пользовательских функций для подключения. К примеру, проценты (для преобразования введенного ранее числа для получения процента), знак равно, сброс и память.
Python
self.pushButton_pc.pressed.connect(self.operation_pc)
self.pushButton_eq.pressed.connect(self.equals)
self.pushButton_ac.pressed.connect(self.reset)
self.pushButton_m.pressed.connect(self.memory_store)
self.pushButton_mr.pressed.connect(self.memory_recall)
|
1 2 3 4 5 6 7 |
self.pushButton_pc.pressed.connect(self.operation_pc) self.pushButton_eq.pressed.connect(self.equals) self.pushButton_ac.pressed.connect(self.reset) self.pushButton_m.pressed.connect(self.memory_store) self.pushButton_mr.pressed.connect(self.memory_recall) |
Теперь кнопки и действия связаны, и мы можем реализовать логику в методах слота для обработки этих действий.
Qt for Python
Официальный логотип Qt for Python.
Модуль был выпущен в середине июня 2018 года как Technical Preview (с поддержкой Qt 5.11), и в декабре 2018 года он был официально выпущен для Qt 5.12 без тега Technical Preview tag.
Эта вики-страница отслеживает прогресс разработки проекта Qt for Python и предоставляет сопутствующую дополнительную информацию.
| Linux | macOS | Windows | ||||
|---|---|---|---|---|---|---|
| 32bit | 64bit | 32bit | 64bit | 32bit | 64bit | |
| Python 2.7 | * | * | ** | ** | ||
| Python 3.5+ | * | * | *** | *** |
*: .
**: .
***: 5.14 не будет работать на Windows с Python 3.8.0, пожалуйста, используйте Python 3.8.1 или выше.
Установите PySide2 через pip, запустив: pip install PySide2
Как это выглядит?
1 import sys
2 from PySide2.QtWidgets import QApplication, QLabel
3
4 if __name__ == "__main__"
5     app = QApplication(sys.argv)
6     label = QLabel("Hello World")
7     label.show()
8     sys.exit(app.exec_())
Итоги
Вот и закончилась наша серия статей о создании с нуля автономного мобильного обслуживающего робота. В этой статье мы обсудили создание GUI для управления ChefBot обычным пользователем, который не знает, как работает этот робот. Мы использовали привязку Python Qt под названием PyQt для создания данного графического интерфейса. Прежде чем мы перешли к проектированию GUI, мы, чтобы облегчить понимание PyQt, в качестве примера рассмотрели создание приложения Hello World. Пользовательский интерфейс создавался с помощью QT Designer, а файл UI с помощью компилятора UI Python был преобразован в эквивалентный скрипт Python. После проектирования основного GUI в QT Designer мы конвертировали файл UI в скрипт Python и вставили в него необходимые слоты. Для запуска робота следует в графическом интерфейсе задать номер стола, к которому должен переместиться робот, и отдать приказ на движение. В карте отмечено положение каждого стола. Карта зашита в скрипте Python и может быть использована для тестирования. После выбора целевого стола мы определяем положение робота на карте, и когда нажмем кнопку Go, робот начнет движение в целевую точку. Пользователь может отменить операцию в любое время, и робот после отмены должен вернуться в исходное положение. При необходимости GUI может в реальном времени получать данные о состоянии аккумуляторной батареи и самого робота. После обсуждения графического интерфейса был рассмотрен инструмент отладки GUI в ROS. Этот инструмент называется rqt. Также были рассмотрены некоторые плагины, используемые для отладки данных, получаемых от робота.
