Lumion pro 8.5 free download
Содержание:
- Lumion 9 Crack?
- Guide: Working with OpenStreetMap in Lumion 11 Pro and newer versions
- Concept rendering with the hand-drawn Outlines effect
- Lumion 11.3: Release Notes
- Major Features
- Your Architectural Vision in the Best Possible Light
- New HD Objects and Materials
- Uninstall steps before installing the latest version
- 3. Unable to see the plugin in ArchiCAD?
- 4. Older download links
- Other new features & improvements
- Here’s how
- Simulate daylight with Sky Light
- Lumion 10.0.2 Alternatives
- Workflow Power for Faster, Better Results
- Faster Revit rendering with one plug-in!
- Instant smooth edges with the edges slider
- Supercharge SketchUp with one plug-in!
- Wide variety of usable objects
- How to crack Lumion 11 pro for use
- Changes & Resolved Errors
- Features of the Lumion 12.7 Pro Crack
- Transform a render’s look with color correction
Lumion 9 Crack?
You can get the crack here and follow the simple steps below to access its full features without paying a dime. Here are the steps:
- For a start, download the crack version here
- Open the folder and extract the installer.
- Install the crack in so much way as you would install any other app.
- Substitute the file folder with C:/programs
- The process is complete and you’re set to enjoy it!
Pros
- The powerful and great rendering tool is very easy to use. You don’t need some complex tutoring to use it.
- Its rendering speed is incredibly fast. This is a great advantage if you are on a deadline.
- If there are items you need that you can’t find in the environment, you can get it from its online source.
- It presents excellent opportunity for presentations.
- Excellent customer support. Once contacted, the customer service section takes time to address all issues in detail.
- Rendered images can be exported into videos for viewing pleasure.
- It doesn’t require much system resources for installation. Again, its installation process is quite easy.
Cons
- Renderings of it are not hyper-real. The best you can get is a make-up via its filter feature to add some “flavors” to it.
- Its undo feature is limited. In fact, in some earlier versions, undoing a process is totally impossible.
- Its interface has been termed childish. Though easy to use, it’s quite unattractive.
- Again, it takes time to run. Howbeit, it renders very fast.
- When exporting to Video, it consumes lots of space on the hard disk.
Guide: Working with OpenStreetMap in Lumion 11 Pro and newer versions
This article applies to Lumion 11 Pro and newer versions.
Older versions are covered in the following articles:
- Knowledge Base: Guide: Working With OpenStreetMap in Lumion 10 Pro
- Knowledge Base: Guide: Working With OpenStreetMap in Lumion 9 Pro
- Knowledge Base: Guide: Working With OpenStreetMap in Lumion 8 Pro
- Knowledge Base: Guide: Working With OpenStreetMap in Lumion 7 Pro
Lumion 11 Pro and above integrates OpenStreetMap, elevation data and satellite imagery to provide rapid in-context and masterplan content to a visualization.
- This feature makes it possible to import buildings, roads, water, green spaces, and transit infrastructure as simple 3D shapes.
- Rapidly add a whole suburb or city area to your visualization.
- Simply search for the location and download the map and satellite imagery directly into Lumion.
- This feature is currently in beta status.
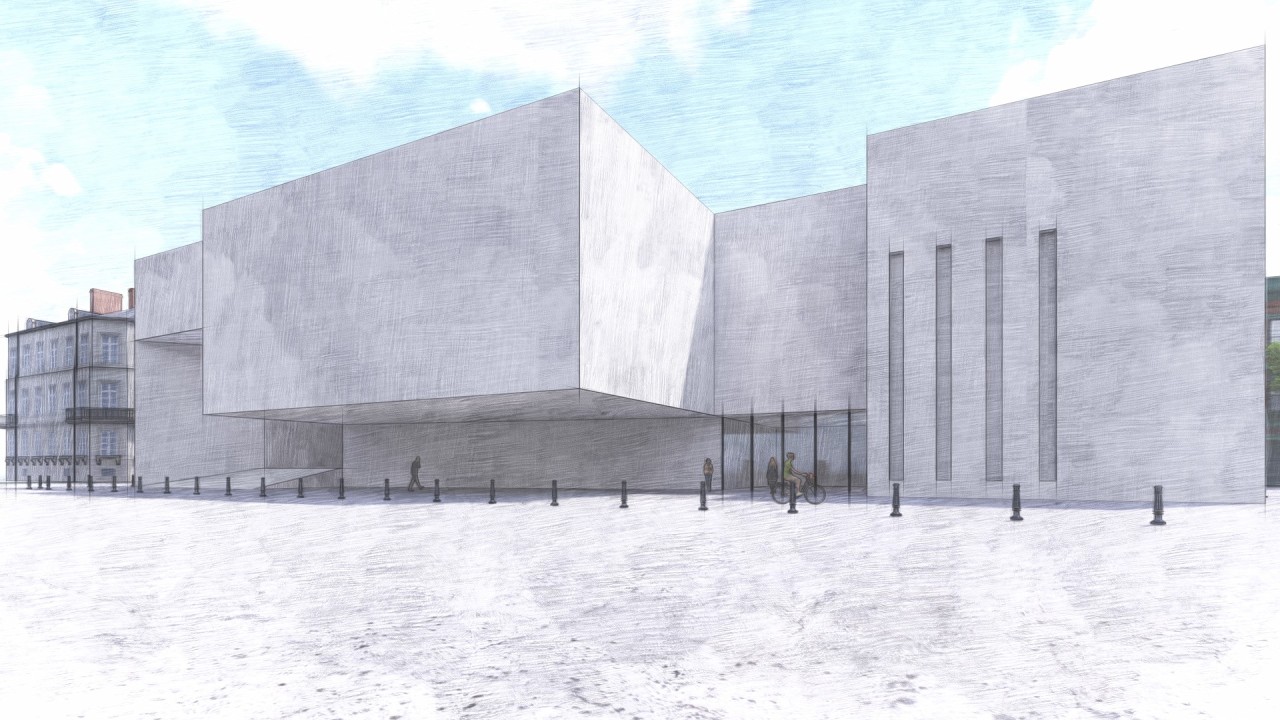
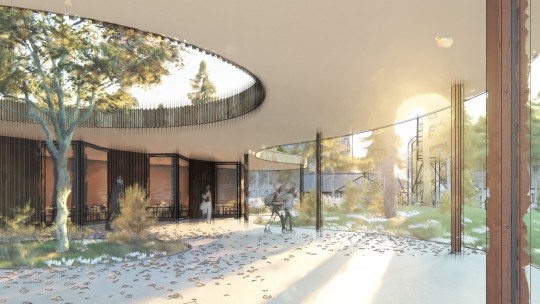
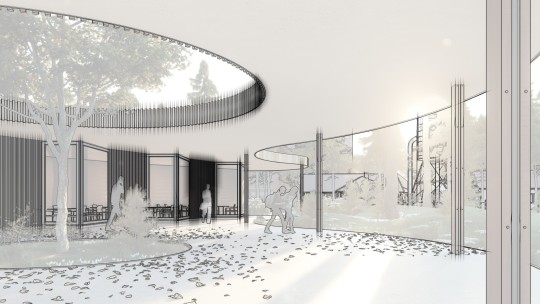
Concept rendering with the hand-drawn Outlines effect
Located within the Sketch effects in photo or video mode, the Outlines effect transforms buildings and spaces into conceptual, artistic renders by highlighting outlines, structural details and building facades.
Whether you’re in the early stages of design development or showing a client an interesting perspective, this artistic effect makes it easier to clearly communicate the form of your design and to draw a focus to your building’s general shape.
Adding the Outlines effect not only helps with communicating the three-dimensionality of the building, but it also guides the viewer’s imagination for the finished result.
The Outlines effect plays really well with many other photo or video effects. As a result, there are virtually endless possibilities when modifying the render’s style.
For instance, if you have a concept to show to your boss or client, but you don’t have time to enhance the render for a striking level realism, you can instantly access two Outlines-based presets from the Styles button, including:
Color Sketch Style
Watercolor Style
After adding textures, a couple of people and some context, we simply applied the Sketch and Watercolor Style for this instant, attractive result.
Have a little more time to create the perfect concept render?
As mentioned before, the Outlines effect works well with other effects and rendering styles. To give you an idea of the broad range of possibilities, here are three concept renders created using Outlines.
Concept render #1 – realistic with Outlines
Concept render #2 – painting effect with Outlines
Concept render #3 – Desaturation with bold outlines
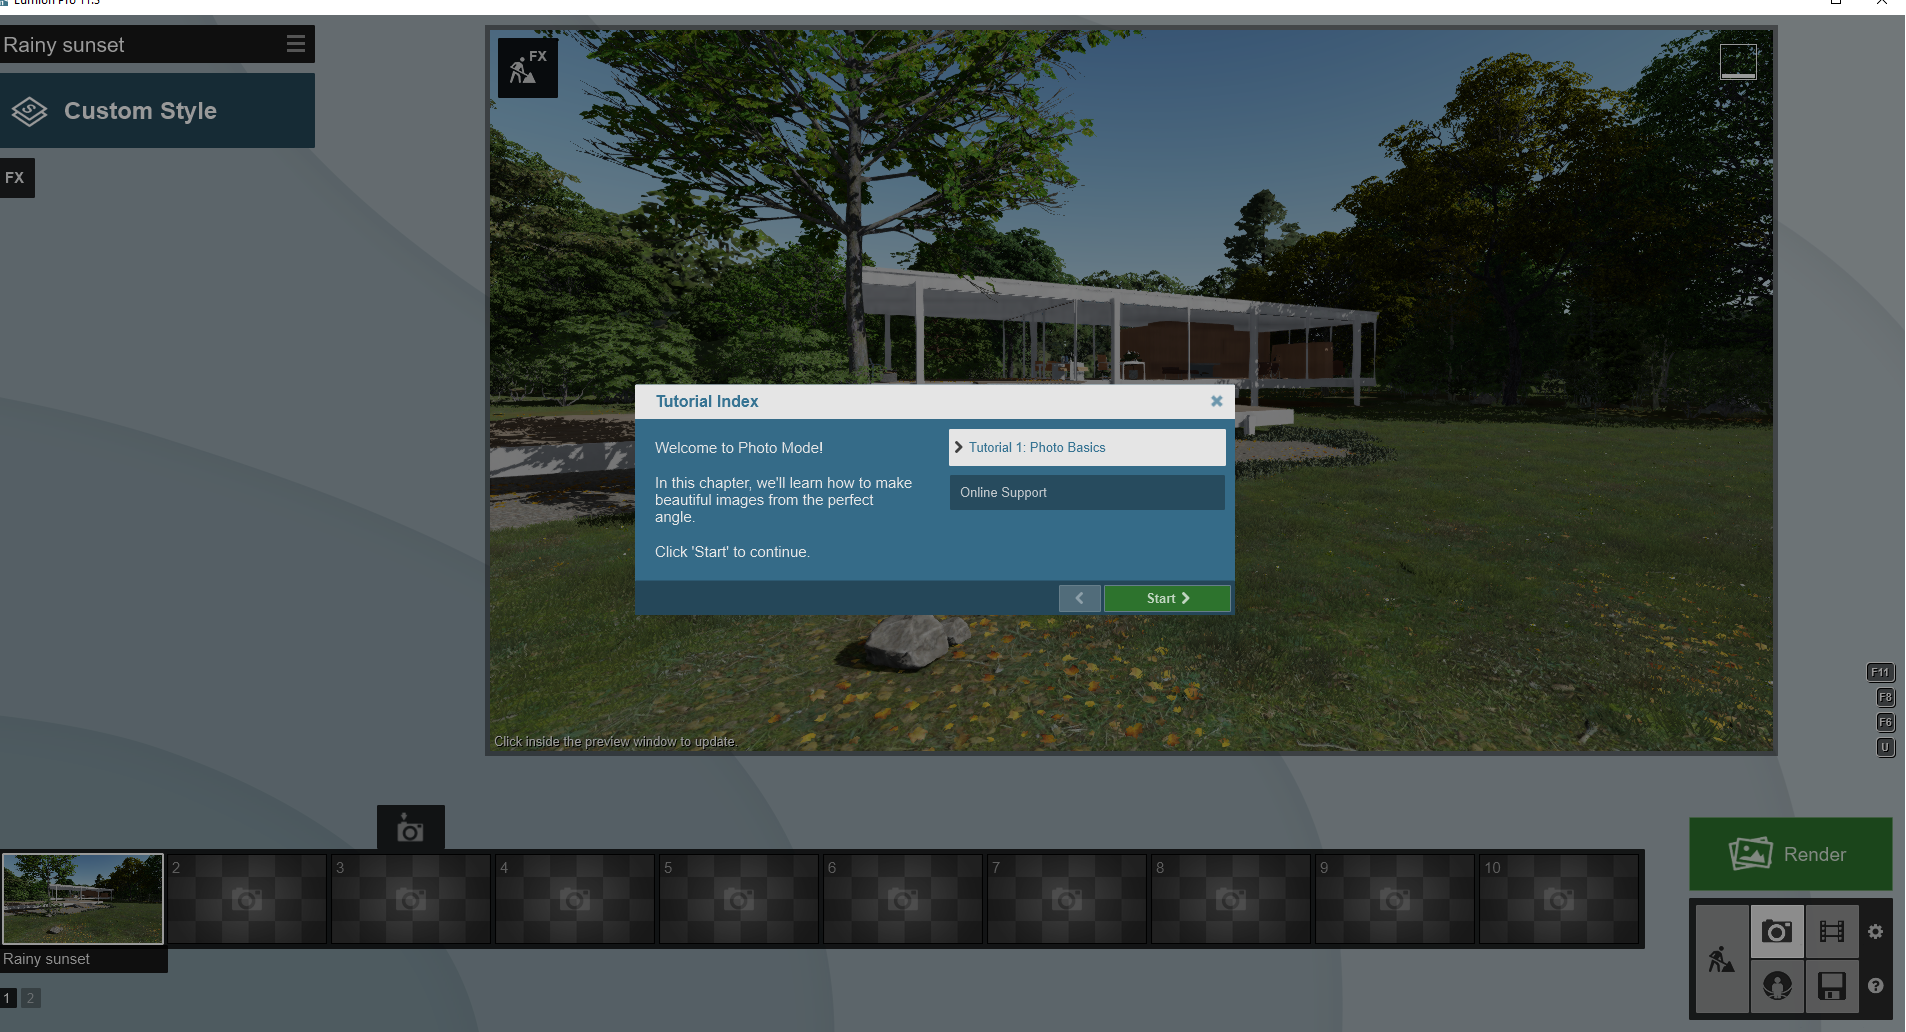
Lumion 11.3: Release Notes
— The 16th of March 2021.
Lumion 11.3, Lumion 11.3 Pro are available today as a free download and update for Lumion 11 users.
Lumion 11.3 Trial Lumion 11.3 Pro Trial and Lumion 11.3 Pro Student are also available today.
See the following article for more information on how to download the new version:
Knowledge Base: Lumion 11.3: Everything you need to know
Compatibility
- Please note that Projects and models saved in version 11.3 cannot be opened in older versions of Lumion. That also includes V11.0/V11.0.1/V11.0.2.
-
Please click on the following link to see how to transfer settings, models and Projects from older versions of Lumion:
Knowledge Base: Lumion 11.3: Everything you need to know
Note: Features, models, and materials with the asterisk (*) character are only available in Lumion 11.3 Pro.
Major Features
- Its 3D models are built in natural ways. That is, they are real.
- The package can create a movie from the 3D images it has rendered.
- Its 3D rendering is very fast.
- Material levels have been enhanced.
- Contains tools for decorating.
- Builds roadmaps, garden maps, maps for towers, and other features.
- Designs layouts and shapes for a vehicle, a feature mechanical engineers would like.
- Over 172 exotic objects included to tweak media.
- Previous features now come in various sizes and shapes.
System Requirements for Lumion 11
- Operating System: Windows 10 (only 64-Bits), Vista (must be SP2), 7, 8.1
- Memory: Not less than 20GB should be free on hard disk
- DX: v11 or a later one.
- Display Resolution: at least 1600 by 1080
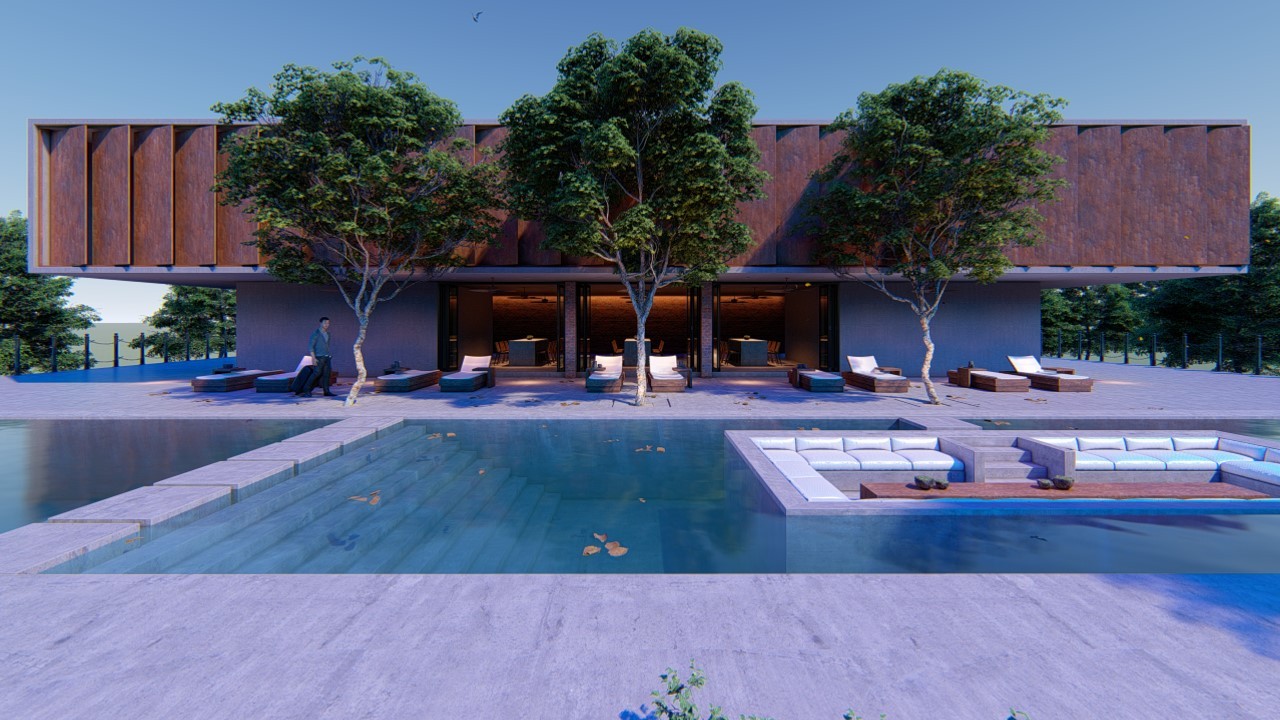
Your Architectural Vision in the Best Possible Light
Lumion 8 also presents a wide variety of new image quality features to help you capture your designs in the best possible light.
Just a few of these new features include:
- “Hand-drawn” outlines (Pro only) — Clearly communicate the form of your design. Apply to photorealistic, sketch or artistic effects to draw a focus to your building’s general shape and form.
- Soften hard edges (Pro only) — Soften the corners of adjacent faces for a look that better represents the real qualities of physical homes and buildings.
- Beautiful new water — Lumion water now looks more realistic than ever and there are twenty new water presets.
- Tilt shift (Pro only) — Transform your CAD model into a scaled-down maquette of the real thing.
- 4K movie rendering* — Give your projects a visual edge that just can’t be replaced.
- Omnilight fall-off slider — Illuminate the finer details of your design by casting the right amount of light.
- New fog — Immerse your model in an attractive, moody ambience.
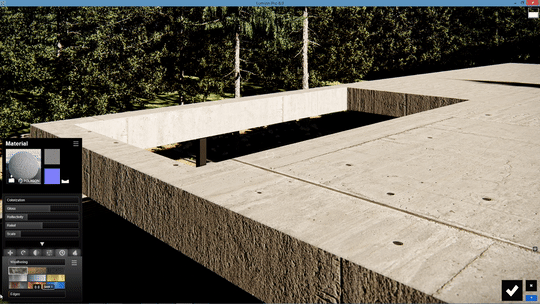
New HD Objects and Materials
In Lumion 8, you’ll discover new HD materials and objects** that are purely extravagant in detail, surface shading and texture.
With 100 HD materials, you can give depth and realism to your buildings and landscapes. As a result, it’s easier for viewers to “touch” the walls, “smell” the leather of the living room couch and “hear” the sound of feet moving across the floor.
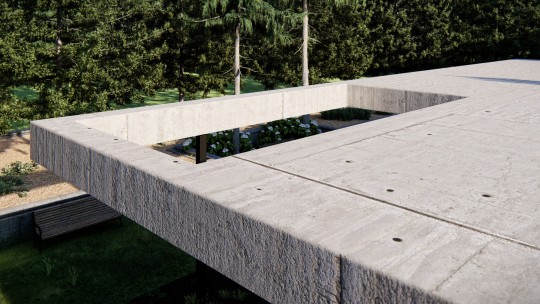
There are 168 new material options in Lumion, including 38 new stone and concrete materials, 10 wallpapers, 51 metal materials and more.
Enriching your renders is effortless with a host of new trees, more character models, new lights and much more.
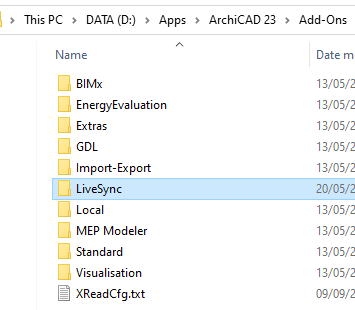
Uninstall steps before installing the latest version
| 2.1: Quit ArchiCAD. | |
|
2.2: Type ‘Add or remove programs’ in the Windows search field, press Enter and uninstall Lumion LiveSync for ArchiCAD (if it exists). |
|
2.3: Remove all Lumion ».APX’ files from the ArchiCAD Add-Ons folder:
|
|
| 2.4: Click on the download link above to install the plug-in. |
3. Unable to see the plugin in ArchiCAD?
The LiveSync installer checks which ArchiCAD versions are installed via the Windows Registry.
If the ArchiCAD folder name or location has changed since it was originally installed, our installer won’t be able to install the ‘.APX’ files.
You can either re-install ArchiCAD before re-installing the Lumion plug-in, or you can Contact Us for the APX file.
Just make sure to restart ArchiCAD after doing that (if it was already running).
4. Older download links
4.1: Download the desired version below.
4.2: Unzip and extract the file ‘ArchiCADToLumionBridge.apx’ to a folder.
4.3: Follow the instructions in section 2 above.
4.4: Move ‘ArchiCADToLumionBridge.apx’ to Installation folder\ArchiCAD (Version)\Add-Ons\
Other new features & improvements
2.1: Build Mode
-
Fine-Detail Nature: Removed most of the Fine-Detail Nature object restrictions on:
- Alt+Move to copy.
- Add to Groups.
- Replace Nodes and Place on Nodes.
-
Improved the Light object gizmos:
- Gizmo scale is no longer world-size but screenspace size.
- Height line indicator is only visible when selected (in Build Mode).
- Gizmo scale no longer creates too wide a cone at large cone angles.
2.2: Effects & Styles
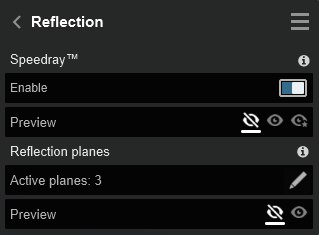
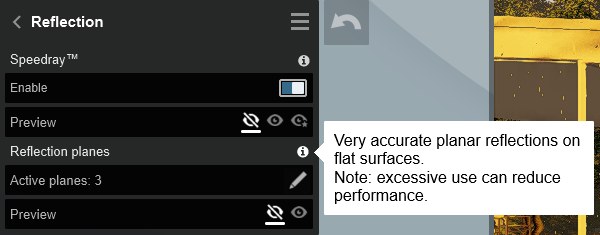
2.2.1 Reflection Effect: The user interface has been updated to clarify the features of the Reflection Effect.
This includes wording changes and tweaking the interface:

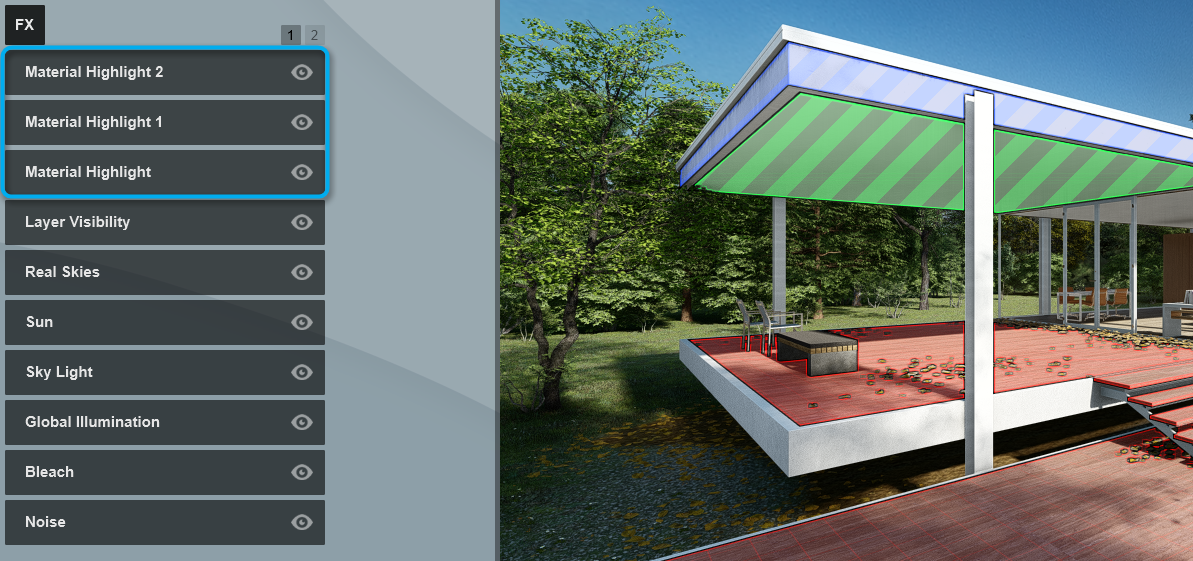
2.2.2 Material Highlight Effect:
The effect can be applied multiple times to the Effect Stack, to enable highlighting different surfaces in your scene.
2.3: Miscellaneous
2.3.1 Tutorials:
Added new beginner tutorials for Photo Mode and Movie Mode.
2.3.2 Notification:
A notification will show on the Home screen when a newer Lumion version is available.
2.3.3 Save errors: Separate error screens are now displayed when an error occurs during the saving of a file.
2.3.4 Load and Save progress for the Lumion icon on the Windows taskbar.
![]()
2.3.5 Light source and Specular lighting:
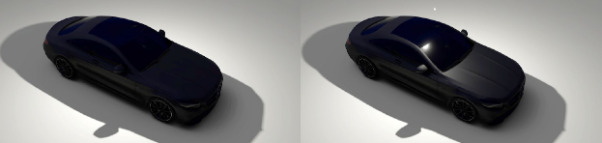
Omni Lights now have a light source that you can toggle on/off. When the light source is on, the Omni Light source will appear in reflections.
Here’s how
2.1: Click on the Terrain mode button followed by the OpenStreetMap on/off button.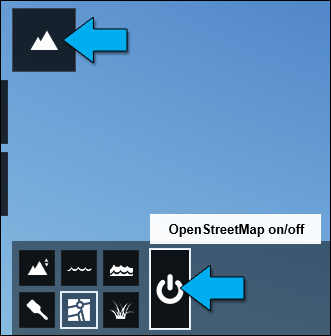
2.2: Click on the Pick GPS Coordinate button.
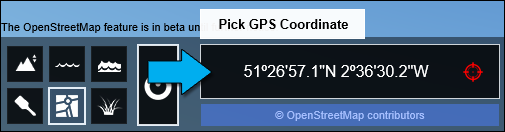
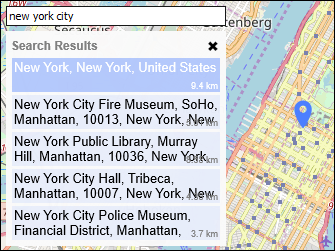
2.3: Click on the Search field to type in a place name or click anywhere on the map to place or move the GPS Coordinate pin.
- Hold down the left mouse-buttton to pan.
- Use the mouse scroll wheel to zoom in/out.
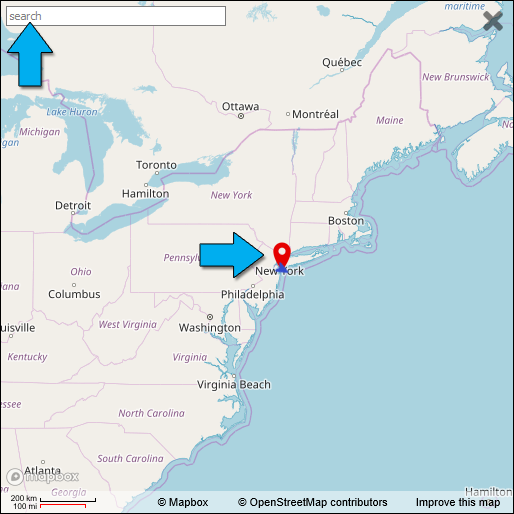
2.4: Drag the Map Range slider to adjust the area that will be downloaded. You may notice that the Map Range in kilometers/miles varies depending on the chosen location. This is due to the way cartography works as Earth (a spherical planet) has been projected onto a two-dimensional map.
2.5: The red square is the area that will be downloaded and the triangular, blue arrow represents the camera position in your Lumion Scene, relative to the red square:
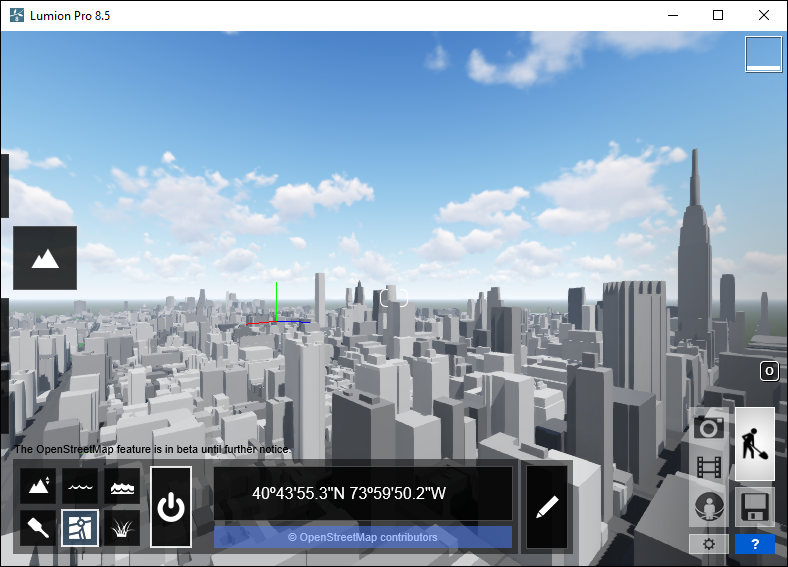
2.6: Click on the Start Download button to download the chosen area and wait for the download process to finish:
2.7: This whole area was built in a couple of minutes (download and finalization speeds are dependent on Map Range (size), your location and your local connection speeds):
2.8: Lumion 8 Pro and above lets you edit the position, height, heading and appearance of the OpenStreetMap model:
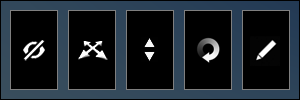
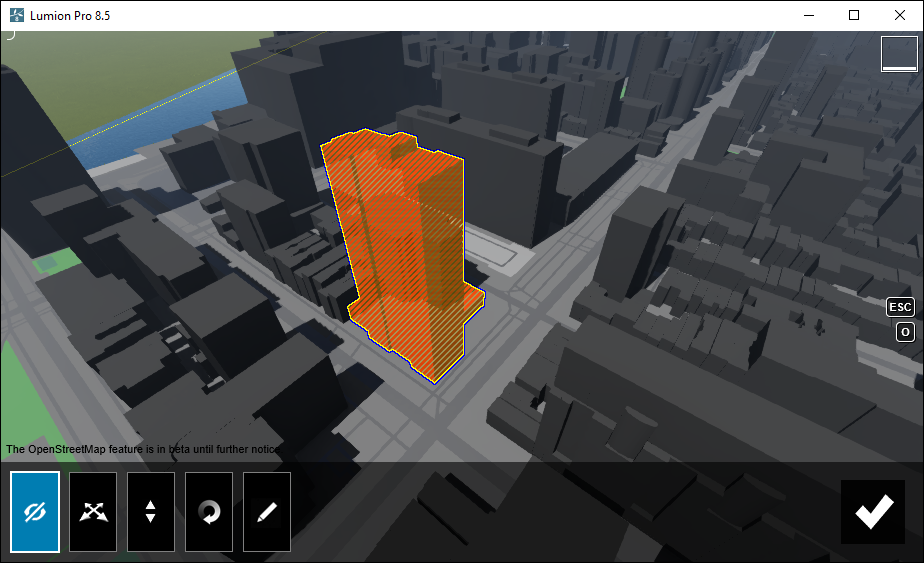
2.9: To show or hide individual buildings in the OpenStreetMap model, click on the Hide Buildings toggle button and then click on buildings to show or hide them: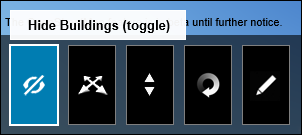
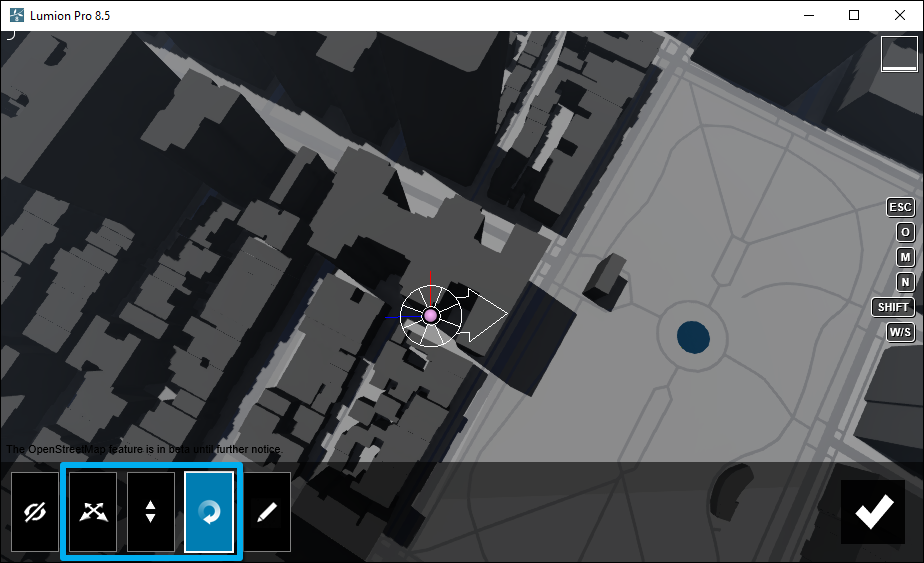
2.10: Click on the Move OSM, Change Height OSM, Rotate OSM buttons to move and rotate the OpenStreetMap model via the Object Icon:
2.11: Click on the Change Appearance button and use the tickboxes to show or hide water, earth, buildings, land-use and roads:
2.12: Click on the Select Preset button to select a different look for the OpenStreetMap model: 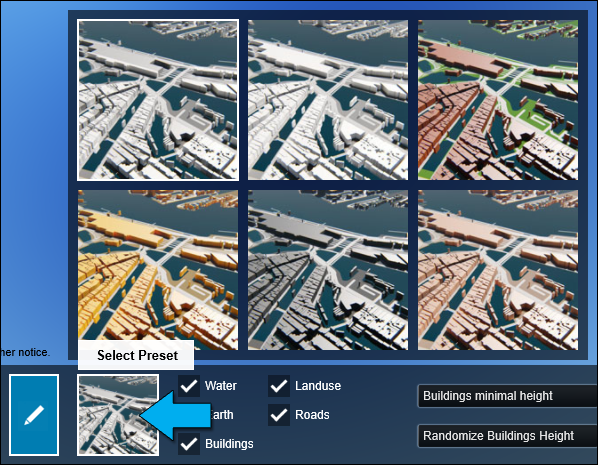
2.13: Use the Buildings Minimal Height and Randomize Buildings Height sliders to adjust and randomize the height of OpenStreetMap buildings that use default heights (i.e. not correct heights from the real world):
2.14: It is not possible to assign the OpenStreetMap model to one of the Layers if you wanted to control visibility. It exists on a special Lumion Layer only. So you need to turn off OpenStreetMap to fully hide the model.
2.15: Switching off OpenStreetMap before saving the Project means that the model won’t be saved as a part of the .LS8 Project file.
To avoid having to download the OpenStreetMap model again, please make sure you turn OpenStreetMap back on again before saving the .LS8 Project file.
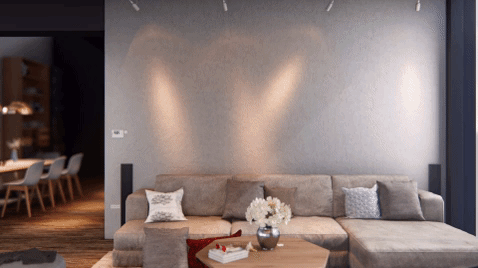
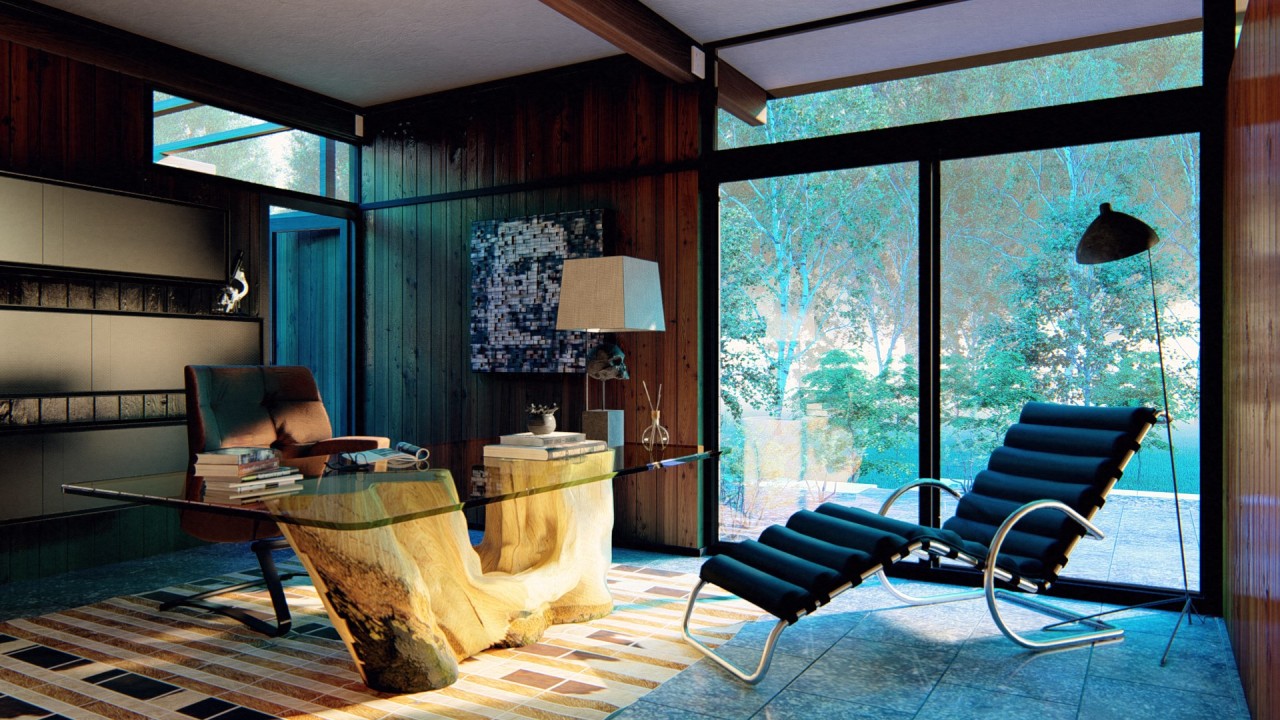
Simulate daylight with Sky Light
In spaces where the sun doesn’t reach, the Sky Light daylight simulator fills in the gaps. It’s one of the most advanced technologies new in Lumion 8, as applying the Sky Light effect instantly softens and diffuses the design’s environmental lighting.
Using the sky as a light source, Sky Light helps the color of foliage or the texture of your building’s exterior jump from the screen. Interiors suddenly gain an accurate sense of depth, massing and scale.
Truly, Sky Light’s impact on visual quality and realism is uncanny.
In the image above, we’ve toned down the colors and saturated the pale blue light. This is Sky Light in action, showing where the daylight simulator affects your scene.
In many ways, Sky Light is like coffee—turn it on and it “wakes up” your render —and you may find you can’t render without it.
Like the name suggests, however, Sky Light has the most significant visual impact when applied to exterior scenes or interior renders with abundant sunlight.
Sky Light’s impact on exteriors
No Sky Light applied.
Sky Light brightness and contrast set to 1 (standard).
Sky Light brightness and contrast set to max.
Sky Light’s impact on interiors
No Sky Light applied.

Sky Light brightness and contrast set to 1 (standard).
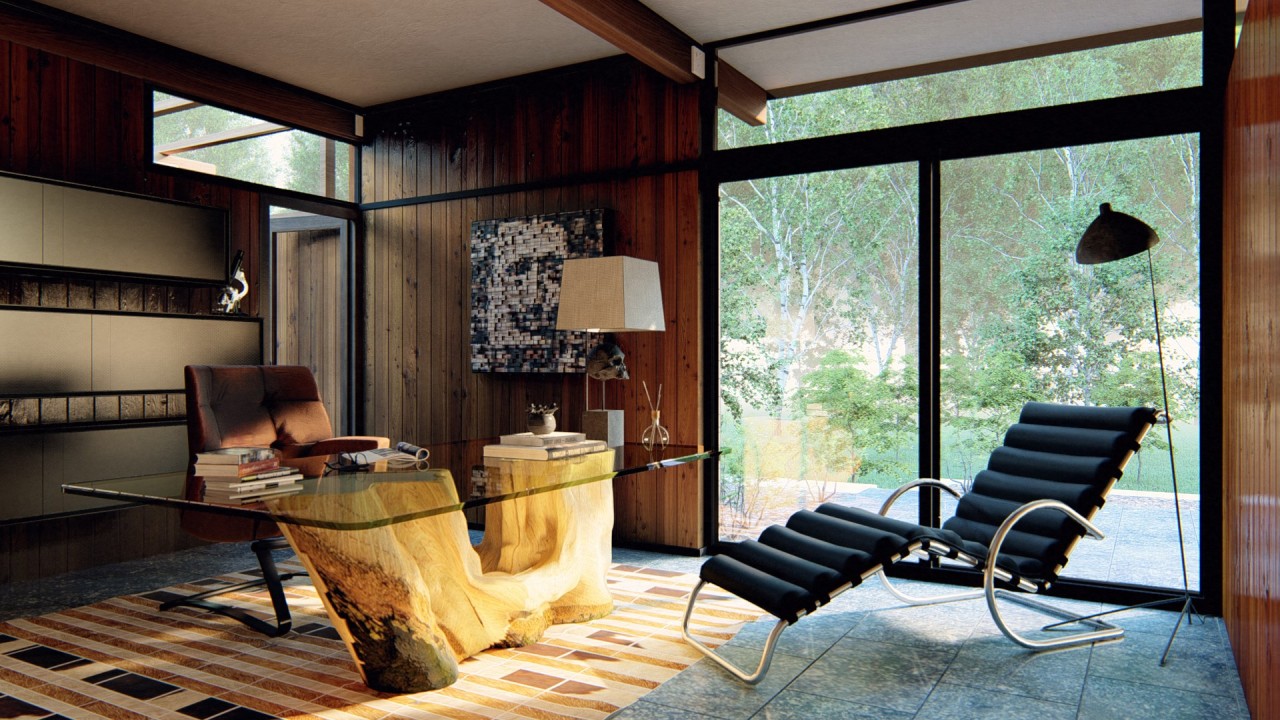
Sky Light brightness and contrast set to max.
Lumion 10.0.2 Alternatives
It’s good you are aware Lumion is not the only software available for rendering. Here are some alternatives you may wish to try out.
- Blender: also used for creating 3D contents. Its free and open source.
- Cinema 3D: works on different platforms and essentially used commercially. If you need a high-end rendering, you may wish to check it out.
- Sketchfab
- Twinmotion: primarily meant for architects. It was even designed by an architect.
- MODO
- iClone: freemium and offers animations in real-time.
- LightWave: accessible to both Mac and Windows users and it’s a commercial tool. This means it isn’t free.
- Cheetah 3D: very fast but only available on MacOS.
- Structure Synth: It works on most platforms – Mac, Linux, and Windows and it produces very excellent 3D images.
- CorelCAD: your 2D designs can easily be transformed into 3D with this tool. It has the advantage of being affordable too.
Bring Your Architectural Designs to Life with the Lumion 11 Pro Crack
Replicating a structural vision into a graphic representation is imperative to an architect. For the longest time, one computer aided design software after the other, a variety of architectural tools were offered to architects, but each software missed one important tool or another. This vacuum and lack of an all-rounded computer aided design software had been a major obstacle for architects all over the world. Lumion 8 pro has resolved this gap for all architects. Lumion 8 pro allows you to clearly communicate your architectural designs. If you are used to the old school hand drawing, Lumion 8 pro includes the hand drawn outline feature as well. Architects can make their architectural vision come to life by softening the hard edges of their created structures too. They can do the same for furnishings and use the tilt shift to simulate a maquette. When you are content with what you have created, you can then render crystal clear videos in 4K resolution!
The designers of Lumion 10.0.2 pro have taken into consideration even the minor challenges that architects may face when designing a structure. If you have trouble picking one of the multiple objects, Lumion 8 Pro allows you to set different options next to each other so you can decide which one you prefer with variation control effect. Professionals love using Lumion 8 pro primarily because it can render incredibly realistic building interiors as well as exteriors. They can even create luscious sceneries and landscapes containing hundreds of trees. They can also animate humans that interact with the created models. Proposing potential architectural designs to clients has been made a lot better and easier using Lumion 8 pro. Not only is the usage of Lumion 8 pro very quick, but it also renders high quality designs. People often forget to realize they are not watching a real life video, because the visuals are intricately detailed, life like, textured, and smoothly animated.
In the abundance of computer aided design softwares, there are plenty of superficial factors that sets Lumion 8 pro apart from the rest. Let’s take a look at a few of them
Workflow Power for Faster, Better Results
Remove the timeliness component of the rendering process. With Lumion 8, you can take advantage of several new workflow advances:
- Model and material variation (Pro only) — Compare multiple options, balance a range of concept options and choose a look you can be satisfied with.
- New grouping function — Bunch multiple objects together and control them all at once.
- New layer functions — Easily organize the elements of your render, demonstrate phasing and achieve greater efficiency.
- Mass placement for curved shapes — Instantly place numerous objects in complex shapes, including curves.
- Time Warp — Shift the small movements of animated people, animals and objects in photo or video mode.
- New measuring tools (Pro only) — Make quick measurement checks without needing to go back to your modeling software.
- “Look at fixed point” feature for the handheld camera effect — Lock the camera onto a single target point.
- 2-point perspective slider — Give your model a solid, realistic appearance with a cleaner and more geometrically accurate look.
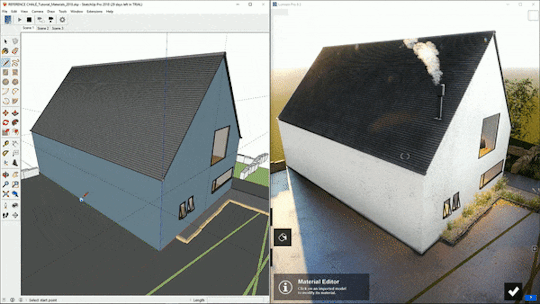
Faster Revit rendering with one plug-in!
The Lumion LiveSync for Revit plug-in includes two features — LiveSync and a Collada (.DAE) exporter. Now, you can view and change your Revit model in real-time in Lumion, as well as export a Collada (.DAE) file from Revit and import (or re-import) it seamlessly into Lumion.
You will need Lumion 8.3 (or newer) and Revit 2015 (or newer).
The plug-in will not work with Revit LT.
Lumion LiveSync for RevitImmediately set up a live, real-time visualization between Revit and Lumion. Change the Revit model’s shape and you’ll see these changes taking place, in real-time, in Lumion’s breathtaking, lifelike environment.
As you continue modeling in Revit, you can simultaneously view your project in Lumion surrounded by an immersive, fully featured landscape (mountains, water, grass). Beautiful materials make the design ‘pop’, while photo-realistic lighting suddenly heightens your sense of environment, realism and depth.
Real-time materials synchronizationInstantly breathe life into your synced Revit model by applying any of Lumion’s 1000+ high-definition materials in the Lumion editor. As you continue to develop the design, you can tweak the materials exactly to your liking and then save your material layouts for future rendering.
Live point-of-view synchronizationLiveSync now enables live point-of-view synchronization. Turn it on and immediately adopt the Revit camera perspective, making your work easier, faster and more enjoyable.
Instant smooth edges with the edges slider
In real life, the edges of any surfaces generally appear slightly rounded or worn. They are never perfectly sharp.
With the new Edges slider in Lumion 8, you can control how rounded and soft you want the edges to look. This is a major factor for driving realism into your renders; your model will take on a more natural and weathered look, one better representing the real qualities of physical homes and buildings.
Just compare this render with sharp, virtually “perfect” 90-degree edges…
…to this one with smoother, rounded edges.
You can find the Edges slider as part of a material’s weathering setting, which is quite convenient as these two features complement each other. Dial up the Edges slider and add a little weathering for an effect that imparts age, general wear and environmental corrosion.
Pay attention to the edge closest to the screen. By dialing up the Edges slider, the angle becomes softer and rounded, enhancing the material’s realistic look in an instant.
Supercharge SketchUp with one plug-in!
The Lumion LiveSync for SketchUp plug-in allows you to model your SketchUp design in a beautiful environment that’s so realistic, it’s like you’re pushing and pulling real-life buildings into shape.
You will need Lumion 8.3 (or above) and SketchUp 2017 (or above).
Lumion LiveSync for SketchUpImmediately set up a live, real-time visualization between SketchUp and Lumion. Change the SketchUp model’s shape and you’ll see these changes taking place, in real-time, in Lumion’s breathtaking, lifelike environment.
As you continue modeling in SketchUp, you can simultaneously view your project in Lumion surrounded by an immersive, fully featured landscape (mountains, water, grass). Beautiful materials make the design ‘pop’, while photo-realistic lighting suddenly heightens your sense of environment, realism and depth.
Real-time materials synchronizationInstantly breathe life into your synced SketchUp model by applying any of Lumion’s 1000+ high-definition materials in the Lumion editor. As you continue to develop the design, you can tweak the materials exactly to your liking and then save your material layouts for future rendering.
Live point-of-view synchronizationLiveSync now enables live point-of-view synchronization. Turn it on and immediately adopt the SketchUp camera perspective, making your work easier, faster and more enjoyable.
Wide variety of usable objects
One of the reasons Lumion 9 pro creates life like designs is its wide variety of environmental objects that can be used to enhance your renderings. Lumion 9 pro contains an extensive variety of people, cars, plants, and similar objects that can make the exterior or interior of your design realistic. These objects can supplement any design when used correctly.
How to crack Lumion 11 pro for use
Before installing Lumion 10 pro, make sure that you fulfill its system requirements. Lumion 10 pro is a powerful software that requires a powerful system. It can only work on Windows Vista, XP, 7, 8 and 8.1. It requires 32 and 64 bit system along with a dual core processor. Additionally, there must be 50 GB of disk space and 10 MB available for memory usage. The system must also be compatible with DirectX 11 and DirectX 12. A decent resolution will be helpful too.
Once you have met these requirements, download the crack and unzip it. Then, copy the crack patch of Lumion 8 pro and paste it into the installation folder. You can then run the crack file to enjoy the full version of Lumion 8 pro.
Verdict
No doubt, your choice of a rendering software either as an Engineer, Photographer or Architect, would depend on your needs. Such could include time, efficiency and ease of usage. Lumion 9 being the latest, gives you almost anything you need. It’s fast, efficient and easy to use. You may want to try it out and see for yourself.
Changes & Resolved Errors
3.1: Build Mode
- Landscape Scatter objects: no longer become black when multiple Projects with these objects were opened in the same Lumion session.
- Nature objects: When 2000 or more objects have been selected the Move, Rotate, and Size tools are grayed out.
- Corrected the display of the Group icon in the Object Properties window.
Lights:
- Updated the lights Color PickerYou can now only select colors that can be used as a light color for all light types (Spotlights, Omnilights, Area, and Line lights).
- Spotlights: Improved performance when shadow quality is set to Medium or High. Note: this is only noticeable as a screen redraw (FPS) improvement when the project is CPU bottlenecked, it won’t change the graphics card workload.
- Omni Lights: Added translucency for plants in combination with Omni Lights. It is only visible when you look toward a light.
- Spotlights: The cone angle is now in degrees.
Layers:
- The Add Layer button now no longer overlaps with other Layer tabs.
- Layer Tabs will no longer get combined causing unreadable Layer names when the text of the Layer name is too long.
Other:
-
Missing model files: For when you see the Red Questionmark object for an Imported Model that is unable to be loaded in a Project. The following changes and fixes were made:
- Missing file type icon in the Object Properties window.
- The missing model Placeholder keeps original Position, Orientation, and Scale.
- The object is now locked and can’t be moved, rotated, scaled, or copied.
- Can be moved to other Layers.
- Links to a Knowledgebase article to provide you with further assistance.
- Is not able to be Grouped.
- It is no longer possible to try using the Find in Library function (there is no lib category for this object).
- Mouseover on Object Icon (node), will show the file name of the missing model.
- When saving a Project with the missing model files, the data is lost forever (but can be re-imported if you have the original file).
- The number of missing objects is listed in Lumion Performance Monitor.
- Nature objects: Conform to Landscape, hotkey can now be applied to trees and plants from the Nature Category.
- Nature objects: Shadows for trees and plants are now correct when the Shadow Effect is set to Sharp or Ultra Sharp when the model had double-sided surfaces in certain situations.
- Invisible objects: In certain cases, other objects in a project no longer go invisible after placing a specific Imported Model from the Imported Model Library.
- Replace Selection: Now selects the Category of the object selected when the Category is the All Category rather than a default of the Nature Category. The first object in a multi-selection will be the Category chosen.
- Clip Planes: Trees and plants from the Nature Category are now clipped as expected.
- Flag object: The custom flag texture now displays as expected rather than having to switch to Place Mode.
- Measure object: All nodes from the same Measure object will always be placed and/or move to the same Layer.
- Measure object: The vertical height from the ground guideline no longer disappears if it is vertically overlapped by geometry from Imported Models.
- Place object on Nodes: Will now always open the Nature Category as default and not preselect any model.
- Object gizmos: The Spotlight, Omni Light, Area Light, Clipping Plane, and Reflection Control Object no longer scale as the scale doesn’t need to change these objects.
OpenStreetMap:
- OpenStreetMap: when disabled it will no longer save OpenStreetMap data in the Lumion Project file.
- OpenStreetMap: layers are working again for an OpenStreetMap saved in Lumion 10 and opened in Lumion 11.
- OpenStreetMap: Satellite images are a little bit sharper. The satellite image outside the 2x2km range is still blurrier than the satellite image inside the 2x2km range, as a lower resolution texture is used.
- OpenStreetMap: sRGB is applied to the satellite image for better color and contrast.
3.2: Photo mode, Movie mode, Panorama mode:
Photo Mode, Movie Mode&Panorama Mode:
- Improved performance in the Preview window where the camera eye level widget is shown. This improvement is most noticeable in a scene with many Imported Model surfaces.
- The camera no longer triggers when typing in a Title for a Photo, Clip or Panorama using keys Q,W,E,A,S,D,U, and O.
- Fixed an issue where the thumbnail wouldn’t update when Effects and/or Styles were changed.
- Titles: Words in Titles no longer get translated if it is a word in the Lumion translation file.
Photo Mode:
Photo Sets: Switching between Photo Sets now updates the interface and shows the Style name from the last selected photo.
Movie Mode:
Movie Mode: The Frame Number will no longer exceed the total Frame Number.
Features of the Lumion 12.7 Pro Crack
It is now easier to communicate your design’s form clearly, with the ‘hand drawn’ outline effect. To draw focus towards your building’s form and shape, apply this effect alongside artistic, sketch or photorealistic effects. This is a natural and beautiful rendering of the skeletal structure of your design.
Soften Hard Edges
When looking at an object in real life, the edges of their surfaces appear to be a bit worn or rounded. You never find them to be perfectly sharp. The new slider for edges, in Lumion 8 Pro Crack, enables your model to look more weathered and natural.
Such images are closer to reality and can truly represent the characteristics of homes and physical buildings. By making the edges of adjacent faces smooth, you can enhance the realism and give an aged appearance.
Easily and effectively, by simply moving a slider, you can soften the corners of wood, concrete, bricks and other materials.
Tilt Shift
Maquettes seem to have this uniqueness about them that renders generated by computers simply cannot replicate. Your design can become part of a small world of its own by application of the ‘tilt shift’ effect in the Lumion 9 Pro Cracked.
This tilt shift blurs the background and the foreground and changes the plane of focus, from a viewpoint that is on top of your model inside Lumion. This is a camera effect that creates a scaled-down version of the actual object by transformation of your CAD model.
Material and Model Variation
Does the wood flooring fit in with the stone wall? Will the client prefer Design A or Design B? Or maybe it is tricky to find a match for the home’s patio and the siding.
In any case, there is an easier way to compare multiple models material options using the newly introduced ‘variation control’ effect. This also makes life easy for your clients when they have to decide between arrays of concept options and select the look that is satisfactory.
This feature in the Lumion 8 Pro Cracked is highly beneficial for you, as an architect, as it allows you to speed up the flow of your work. Especially when communicating and researching for the best design solution.
New Measuring Tools
The new measuring tools in the Lumion 8 Pro Cracked can aid you by making fast and accurate measurement checks without you having to go back and forth to the modeling software. Whether you want to find out how far the couch is from the television or how spacious the patio is, these tools are there to help you.
These on-screen tools enable you to accurately verify the distances and ensure the scale and precision of your model.
Foliage For Materials
This exclusive ability is allowing transformation of simple shapes into foliage that looks more realistic, you can create hedges of any shape or size that you imagine. You can even insert creepers, crawlers and climbers along entire surfaces e.g. statues or walls. And you may also add a simple tinge of green to the ground if you wish.
Lumion 8 Pro Crack has a variety of up to nine preset climbing plants which will allow you to cover entire walls with plantation or just add a leafy dash to materials. This will be a breath of fresh air for your design.
OpenStreetMap
This is a beta function that allows you to pick any location anywhere in the world. Using the 2D data from the OpenStreetMap database, Lumion 8 Pro Crack will generate a 3D map that corresponds to it.
Text Effect
You can now add logos and text overlays to your videos directly from the application. Because of the various transition effects present in the Lumion 8 Pro Crack, you do not have to separately add text to your movie by using external editing software.
This built-in text feature also enables you to place 3D texts that will fade automatically with the camera closing in.

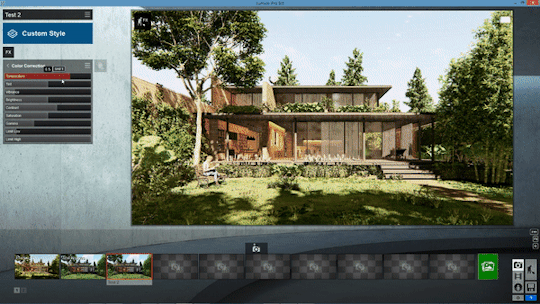
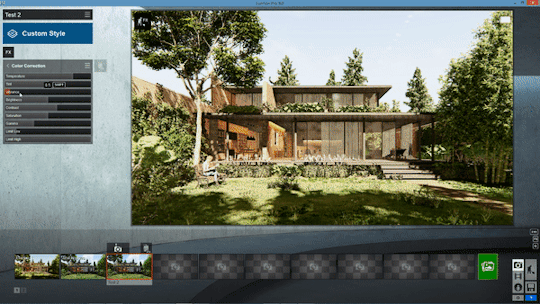
Transform a render’s look with color correction
Through several new improvements to the Color Correction effect in Lumion 8, you can easily dress your model in its best light and achieve virtually any look you want.
Whether that’s a colder, dramatic look or something a little warm and romantic, getting the color just right can have a major impact on both realism and style.
For instance, when looking at the following render, it’s clear that there are a few issues with the color. The scene is a touch too blue, the light is overexposed and several important details are washed out.
Fortunately, due to the Color Correction effect’s ease-of-use and multiple sliders, achieving a stunning color profile can be easy.
To fix the above render, we simply dialed up the temperature, added a little vibrancy and saturation and touched up the contrast.
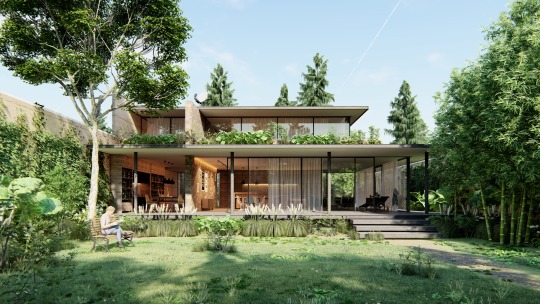
Much nicer! With a little color correction, you can produce a beautiful render that’s sure to captivate your audiences.
The Color Correction sliders in Lumion 8 and their impact on your render are shown below:
Warm to cold with Temperature
From green to red with Tint

From dull to saturated with Vibrance
The other color correction sliders include:
- Brightness
- Contrast
- Saturation
- Gamma
- Limit Low
- Limit High
